← World Vault
dungeon
Cave of the Unknown
bf1-cave • bf1-cave • Morgansfort: The Western Lands Campaign
One-level dungeon of strange monsters under an unusual master — Starisel Zelinth.
Adventure background (BF1 pp.67-68): Introduction The following text is provided to help the GM get this adventure started; feel free to modify it as needed. You are relaxing in the Toothless Dragon, enjoying the ale and regaling the other patrons with the story of your latest exploits. A man enters, wearing dirty, torn clothing, with a worried expression on his face. He looks around the room, evidently still sun- dazzled, but then his eyes fall upon you, and he quickly approaches. "I am Kardon Karien, a merchant. I heard from the watchmen that you are capable individuals who might be available for hire... is that so?" Assuming the player characters answer in a more or less positive fashion, the merchant continues: "My caravan was attacked north of here by orcs... I am the only man who survived, and then only because they thought me dead after they overturned my wagon. My daughter Gwelayn and her serving girl were taken by them into the forest. As soon as I recovered my senses and dragged myself from under the wagon, I came directly here to look for help. "Hunt them down for me, rescue my daughter, and I will give you eight hundred gold pieces, all I have available right now. Will you help?" GM's Information The orc lair is in a cave beneath a hill in the forest a few miles north of Morgansfort; it will not be hard to find, as the wrecked caravan is easy to locate, and the orcs stupidly left numerous clues as to their direction of travel. However, the orcs don't have the women anymore; behind the more or less natural caverns of the orc lair lies another dungeon complex: Long ago, a powerful necromancer caused an underground complex to be built within the hill. The primary entrance is through the caves (the present orc lair) but there is also an old well on top of the hill which connects to room 19, and can be used as an entrance/exit. It is recommended that the players not be told of this second entrance, though they may discover it by diligence or luck. The necromancer who lived and conducted research here left long ago; it is left as an exercise for the GM to detail this part, if they wish. Deep inside the dungeon is the Altar of Darkness, a powerful evil magic item. A frustrated low-level necromancer named Starisel Zelinth learned of the Altar, and traveled to the caverns to obtain it. The Altar has the power to animate the dead as zombies. Unfortunately for Starisel, the Altar is too large to move, so he has had to learn about its powers "on location." Starisel was a sickly individual, and staying in the cold, damp dungeon and handling the dead made his condition progressively worse. He finally convinced himself that the Altar could make him a lich (a powerful undead wizard) if he poisoned himself while lying on it. For several days he gave himself small doses of arsenic, until he felt quite sick. Then he laid down on the Altar and drank a large dose of the same poison mixed with a narcotic, and soon he died. The Altar did its work, animating him as a zombie; but as he was also the person controlling the Altar, he was animated in a self-willed form. The arsenic in his body prevents him from rotting, and he can still prepare and cast spells, and function mostly as though he was still alive. There was, however, a cost. Starisel no longer has a pulse, and his body is cold. He has lost most of the sensation in his body as well, so he no longer feels pain (or pleasure). Finally, he has recently realized he can no longer improve his magical abilities. He has, in fact, been transformed into a type of monster known as a Zombraire. These limitations have largely cost him his sanity. He skulks around the dungeon, looking for dead bodies he can animate and dragging them back to the Altar. Assuming the player characters don't dispose of the bodies of any monsters they slay, Starisel will collect them and animate them (up to six per day as given in the description of the Altar, below). The PC's may begin to recognize the zombies they meet... especially if they leave a dead comrade behind. The tribe of orcs living here is unusual. It all started with a female orc named Badushna, who was cast out of her tribe because she was "more beautiful" (less repulsive) than the chief’s head wife. She didn’t wander the wilderness long, because she knew the ogre who lived nearby would take her in. After all, she was beautiful, wasn’t she? Badushna isn’t just a "pretty face" though, she’s smart too (for an orc anyway) and has led the ogre, Onyg, to greater successes in looting and extortion than he could have ever done on his own. Their successes led to other outcast or "rogue" orcs, mostly males, joining them, and eventually they needed a larger home. Their search led them to the caves at the front of the complex. They quickly began regular raids on the caravans on the nearby trade road, being careful to attack only the weakly defended caravans, and they became richer than any orc ever believed possible. Zelinth quickly learned of their arrival, and considered destroying them, but by this time he had completed his transformation into an undead monster and become quite insane. He decided that he wanted a wife, and he would use the orcs to get one. In the night he entered the quarters of Onyg and Badushna, using a hold monster spell (from a scroll) to immobilize the sleeping ogre. His zombie minions grabbed Badushna as she awoke and he quickly asserted his power over her by means of threats. He then told her that the orcs must capture an attractive maiden for him, to be his wife, and if they did this he would spare their lives. Onyg overheard this exchange but could not move to attack the necromancer and his minions. By the time the spell wore off, Zelinth was gone. Badushna saw him leave and knows of the secret door, but does not know anything about the room beyond. Under orders from Onyg, the orcs kept a lookout for an attractive maiden among the caravans they robbed. Until this point they had avoided taking any hostages, as Badushna knew that capturing people was certain to lead to rescue missions. In a few days, they were successful, capturing both the daughter of a merchant and her serving-maid. They opened the secret door and shoved both women inside. Zelinth was pleased beyond belief, and immediately imprisoned both women in cells in area 8. He promptly forgot about the serving- maid Saril, as he has no interest in her; he will not remember to give her any food or water, and so she may be in poor shape when found. He plans to take Gwelayn, the merchant’s daughter, to area 23 at midnight. He will place her on the altar and pour a strong solution of arsenic down her throat. The transformation of his new "wife" will be complete by dawn. Thus, if the player characters do not find her before midnight, she will be dead (or undead) when they do. The merchant, Kardon Karien, will still pay the reward for his daughter if her body is returned to him. The serving-girl is of no interest to him if Gwelayn is dead, and he will release her from his service at that point. The GM may wish to give the players 100 XP for each girl rescued alive as a bonus. It is recommended that the full bonus be given to each character involved, rather than divided.
Wandering Monsters (BF1 p.69): Monsters Wandering Monsters An encounter should be rolled for every second turn. Roll 1d6; on a 1, roll again to choose among the monsters below, and again for the number appearing. Most monsters below are limited in number, as shown; when the number listed have been met and defeated, no more of that sort will be encountered. Of course, those that flee may return again if indicated. 1. 1d20 Normal Bats (79 total) AC 14, HD 1 HP ea., #At Confusion, Dam N/A, Mv 30' Fly 40', Sv NM, ML 6, XP 360 total or 3 ea. Note: As each bat has just 1 hit point, each checkbox below represents a single bat. 2. 2d4 Zombies (8 total*) * This maximum number may increase if Zelinth succeeds in creating additional zombies during the adventure. For convenience, an additional 10 rows of zombie hit points are given below. AC 12, HD 2, #At 1 bludgeon, Dam 1d8, Mv 20', Sv F2, ML 12, XP 75 ea. Half damage from blunt weapons, 1 point only from arrows, bolts, or sling stones 3. 1d8 Skeletons (10 total) AC 13 (half damage from edged weapons, 1 point only from arrows, bolts, or sling stones), HD 1, #At 1 bony fist, Dam 1d6, Mv 40', Sv F1, ML 12, XP 25 ea. 4. 2d4 Giant Centipedes (8 total) AC 11, HD ½* (1d4 HP), #At 1 bite, Dam Poison (save at +2), Mv 40', Sv NM, ML 7, XP 13 ea. 5. 1d8 Giant Fire Beetles (9 total) AC 16, HD 1+2, #At 1 bite, Dam 2d4, Mv 40', Sv F1, ML 7, XP 25 ea. 6. Starisel Zelinth (plus 2d4 zombies) Starisel's statistics are given below. He will be accompanied by 2d4 zombies (taken from item 2 in this list; also, 25% of the time, his "wife" Gwelayn (also described below) will be with him (unless, of course, the adventurers succeed in saving her). If seriously threatened, Zelinth will leave the remaining zombies to keep his adversaries (the adventurers) busy while he makes his escape; he will always seek to take Gwelayn with him if she is present. The Orcs (And Their Leaders) Onyg the Ogre: AC 15, HD 4+1, #At 1 huge club, Dam 2d6, Mv 30', Sv F4, ML 10, XP 240 Badushna the Orc Queen: AC 11, HD 1, #At 1 shortsword, Dam 1d6, Mv 40', Sv F1, ML 8, XP 25 5 Armed Female Orcs: AC 11, HD 1, #At 1 spear, Dam 1d6, Mv 40', Sv F1, ML 7, XP 25 ea. Note: The unarmed (pregnant) female orcs in room 3 are non-combatant; assume all have 3 hit points and use the statistics above only if necessary. 28 Orc Warriors: AC 14, HD 1, #At 1 scimitar, Dam 1d8, Mv 40', Sv F1, ML 8, XP 25 ea. Starisel Zelinth and Gwelayn Starisel Zelinth, Zombraire: AC 13 (half damage from blunt weapons, 1 point only from arrows or bolts), HD 2*, #At 1 dagger +2, Dam 1d4+2 or by spell, Mv 20', Sv M2, ML 9, XP 100 Spells available: shield, sleep (x2), invisibility, web, protection from normal missiles, hold person Zelinth is immune to sleep, charm, hold, and poison due to his zombie body. He may be Turned as a wight. He has several magic items which will always be on his person or within reach: A Ring of Protection +1, a Staff of Striking with 16 charges remaining, a Dagger +2, and a Rope of Climbing (which he will use to escape via the well in room 19 if he is being pursued). As noted above, Zelinth will almost never be found without a contingent of 2-8 zombies, and is 25% likely to be accompanied by his zombie "wife" Gwelayn. Gwelayn, Zombie: AC 12 (half damage from blunt weapons, 1 point only from arrows or bolts), HD 2, #At 1 bludgeon, Dam 1-8, Mv 20’, Sv F2, ML 12, XP 75 Gwelayn is a normal zombie in most details, but she appears at a glance to be alive due to the preserving power of the arsenic poison.
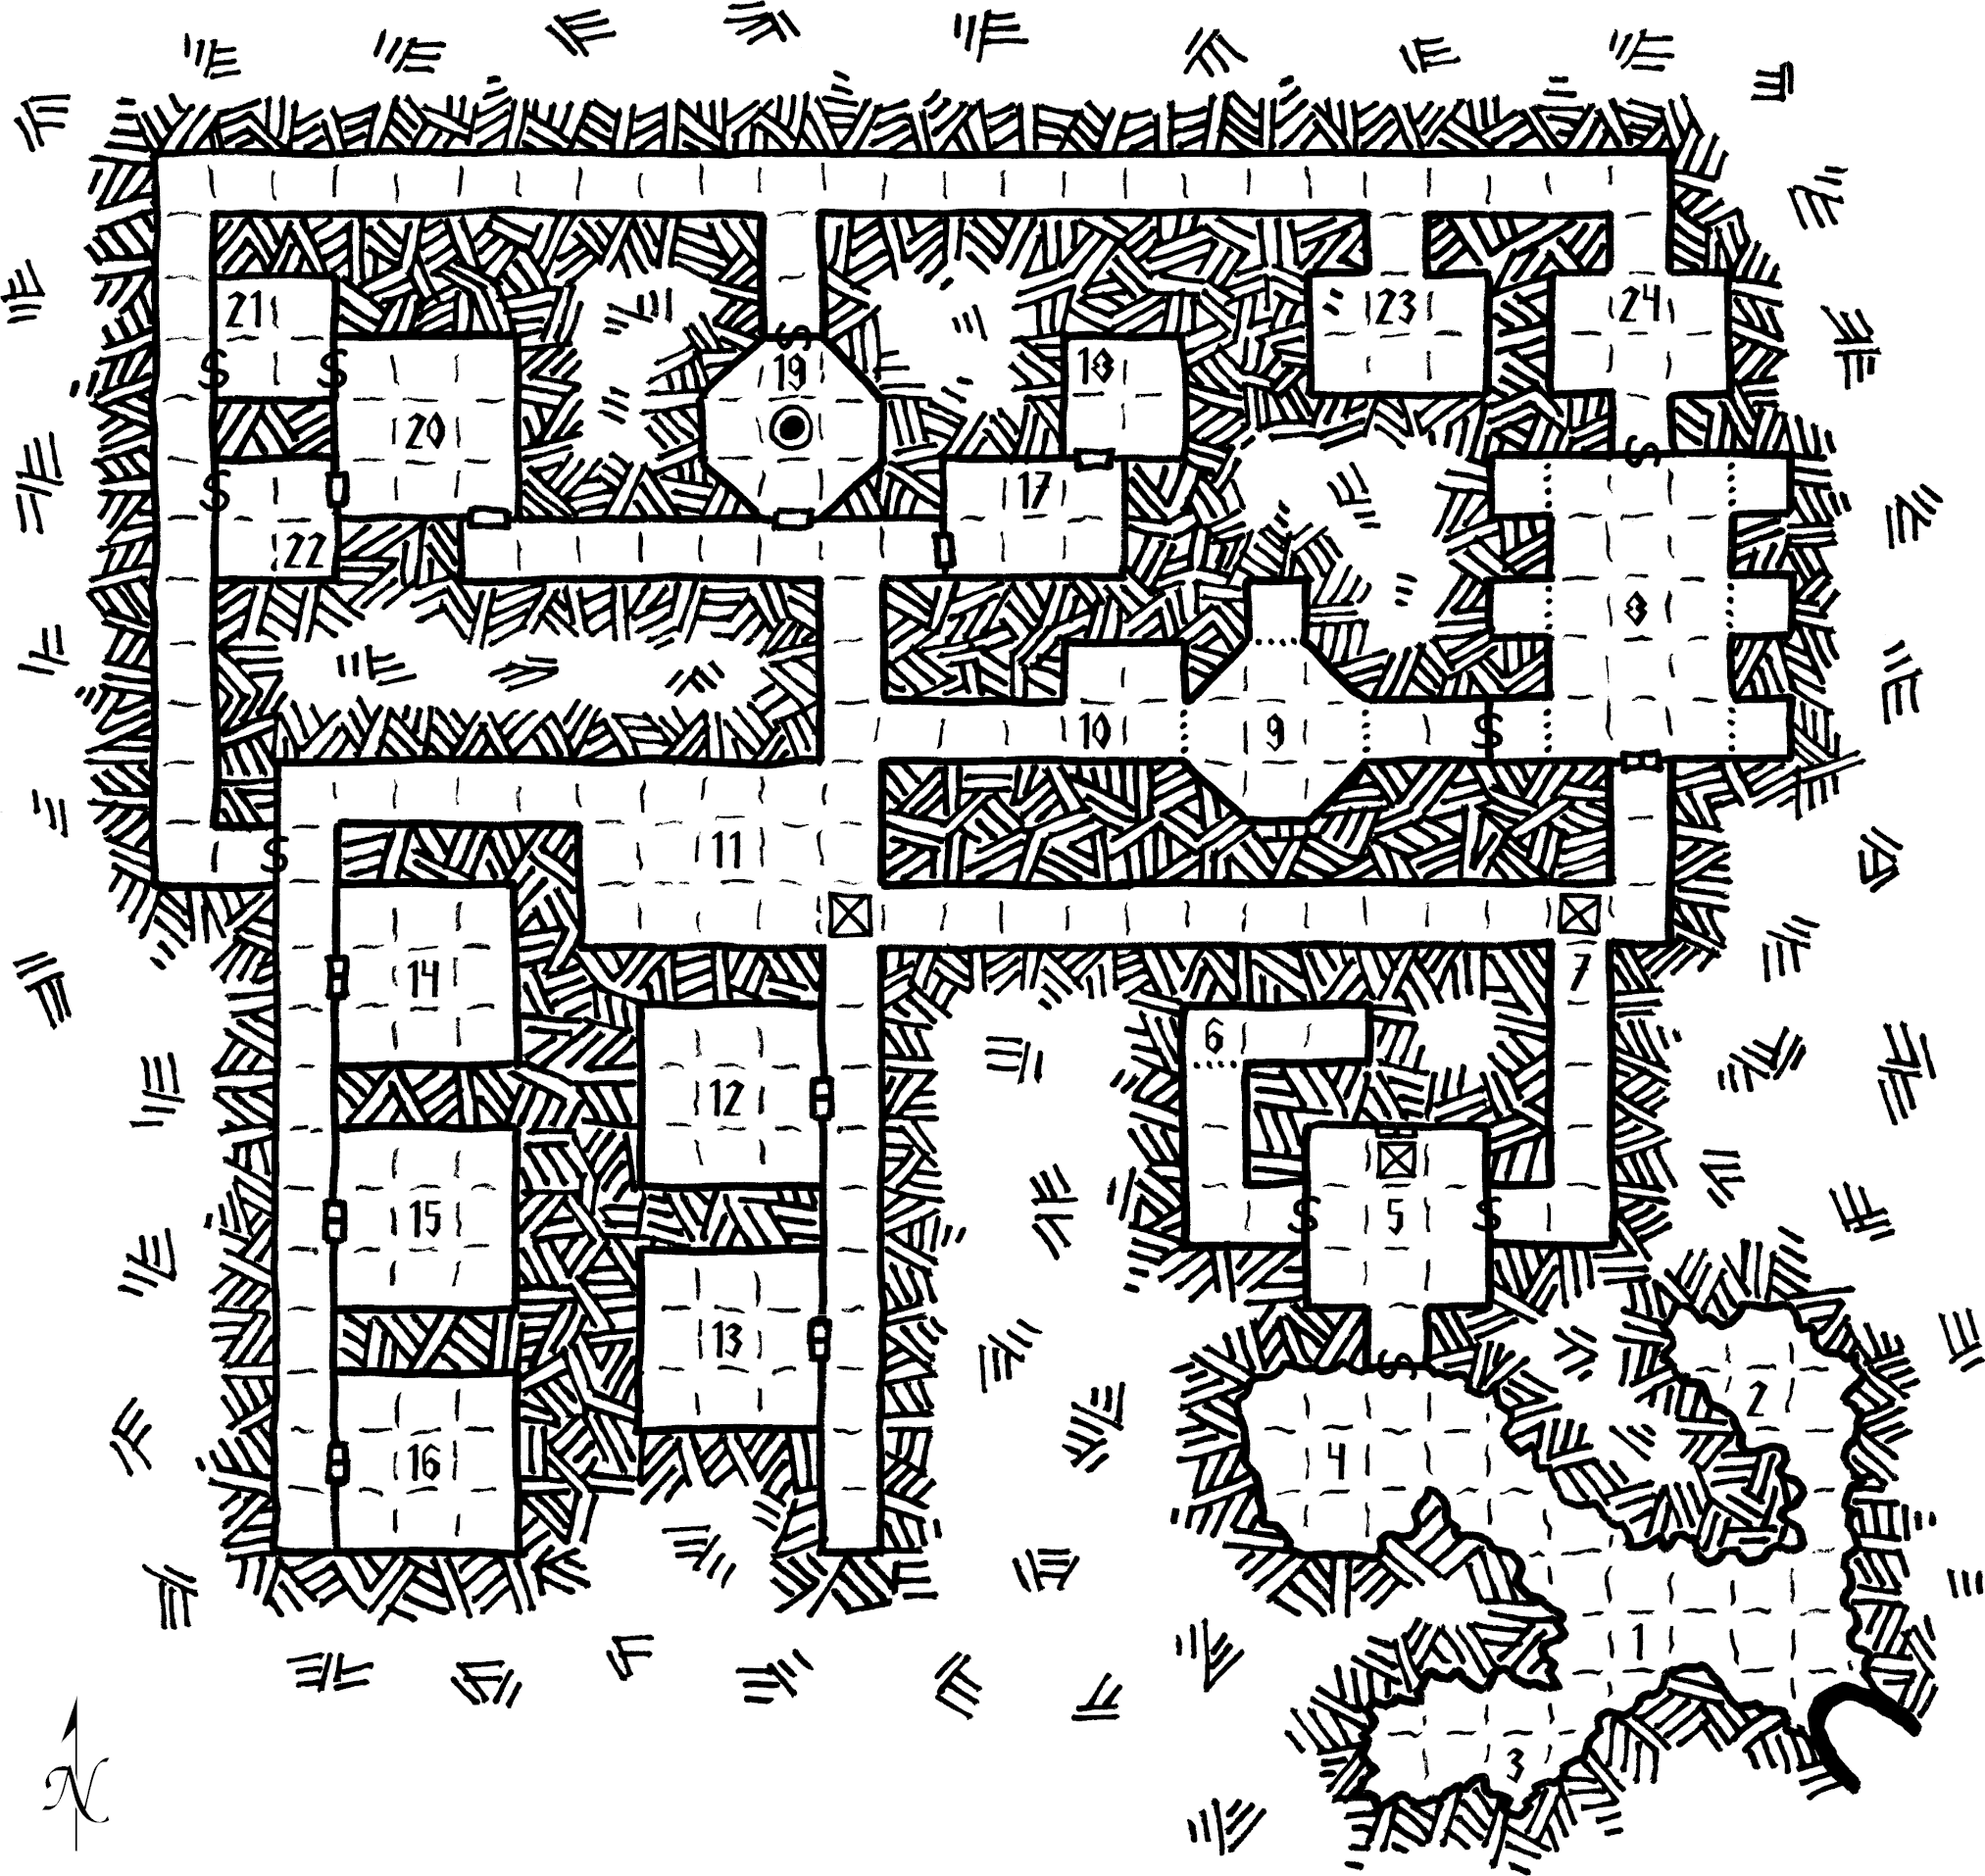
Map: extracted from the BF1 PDF (p.81).
IMAGE
CHILDREN • 24
1. Orc Common Room room
There are many orcs in this room. A few are obviously female; as they see you enter, they flee down the tunnel to the left. The males draw weapons and approach you, grinning. The orcs are described in the Monsters section above; generally there will be 2d6+4 orc warriors present, as the others are out raiding. Make a wandering monsters check (1 on 1d6) every second turn while the player characters are within the lair; if an encounter is indicated, it will be the remaining orcs returning. The females mentioned will leave in the first round of combat (if possible); 1d8 are present when the room is first entered. A noisy battle here will draw the attention of Onyg and Badushna (normally found in room 4). Onyg will wade into battle against any invader immediately, while Badushna will attempt to join the other females.
2. Orc Warrior Barracks room
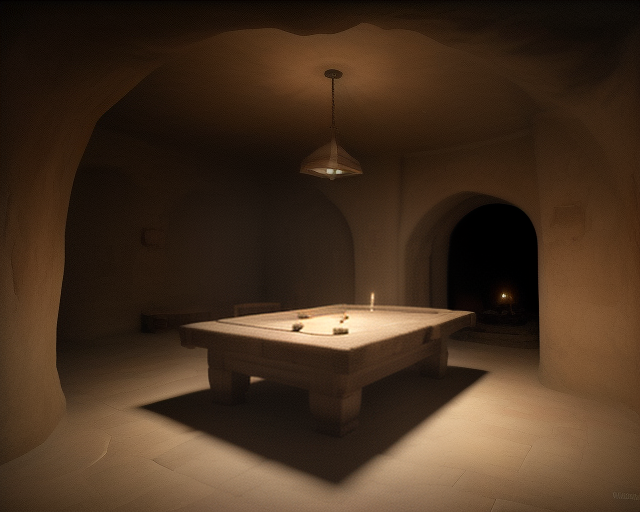
This room is obviously a barracks for the rank and file orcs. There are many piles of bedding, resembling nests, spread around the perimeter of the room. There will only be orcs here at night or if they flee here from room 1, above.
3. Orc Females room
In this room you see many female orcs, dressed in ill-fitting human clothing in garish colors. Several are obviously pregnant. They have a series of nest-like beds composed of furs, fabric and dirty pillows lined up along the walls. All appear surprised to see you enter, and while the more obviously pregnant orc-women move to the back, the others draw shortswords out of their clothing and prepare to defend themselves. Orc women do not go around armed most of the time, but Badushna insisted on arming the women of her new tribe to allow them to better protect their young. This tribe is still new, so there are not actually any offspring to protect yet, but the five not-yet-pregnant females will fight to protect the thirteen pregnant ones. The pregnant females will surrender and beg for mercy if the females protecting them are slain. Of course, you can’t trust an orc even when she surrenders... if the player characters do not drive them out of the dungeon, they may choose to attack the player characters when they are vulnerable (such as when they return from the lair of Zelinth). They will only do so if they are certain they will win. 69
4. Orc Chieftain’S Chamber room
This is evidently the bed chamber of the ogre. A rude pile of furs, skins, and various dirty pillows against the south wall makes up his bed. In the northwest corner of the room is a pile of chests, bolts of cloth and bags that appear to be full of coins. If not encountered elsewhere, Onyg and Badushna will be found here. The tribe's treasure is kept here as well, in a pair of large sacks: 2,661 cp, 1,691 gp, a piece of chalcedony (100 gp value), and a Cursed Scroll. The orcs have not bothered to try to read the scroll, as none of them can read anyway. If unrolled and viewed (not even read), the scroll catches fire, burning the character holding it for 1d8 points of damage. That character must roll a save vs. Spells or catch fire; the fire burns a single round, doing an additional 1d8 points of damage. However, if this happens, all equipment worn or carried by the character which might be damaged by a normal fire must save vs. Death Ray (using the character's own saving throw value) or be destroyed. Roll separately for each such item. This would include items made of paper and leather, as well as any oil carried (which would increase the damage suffered by t
5. Grand Entry Room room
You enter a large room, thirty feet square, with a set of double doors centered in the far wall. Both doors are decorated with bull's heads, carved in low relief, with tarnished silver handles shaped like horns. There are two empty torch sconces on each wall, with each pair being spaced about twelve feet apart. The double doors are false. Turning the doorhandles opens the trapdoor, dropping the victim (and anyone else in that square) into a 20' deep pit unless a save vs. Death Ray is made (adjusted by Dexterity). Each secret door is opened by turning the torch sconce on the left side of the door. The left-hand secret door does not quite close right, and any attempt to search for secret doors will find it right away.
6. Poison Gas Trap room
This hallway ends in a dirty trick. When anyone steps into the last square of the hallway, the hidden portcullis (detect as secret 70 door if looked for) falls, trapping those behind it. After 1d4 rounds a bitter odor will be detected... poison gas. Each character trapped by the portcullis, as well as any standing right next to it (trying to open it, for instance) must make a save vs. Poison each round for three rounds. Any who fail fall into a death-like sleep (likely to be mistaken for death if the victim is not examined closely). The portcullis can be opened by inserting a special crank-handle into a hole in the wall near the secret door, and cranking it up. Zelinth carries the handle stuck into his belt when he comes here, while the rest of the time it will be in his chest in room 21. It can also be opened by lifting it, if the characters trying to do so have a total Strength of 30 or more, i.e. two characters with 15 or better, or one with 18 Strength and one with 12, or any other equivalent combination. No more than four characters can try at a time. This should actually be pretty easy, if they think to have more than one character try; but of course
7. Pit Trap room
The pit is 30' deep, and will be tripped by any weight of 150 pounds or more. "Loose stones" in the walls approaching the pit from each direction can be pressed to lock the trapdoor; if this is done, the trapdoor will remain locked for about one turn. The loose stones can be detected as secret doors. If the trap is tripped, the doors will remain open for one turn, then slowly close by themselves as the trap resets.
8. Prison room
If the player characters arrive here as subdued or sleeping victims, they will awaken in the southwest cell as described in room 6 above. If this is the case, one torch will be lit, in the sconce on the west side of the double doors. Read this text in this case: You awaken in a small cell. The only light comes from a torch outside your cell. You can't see the entire space outside the cell, but you can see that there is another cell across from yours. In this case, if they begin talking among themselves, the serving girl Saril will call out to them (see below). If they search for secret doors, someone in the party will find it (it doesn't close quite right, much like the one in room 5). It opens if a loose stone in the upper right-hand corner is pressed. Alternately, the rusty bars can be bent on a roll of 1 on 1d12; add the character's Strength bonus to the range (so 13 Strength would be 1-2 on 1d12, 16 would be 1-3, and 18 would be 1-4). If room 8 is entered normally, there will be no light at all (other than that brought by the player characters). If it is before midnight, Gwelayn will be in the northwestern cell, and Saril in the northeastern one. If it is
9. Arena room
If the player characters are escaping prisoners with no light, read this text: The pitch-black corridor opens into a larger space, a room of some sort. Suddenly there is light, blinding you momentarily; when you can see again, you realize you are in an octagonal room. The floor of the room is littered with bones, and you see a few rusty weapons. You hear a squeal behind you, and turn about to see a portcullis close off the corridor. Across the room from where you entered is a barred opening, apparently another portcullis. To your right is another such opening; the space beyond it is a ten foot square room, in which you can see a horrible catlike monster moving slowly toward you... In the small cell is a zombie deceiver. Due to its undead status it no longer has the power of displacement, but on the other hand it has gained a hit die in the exchange. If the lever in room 10 is pulled, the gate will open and the monster will attack anyone in the arena. Of course, Zelinth is in room 10 if the players are escaping prisoners, and he will taunt them before pulling the lever. The weapons on the floor include a spear, two shortswords, a battle axe, and a mace; the we
10. Arena Viewing Room room
This room is used by Zelinth to control the events in room 9. On the short wall section beside the bars there are four levers. Initially, the first and second levers are up, while the third and fourth are down. The first, if pulled down, exposes a metal stud with continual light cast on it in the middle of the ceiling of room 9. This will be blinding to anyone who entered the room in the dark. Zelinth won't be blinded by this effect as he no longer sees as the living see. Pulling down the second lever closes the portcullis in room 9, preventing anyone in that room from returning to the cell. Raising the third lever opens the portcullis that closes off the monster-cage on the north side of the arena. The last one controls the portcullis between 9 and 10 and is down initially, as the portcullis is already closed when room 9 is entered. Each lever has the reverse effect when raised back up (i.e. hiding the light or opening the appropriate portcullis). 72
11. Common Room room
The pit trap at the entrance to this room opens if 150 pounds or more of weight is placed upon it. It does not reset automatically, but must be closed by inserting the crank-handle into a hole in the east wall of this room and cranking it back up. The pit is 10' deep, and contains a tentacle worm. After the pit has been dealt with, read or paraphrase the following: This large space is a sort of common room, with hallways leading out in every direction. There is a pile of rotten lumber in the southwest corner that may have been a couple of long tables and some chairs a long time ago. The room appears unoccupied. Make double the usual number of encounter checks while any characters are in this room. Tentacle Worm: AC 13, HD 3*, #At 6 tentacles, Dam Paralysis (save to resist), Mv 40', Sv F3, ML 9, XP 175 HP 15 ☐☐☐☐☐ ☐☐☐☐☐ ☐☐☐☐☐
12. Laboratory room
This room appears to be a laboratory. A variety of glassware, some filled with fluids of various unhealthy colors, is spread across two worktables, one along the left-hand wall and the other against the far wall. A smaller table, more like a desk, is positioned near the right-hand wall; it bears a large book and an ink bottle with a quill pen sticking out of it. A chair stands nearby, pushed back against the wall. In the middle of the room stands a large cauldron, which appears to be filled with tar. The "tar" is actually a small black jelly which is dormant. If the cauldron is disturbed, the "tar" touched or probed, or if any living creature stands within 5' for more than 3 rounds, the monster will awaken and rear up out of the cauldron, attacking the nearest character. Black Jelly: AC 14, HD 2*, #At 1 pseudopod, Dam 2d8, Mv 60' (20'), Sv F2, ML 12, XP 100 HP 11 ☐☐☐☐☐ ☐☐☐☐☐ ☐ 73
13. Laboratory room
Tables line the walls, left, right, and opposite. In the middle of the room is a statue, apparently a wild boar. A variety of stonecutting tools as well as chunks of stone litter the tables. Everything in the room is very dusty. The statue is actually a crystal living statue which will attack anyone who touches it, or who disturbs any of the tools. Some of the tools in the room could be used as weapons, doing 1d4 (for small tools) or 1d6 (for larger tools) points of damage. As they are not actually weapons, apply a penalty of -2 on the attack roll to anyone using a tool in this way. Also, anyone searching for small stones to use with a sling will find 2d6 such stones on the first turn spent searching, 1d6 on the second; no more will be found after this. Crystal Living Statue: AC 16, HD 3, #At 1 bite, Dam 2d6, Mv 30', Sv F3, ML 12, XP 145 HP 17 ☐☐☐☐☐ ☐☐☐☐☐ ☐☐☐☐☐ ☐☐
14. Laboratory room
This room appears to be a laboratory. A number of dusty metal implements and glass vessels are spread across two worktables, one along the left-hand wall and the other against the right-hand wall. The table along the right-hand wall has three glass jars with metal lids. One contains a viscous red liquid, another contains a light brown fluid, and the last contains a green liquid. The red liquid is paint. The light brown fluid is honey. The green fluid is in fact a green jelly. Neither of the first two are in any way dangerous, and the honey will, in fact, taste good if anyone tries it. Sticking a finger into the green jelly will cause it to attack, as will attempting to drink the green jelly (and there is no way to burn it off in this case). Green Jelly: AC 12 (only hit by fire or cold), HD 2**, #At 1 acid, Dam if not scraped off in first round, will destroy flesh and clothing in 6+1d4 rounds, Mv 1', Sv F2, ML 12, XP 125 HP 9 ☐☐☐☐☐ ☐☐☐☐
15. Laboratory room
The first thing you notice upon opening the door to this room is the filthy screaming manlike monster chained to the far wall. After taking a moment to compose yourselves, you take note of a long worktable against the right-hand wall, laden with the sort of tools used by morticians. A wooden chair stands beside the table. More interesting perhaps is the chest just to the left of the screeching horror. The monster is a wight. The chains which hold it will break in 3d10 rounds after the party enters the room. The chest is close enough to the monster that it can reach anyone approaching it, and thus attack normally. The chest is latched, but not locked, and contains two Potions of Healing wrapped in cloth. Wight: AC 15 (s), HD 3*, #At 1 touch, Dam 1 level drain, Mv 30', Sv F3, ML 12, XP 175 HP 14 ☐☐☐☐☐ ☐☐☐☐☐ ☐☐☐☐ 74
16. Laboratory room
This room is obviously another laboratory, but it is in disrepair. Several work tables are scattered around the room; one is missing the legs at one end and thus sits at a crazy angle. In the far left corner of the room, several large mushrooms are visible. The large mushrooms are, in fact, shriekers. Searching the room (if a search is undertaken) will require at least three turns, and nothing of value will be found. Note that the shriekers will begin shrieking one round after the door is opened. 3 Shriekers: AC 13, HD 3, #At shrieking, Dam nil, Mv 5', Sv F1, ML 12, XP 145 ea. HP 13 ☐☐☐☐☐ ☐☐☐☐☐ ☐☐☐ 12 ☐☐☐☐☐ ☐☐☐☐☐ ☐☐ 18 ☐☐☐☐☐ ☐☐☐☐☐ ☐☐☐☐☐ ☐☐☐
17. Dining Room room
As you open the door, a powerful stench of rotting flesh fills the air. At this point, all characters must make saving throws vs. Poison or retch for 1 round; those who fail suffer -2 on all attack rolls for the duration of their stay in this room. Inside the room you see a chilling sight: six people sitting at a table, utensils in hand, about to feast upon mounds of steaming rotten flesh. They turn toward you slowly, and you realize the diners aren't living people... they're zombies. They arise from their seats, moaning, and begin to approach you threateningly... 6 Zombie Diners: AC 12 (half damage from blunt weapons, 1 point only from arrows, bolts, or sling stones), HD 2, #At 1 bludgeon, Dam 1d8, Mv 20', Sv F2, ML 12, XP 75 ea. HP 13 ☐☐☐☐☐ ☐☐☐☐☐ ☐☐☐ 12 ☐☐☐☐☐ ☐☐☐☐☐ ☐☐ 9 ☐☐☐☐☐ ☐☐☐☐ 8 ☐☐☐☐☐ ☐☐☐ 11 ☐☐☐☐☐ ☐☐☐☐☐ ☐ 7 ☐☐☐☐☐ ☐☐
18. Kitchen room
This room is evidently a kitchen. The room is dominated by a heavy worktable in the middle of the floor. Cabinets line the far wall, and a fireplace is centered on the right- hand wall. As you look around the room, you hear a rattling noise to your right. It's an animated skeleton wielding a meat cleaver! The skeleton is from a carnivorous ape, which makes it rather tougher than the average skeleton. Carnivorous Ape Skeleton: AC 13 (half damage from edged weapons, 1 point only from arrows, bolts, or sling stones), HD 4, #At 1 huge cleaver, Dam 1d10, Mv 40', Sv F4, ML 12, XP 240 HP 19 ☐☐☐☐☐ ☐☐☐☐☐ ☐☐☐☐☐ ☐☐☐☐
19. Well room
If this room is entered during daytime hours, read the following: This room is unevenly lit by what appears to be sunlight, streaming in from a circular hole in the center of the ceiling. Centered below the hole in the ceiling is an identical hole in the floor; the rest of the floor is covered with animal droppings. The ceiling of the room is in shadow, but you think you see movement there... If the party enters after nightfall, read this: The floor of this room is covered in animal droppings, everywhere save for a circular hole in the middle of the floor. In daytime, the room is full of sleeping bats; after nightfall, the room empties as the bats go out to hunt for food. Of course, if the party goes ahead and enters the room in the daytime, the bats will probably be disturbed and "attack." If this happens, remember that anyone in the room trying to ward off the bats might fall into the hole in the floor... if the players do not state that they are staying clear of the hole, have each roll a save vs. Death Ray with Wisdom as a bonus, with those who fail falling in. 75 The hole is filled with cold water, which is not exactly clean but neither is it dangerous to
20. Study room
In the middle of this large room is a table at which four men are seated. They are holding playing cards and appear to be playing a game of some sort; a small pile of coins lies in the middle of the table. Slowly they turn toward you, and with a groan they lay down their cards and rise. Their vacant expressions and the smell of decay reveal them to be undead. Besides the table and chairs, the room is furnished with many bookshelves with relatively few books on them. The books are badly damaged and contain random poetry and prose; nothing of value will be found in them. On the table lies 18 cp, 11 sp, and 3 gp. 4 Zombies: AC 12, HD 2, #At 1 bludgeon, Dam 1d8, Mv 20', Sv F2, ML 12, XP 75 ea. HP 9 ☐☐☐☐☐ ☐☐☐☐ 8 ☐☐☐☐☐ ☐☐☐ 12 ☐☐☐☐☐ ☐☐☐☐☐ ☐☐ 11 ☐☐☐☐☐ ☐☐☐☐☐ ☐ 76
21. Master’S Bedroom room
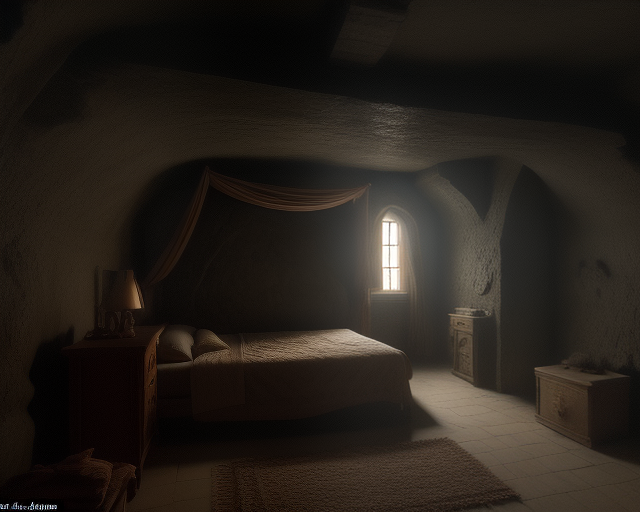
If Zelinth has not yet transformed Gwelayn, this room will be empty: This is a bedroom, with a bed against the right hand wall, a chest at the foot of it, and a large wardrobe against the left hand wall. However, if Gwelayn’s transformation into a zombie has been completed by Zelinth, they will both be here: This is a bedroom, with a bed against the right hand wall, a chest at the foot of it, and a large wardrobe against the left hand wall. Lying in the bed you see a man and a woman, covered only by a thin sheet despite the chilly air of the dungeon. The man sits up suddenly. "What is the meaning of this, interrupting my sleep? Don’t you know I’m the master of this castle?" Turning to the woman, he says "Get up, my love, we must deal with these unwanted visitors." The woman slowly sits up, turning her cold, vacant eyes toward you... Gwelayn will be wearing only a nightgown, and at a glance appears alive (as she is both recently dead and preserved by the arsenic). Her vacant expression and zombie behavior will surely give her away... the GM is advised to play this out as horribly as possible. As soon as Zelinth sees the party enter, he will summon all the rema
22. Bodyguard’S Bedroom room
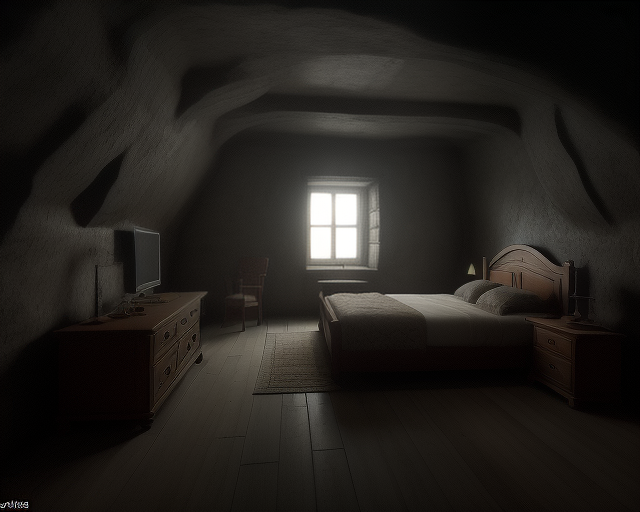
This room is evidently a bedroom. It contains a bed, a chest, a desk, a chair, and a wardrobe. Lying on the bed is the skeleton of a man, or perhaps some sort of humanoid; the skull has prominent canine teeth showing. Suddenly the skeleton arises from the bed, lifts up a rusty longsword and approaches you menacingly. This is the skeleton of a hobgoblin. The room contains no treasure nor anything of particular interest. Hobgoblin Skeleton: AC 13 (half damage from edged weapons, 1 point only from arrows, bolts, or sling stones), HD 1, #At 1 longsword, Dam 1d8, Mv 40', Sv F1, ML 12, XP 25 HP 6 ☐☐☐☐☐ ☐
23. Altar Room room
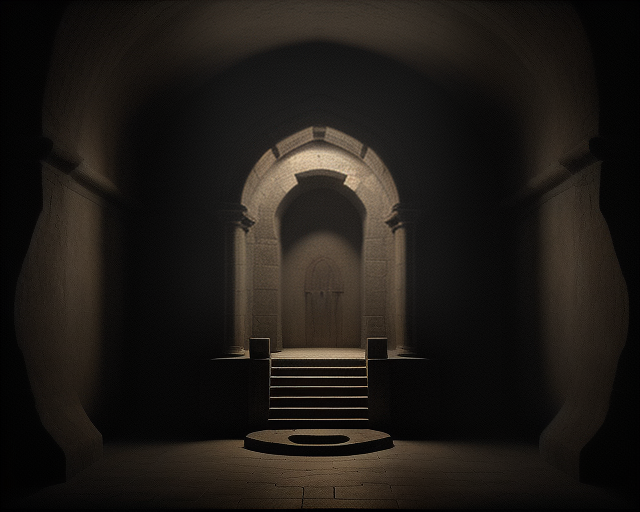
In this chamber you see a large altar, carved from a solid block of black marble. Inlaid into the rim of the top are golden runes, arcane markings of some sort. Set into the top of the altar are shackles, one at each corner. If it is before midnight, this room will be empty, except for the zombies mentioned below. If it is midnight or shortly thereafter, Zelinth will be found here with Gwelayn: A woman is shackled to the altar, and a man stands behind it. He holds a goblet in one hand, and is trying to force the woman to drink its contents. See below for Zelinth's response to this interruption. If it is between midnight and dawn: A woman is shackled to the altar; her eyes are closed and she isn't moving. A man stands behind the altar, dagger drawn, looking at you in surprise and anger. Resting at one corner, beside the woman's left hand, is a golden goblet. See below for Zelinth's response to this interruption. If it is past dawn: There is a wet puddle of what appears to be half-dried blood in the middle of the altar, and resting at one corner, beside one of the manacles, is a golden goblet. The puddle is, in fact, blood. The goblet contains a bit of red wine m
24. Anteroom room
This room is full of armed skeletons, which advance on you as soon as you enter. 10 Skeletons: AC 13, HD 1, #At 1 bony fist, Dam 1d6, Mv 40', Sv F1, ML 12, XP 25 ea. HP 4 ☐☐☐☐ 7 ☐☐☐☐☐ ☐☐ 7 ☐☐☐☐☐ ☐☐ 5 ☐☐☐☐☐ 2 ☐☐ 4 ☐☐☐☐ 2 ☐☐ 4 ☐☐☐☐ 7 ☐☐☐☐☐ ☐☐ 7 ☐☐☐☐☐ ☐☐ 78
NPCs HERE • 4
Add via World pageST
Starisel Zelinth
Undead (Zombraire) Magic-User 2 • AC 13 • HP 10
GW
Gwelayn
Undead (Zombie) Monster 2 • AC 12 • HP 9
ON
Onyg the Ogre
Ogre Monster 4 • AC 15 • HP 25
BA
Badushna
Orc Monster 1 • AC 11 • HP 6
MAP & PINS • 24
Tap the map to drop a pin — drag pins to move them.
Tip: click anywhere on the map above — the form appears here with coordinates filled in.