World Vault — Morgansfort: The Western Lands Campaign
Hierarchical: World → Towns → Buildings → NPCs • Dungeons → Rooms + map pins
196 locations • 51 NPCs • 139 pins
Morgansfort: The Western Lands CampaignBF2: Fortress of the Iron DukeDC1: Tales from the Laughing DragonJN1: Chaotic CavesJN2: Monkey IsleKH1: The Blackapple BrughHRS1: Barks and BladesBF4: Raiders of Enterone
town MorgansfortOpen →
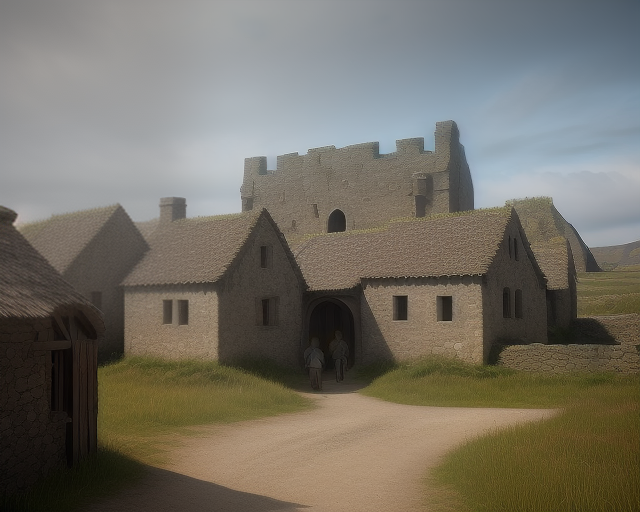
Frontier fort town southeast of Slateholm — home base for BF1. 25 keyed areas, full garrison, keep, tavern, chapel, shops.
RUMORS (1gp at the Toothless Dragon, no re-rolls): 1. A low-level necromancer named Starisel Zelinth disappeared while searching for an ancient underground complex reportedly built for unholy practices involving the undead. 2. A group of adventurers has hidden a boat in the swamp south of the collapsed bridge. (False) 3. Orcs have been raiding the area to the north, stealing livestock and waylaying travelers. 4. Hostilities have broken out between the goblins and kobolds in the area. 5. An adventurer wearing magic armor never returned from Olde Island Fortress. 6. The river around the collapsed bridge is full of giant crocodiles. (False, though the GM might choose to place some regular-sized crocodiles there as an added challenge.) 7. Orcs have been trying to abduct a fair maiden during their raids in the north. 8. Piles of magic armor are hoarded in the dungeons beneath the ancient fortress in the middle of the river. 9. Lizard-men live in the marshes to the south. (False, unless the GM chooses to create a lair or village of such monsters.) 10. Nobody has ever returned from the lakes a few days travel south. (The teller of this tale is making it up, but it might be true or false as the GM wishes.) 11. Goblin war parties have been seen in the area. 12. An ancient barbarian chieftain is entombed within the ruins on the nearby island. He's said to have owned a magic sword. The Garrison The garrison of Morgansfort consists of the following individuals: Eight squads of footmen, each of which consists of one sergeant, one corporal and nine privates (11 men per squad, 88 men total). Each private and corporal wears chainmail and carries a shield, while each sergeant is armored in platemail and shield. All are armed with longswords. 72 Privates: Ftr 1, AC 16, HP 4, #At 1, AB+1, Dam 1d8, Mv 20', ML 11 (9) 1st Squad Corporal: Ftr 2, AC 16, H
BUILDINGS • 26
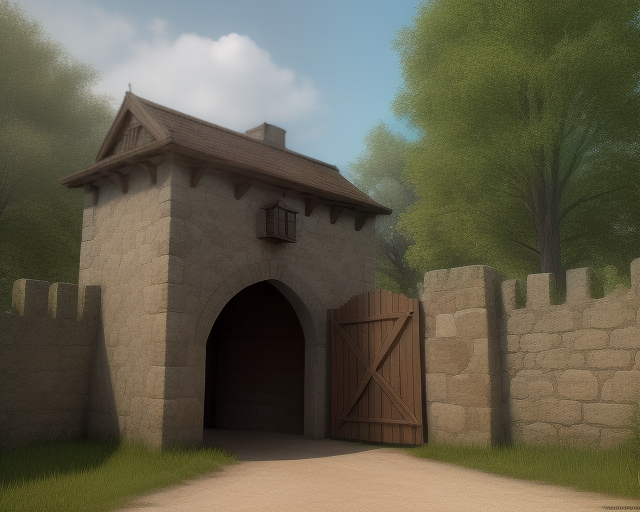
1. Gatehouse building
1. Gatehouse: This two-story building has a hallway 10' wide straight through the middle of the building; toward the back, a heavy iron- reinforced door is positioned on each side, giving access to the interior of the gatehouse. These doors are locked most of the time, of course. The double doors at each end of the hallway are likewise heavily reinforced. "Murder holes" pierce the walls and ceiling of the gatehouse, allowing defenders to shoot arrows into invading forces, or pour boiling oil down upon them, and the gatehouse itself is stocked with the oil and ammunition necessary for this purpose. In peacetime, however, the gatehouse is manned by two regular soldiers led by a corporal or sergeant, as well as a scribe. The scribe has a small table with ledger book, ink and quill, with which he records the names, nationalities and occupations of all who enter the fortress. Animals brought in are counted also, and all who enter must pay a tax of 1 sp per person, 1 cp per animal; those who can show that they have paid the tax within the last month do not have to pay it again. Elsewhere within the gatehouse is a large iron- bound chest, in which the scribe keeps the tax stamp mentioned above (the stamp used to mark antique coins after the relevant tax is paid). Adventurers returning to the fortress with such treasure will be made to wait while the chest is brought out and the scribe counts their treasure. The 10% tax is placed within the chest as the money is counted, with each 9 coin being stamped by the sergeant or corporal on duty (as the scribe cannot be bothered with such a menial task). Each night when the gates are closed, the chest is taken to the keep (area 25) and emptied into the treasury there. There are actually two scribes, Hobeth and his apprentice Glorin; only one will be on duty at a time, with a 70% chance it is Glorin. Though Glorin is noticeably younger, they otherwise look very much alike, leading many to think that Glorin is Hobeth's son. This isn't true, and suggesting it makes either of them angry. Both are bookish sorts who don't like adventurers at all, even when they bring substantial treasure (and taxes) into the fortress. 1. Gatehouse, 2nd Floor: The south wall of this area is lined with 12 bunks, arranged to allow defenders access to the arrow slits in the exterior wall. There are 12 trunks for the guards' personal belongings, one beneath each bunk. They are not locked, and they contain nothing of value. There are weapon racks on the east and west walls, next to the doors, with sword, dagger and crossbow for each guard housed here. Down the middle of the floor, in a north-south line, is a ten foot wide pattern of holes cut into the floor. The holes are large enough for the guards to fire their weapons into the lower level of the gatehouse. Against the north wall there are two vats of oil, located to either side of the hole pattern in the floor. Each vat hangs over a loaded brazier, ready to light. Wood is stacked next to the vats to fuel the fire for the boiling oil. The braziers are mounted on wheels, to be rolled along the floor next to the hole pattern. Once the brazier is in position, the vat can be tipped, pouring the hot oil through the holes in the floor and into the lower level of the gatehouse.
HO
Hobeth
Human
GL
Glorin
Human
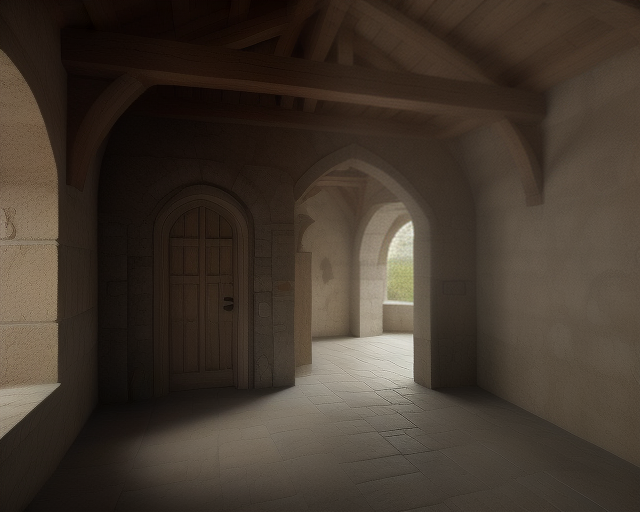
1. Gatehouse, 2nd Floor building
area is lined with 12 bunks, arranged to allow defenders access to the arrow slits in the exterior wall. There are 12 trunks for the guards' personal belongings, one beneath each bunk. They are not locked, and they contain nothing of value. There are weapon racks on the east and west walls, next to the doors, with sword, dagger and crossbow for each guard housed here. Down the middle of the floor, in a north-south line, is a ten foot wide pattern of holes cut into the floor. The holes are large enough for the guards to fire their weapons into the lower level of the gatehouse. Against the north wall there are two vats of oil, located to either side of the hole pattern in the floor. Each vat hangs over a loaded brazier, ready to light. Wood is stacked next to the vats to fuel the fire for the boiling oil. The braziers are mounted on wheels, to be rolled along the floor next to the hole pattern. Once the brazier is in position, the vat can be tipped, pouring the hot oil through the holes in the floor and into the lower level of the gatehouse.
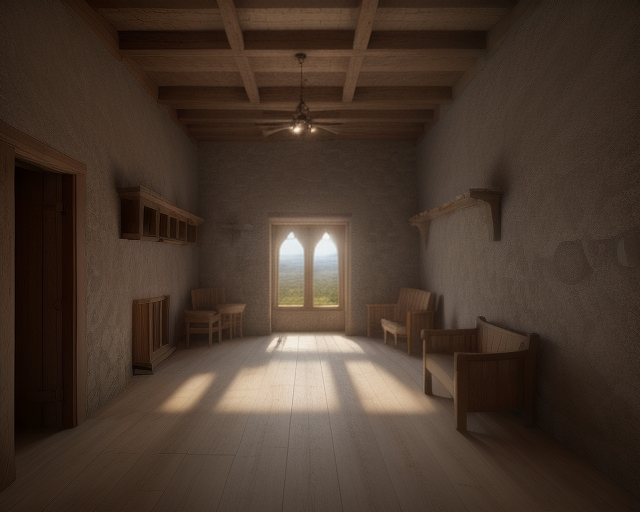
2. Southeast Tower building
this room are lined with bunks. There are enough bunks for nine men, and each has a trunk stowed underneath it for the guards' personal belongings. The bunks are arranged so 10 that guards can stand between them to make use of the arrow slits in the walls. The middle of the room is taken up by weapon racks. A sword, spear and crossbow for each guard is on hand, as well as several quivers of bolts and a pair of daggers for each guard. The weapons are the only things of value in this room. The guards do not leave any valuables in their personal trunks.
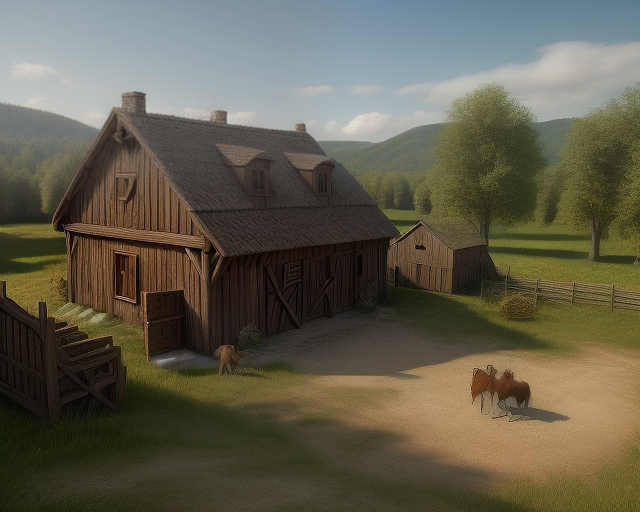
3. Common Stable building
and his three sons take care of the common stable; Hardel's wife died many years ago. They live in building 8, below, although at least one of them is always in the stable; the boys are all rather lazy, and one or more of them will be found sleeping in the hayloft any time their father isn't around. All are normal men, and will be armed with spears only in the most dire straits. Horses, mules, and donkeys can be stabled here for 5 copper pieces per day, or 25 copper pieces per week; this includes feed and daily exercise. As there is no other place to keep them, all civilian-owned riding and draft animals will generally be found here.
HA
Hardel
Human • HP 3
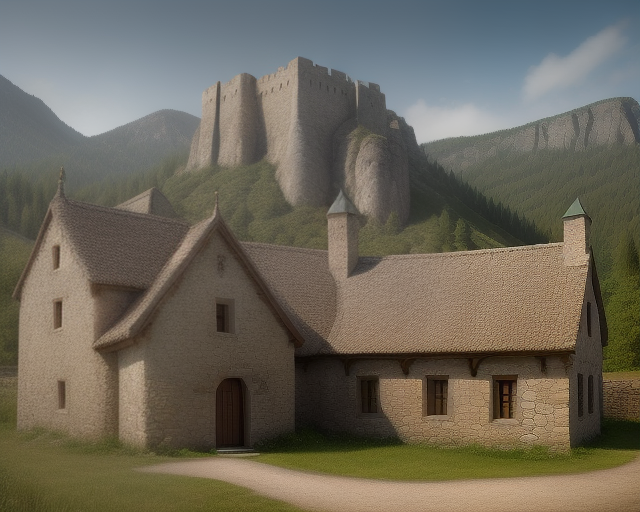
4. Bank building
depository for the keep's valuables. Inside the ostentatiously furnished building, heavy, narrowly spaced iron bars and a strong, locked door divide the room in half. Behind a row of horizontal slots in the bars is a long counter where 1d4 clerks handle routine money transactions. The bank president and vice- president have offices in the back of the building, where they handle loans and other financial matters more complicated than deposits, withdrawals, and payments. In the back there is a thick stone vault with a 4 inch thick steel door. Only the bank officers have keys to the vault door. Off-duty soldiers work as guards in the bank, with one or two on duty at any time, day or night.
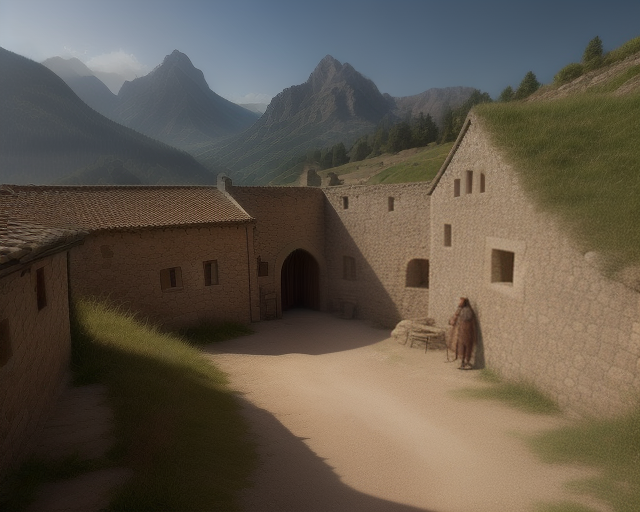
5. Trader building
Lotherra, deals in all sorts of dry goods. All items on the standard equipment list (not including weapons, armor, or livestock) are available here at the usual price. Jeroh will 11 happily purchase any serviceable items which are brought to him, so far as he is certain they are not stolen (items retrieved from a dungeon are not legally "stolen"), but he will only pay 4 sp per gp of value. Jeroh won't purchase jewelry or other high-value items, but he will accept such items at 6 sp per gp of value in payment for items purchased.
JE
Jeroh Lotherra
Human
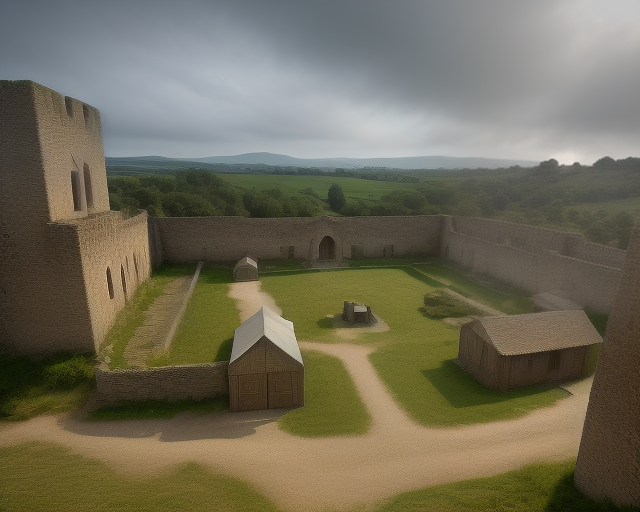
6. The "Square" building
the fort, where the local farmers bring their produce to sell. It has always been called the "Square" even though it is not shaped that way; it's a matter of tradition, and the locals will laugh at anyone who asks why. Presently, the area is lit by continual light spells cast by the local clergy, so that no part of this area will be in darkness after sunset. On any given day, there will be 2d8 commoners plus 1d6 off-duty soldiers present here. Between midnight and dawn the area is usually deserted, but there is a 1 in 1d6 chance of an encounter every three turns; 75% of the time, the encounter will be with a party of 2d4 soldiers investigating an odd noise (the player characters?) while the remaining 25% of the time it will be with one or two local commoners, probably drunk or on illicit business; such characters will be evasive if questioned, but if they see the player characters involved in unlawful acts they will almost always call for the night watch (the 2d4 soldiers previously mentioned).
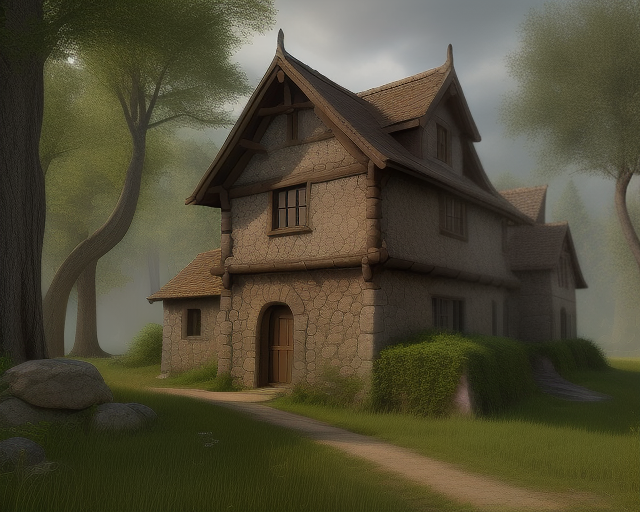
7. Residence building
of herbs outside of this mediocre house indicates that this is the residence of an herbalist. This building is the simple home of Maien Brai, a friendly, middle-aged widow, and her comely teenage daughter Jyni. The dimly lit living quarters contain crudely made tables and chairs and is lit by sputtering candles. The aroma of drying herbs and brewing potions is overpowering. The house contains a wide selection of plants of all types and varieties filling every nook and cranny. The sleeping quarters are sparsely furnished with a pair of simple cots, benches, a table and wardrobe. The kitchen contains a wide assortment of items needed for the preparation, manufacture and storage of potions, salves, poultices and tinctures. Maien usually (60% chance) has a few Potions of Healing (1d4, for 250 gp each, replenishing every two weeks), and if a good enough reason is given she can prepare more potent potions.
MA
Maien Brai
Human
JY
Jyni
Human
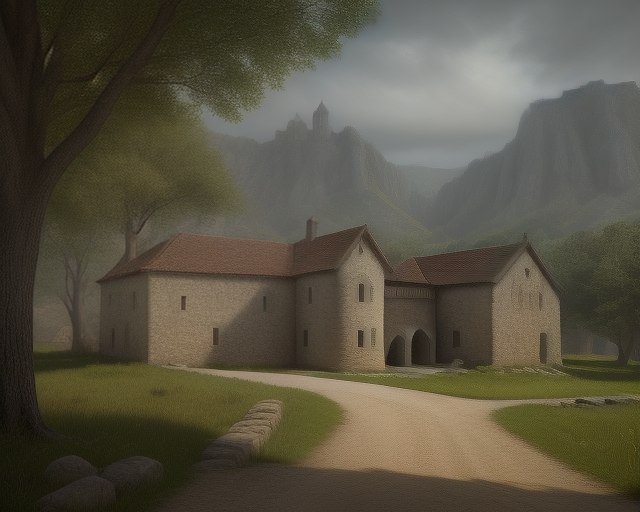
8. Stableman's Residence building
residence of the stableman Hardel and his three sons. The outside of the residence is run-down, but the interior is really bad... the stableman and his sons don't know the meaning of "housekeeping." The house is full of junk: clothing ("clean," dirty, and unserviceable mixed together randomly), pots and pans, tack and harness of various sorts (most of which is in need of repair if not outright disposal), and other things, piled in precarious piles all over. The kitchen area is dirty, and the entire place smells foul. Of course, the stableman or his sons will happily invite favored player characters to "come in for a drink" or to "join us for dinner."
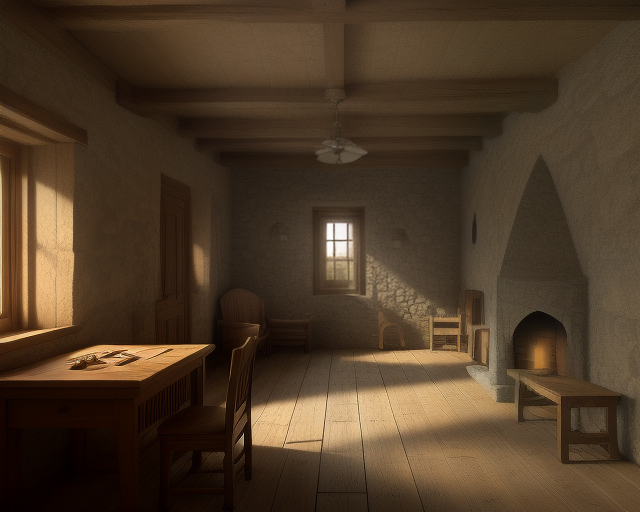
9. Residence (Gambling House) building
occupied by a portly, middle-aged fellow named Bargus. Inside and out, the house is plain and unassuming. However, inside, behind a concealed door, is a staircase down to the basement, where Bargus runs a successful gambling hall. The hall is painted in gaudy colors with risque paintings of scantily clad women. A stained oaken bar runs along part of one wall, with a row of tall stools lined up in front of it. The hall is furnished with crude, rough-hewn tables and benches. Despite the bar, this establishment is more a gambling den than a saloon. Access is granted by invitation only. At any one time, there are 2d6 patrons (including any townsfolk the GM wishes to include or incriminate), the owner, 1d3+2 dealers, and two large, intimidating bouncers. Bargus pays a hefty monthly "protection fee" to the local watch to prevent anything from happening to his business. Most any type of illicit activity or item can be found or arranged here for a price.
BA
Bargus
Human
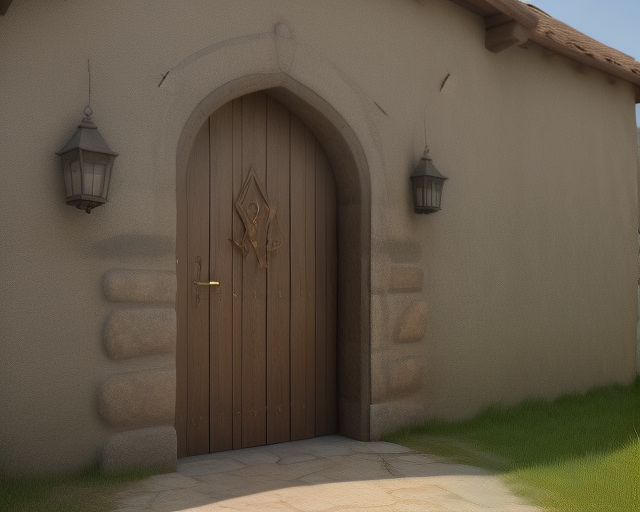
10. Residence building
bound door; on the door is carved an obscure mystical symbol, noticeable only on careful inspection. This house is owned by Thelan Taramedes, an old man dressed in fine, though out of fashion, clothing and jewelry. Thelan is 12 a semi-retired fourth level Magic-User who has taken up residence here to study the many scrolls and tomes he has accumulated over the last several years. Although he puts on airs and believes he is more important than he actually is, he is kind and will help anyone who needs aid. The main living area is dimly lit by strangely shaped lamps and is filled with the tomes and scrolls previously mentioned as well as a variety of sorcerous equipment. The air is filled with the acrid smell of the raw materials used in his various experiments. In his bedroom is a cheaply made cot buried under a pile of papers, as well as a locked trunk filled with mostly useless scrolls. However, hidden deep at the bottom of the trunk amid the mess of papers are the following scrolls: protection from magic, detect magic, detect evil, shield, web.
TH
Thelan Taramedes
Human Magic-User 4
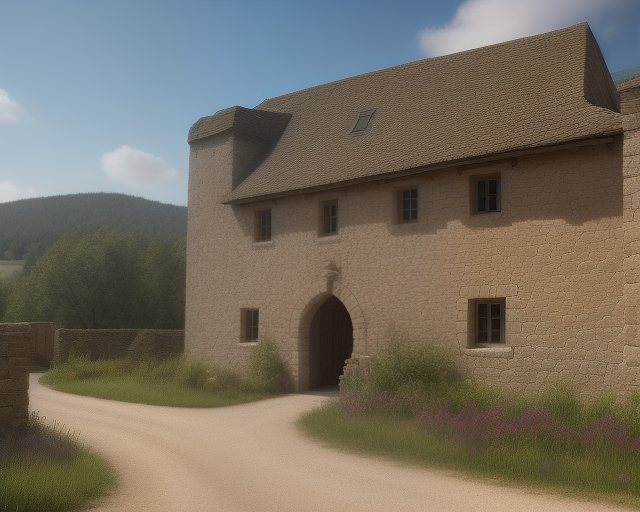
11. Smithy/Armorer building
clearly the home of the fort’s blacksmith, for the heat of molten metal, the smoke from the furnace and the clang of hammer and anvil leave no doubt as to its function. The owner is a robust human male named Rugarr. He has one helper, a strapping young man named Tob. Rugarr is a bear of a man with a friendly smile and a firm handshake. He is a bachelor and lives in a sparsely furnished room upstairs. Tob sleeps on a cot in the back of the first floor (the smithy proper), as befits an apprentice, but sometimes visits his parents on their farm nearby.
RU
Rugarr
Human
TO
Tob
Human
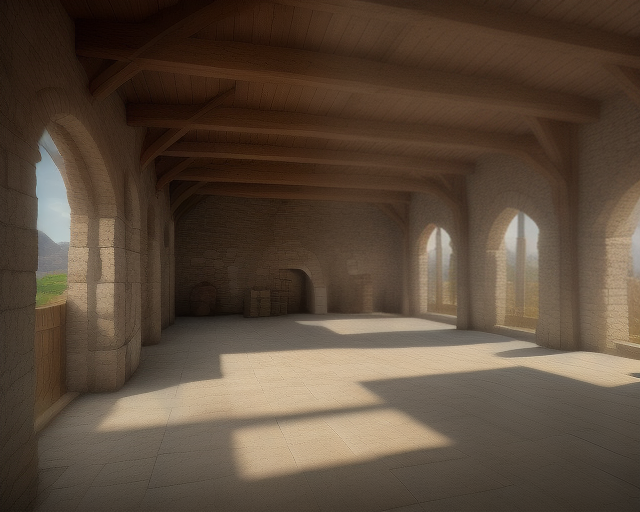
12. Common Warehouse building
structure is used to hold a variety of freight. The open interior is filled with crates, barrels, bales and sacks of dry goods. A fee of 1 gp per week is charged to rent storage space. The warehouse is operated by the local merchant's guild. During the day there is a clerk (Sardas) and three laborers (Valdin, Tamas, and Kaino) who manage the loading, unloading, and storage of freight; the laborers sleep in the building at night, but the clerk rooms at the inn (#14, below). All four are normal men with 3 hit points each; in time of need, they each have a suit of leather armor, a shortbow and arrows, and a spear, so that they may aid in the defense of the fort. The building is locked at night, and the watch keeps a close eye on it.
SA
Sardas
Human • HP 3
VA
Valdin
Human • HP 3
TA
Tamas
Human • HP 3
KA
Kaino
Human • HP 3
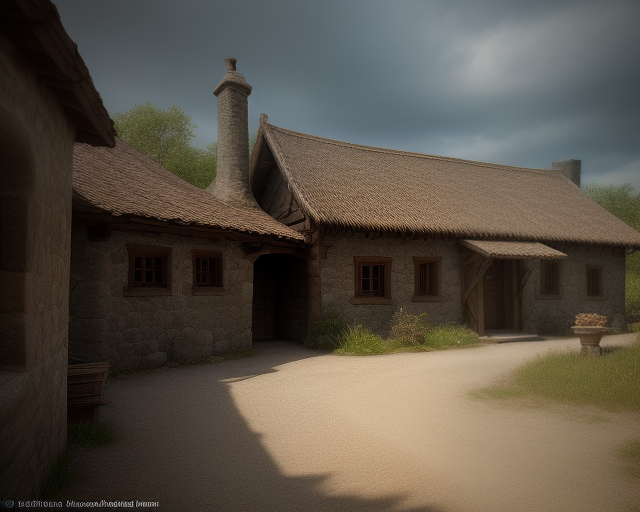
13. The Toothless Dragon Tavern building
Garnoth and his wife Lianna, this tavern serves beer and wine as well as common but hearty food for three meals a day. The serving wenches, Irene and Louise, are the taverner's daughters; rude comments or improper proposals by patrons will result in them being ejected by Garnoth, who is a retired soldier (Fighter 3rd level, AC 11, AB +2, HP 17, #At 1 club, Dam 1d6, Mv 40').
GA
Garnoth
Human Fighter 3 • AC 11 • HP 17
LI
Lianna
Human
IR
Irene
Human
LO
Louise
Human
BA
Bart
Human
KA
Kardon Karien
Human
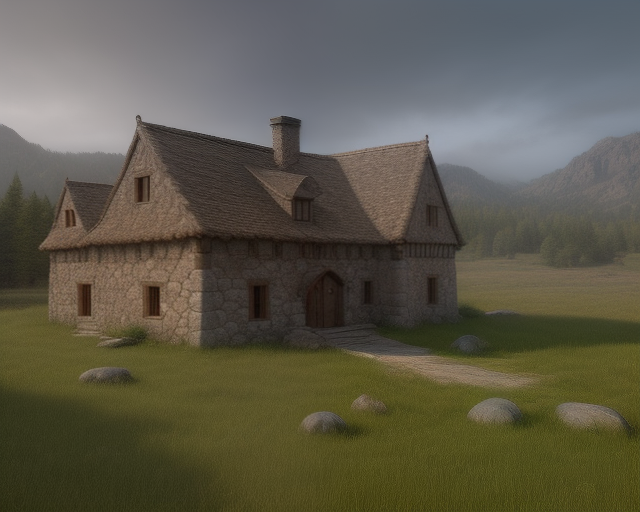
14. Iron Helm Inn building
Lorynn, older brother of Lianna (the taverner's wife). The inn has a common room downstairs, for which a tenant will pay 1 sp per night to sleep on a cot. There are four upstairs rooms, each containing a full-sized bed and having room for two additional cots; 1 gp per night is charged for a room, plus 1 sp per cot. The inn also has a "bathhouse," really little more than a small room on the ground floor with a large bathtub in it; the innkeeper charges 1 sp per person for the use of the bath. Lorynn is unmarried, and a little desperate; he'll take an interest in any human or Elven women who arrive unattended at his inn, giving them free use of the bathhouse and anything else he can think of to curry their favor.
LO
Lorynn
Human
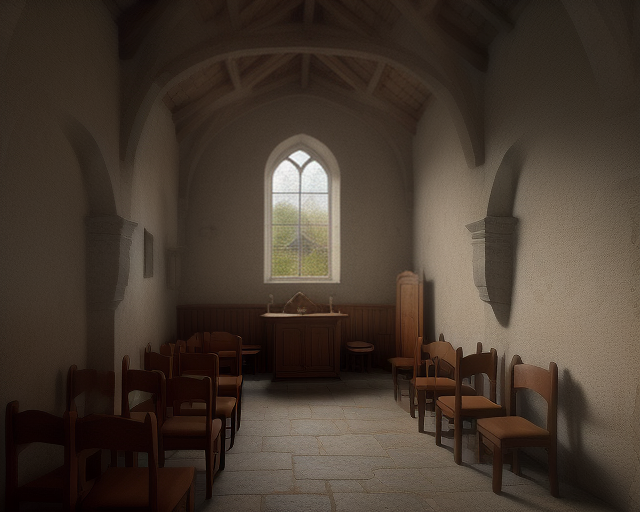
15. The Chapel of St. Queril building
attended to by Father Thelbain, a 6th level Cleric of the Church of Tah, Reformed. He is assisted by three 1st level Clerics named Baris, Jerard, and Melean. The chapel is outfitted in the typically plain style of the Reformers, but the woodwork is highly polished and the floors are beautifully inlaid due to a large donation by a previous group of adventurers. Father Thelbain will not go on adventures, so his statistics are not given here. He will cast spells on behalf of his parishioners for free, and for adventurers in return for a substantial charitable donation; he normally has cure light wounds (twice), bless, hold person, and cure disease prepared, but may of course pray for any spell allowed to a Reformer Cleric if something else is needed.
FA
Father Thelbain
Human Cleric 6
BA
Baris
Human Cleric 1
JE
Jerard
Human Cleric 1
ME
Melean
Human Cleric 1
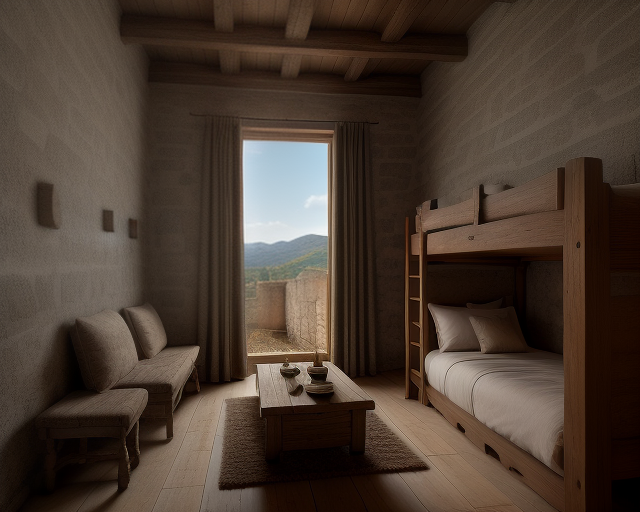
16. East Tower building
this room are lined with bunks. There are enough bunks for nine men, and each has a trunk stowed underneath it for the guards' personal belongings. The bunks against the 13 outer wall are arranged so that guards can stand between them to make use of the arrow slits in the walls. Weapon racks line the walls beside the doors. A sword, spear, and crossbow for each guard is on hand, as well as several quivers of bolts and a pair of daggers for each guard. The weapons are the only things of value in this room. The guards do not leave any valuables in their personal trunks.
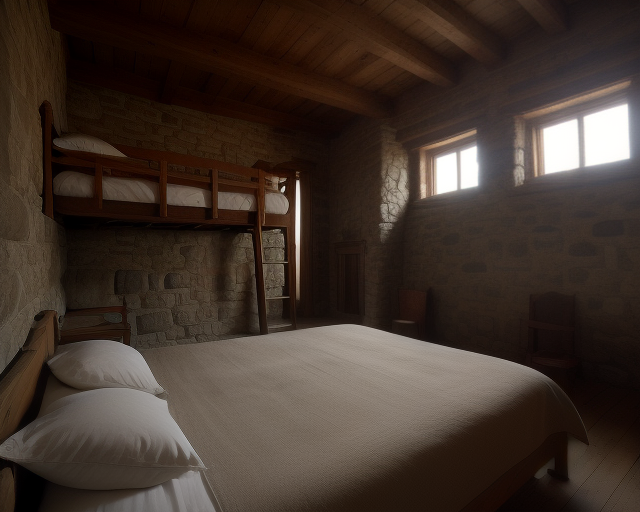
17. Northeast Tower building
The two exterior walls of this room are lined with bunks. There are enough bunks for nine men, and each has a trunk stowed underneath it for the guards' personal belongings. The bunks are arranged so that guards can stand between them to make use of the arrow slits in the walls. The middle of the room is taken up by weapon racks. A sword, spear, and crossbow for each guard is on hand, as well as several quivers of bolts and a pair of daggers for each guard. The weapons are the only things of value in this room. The guards do not leave any valuables in their personal trunks.
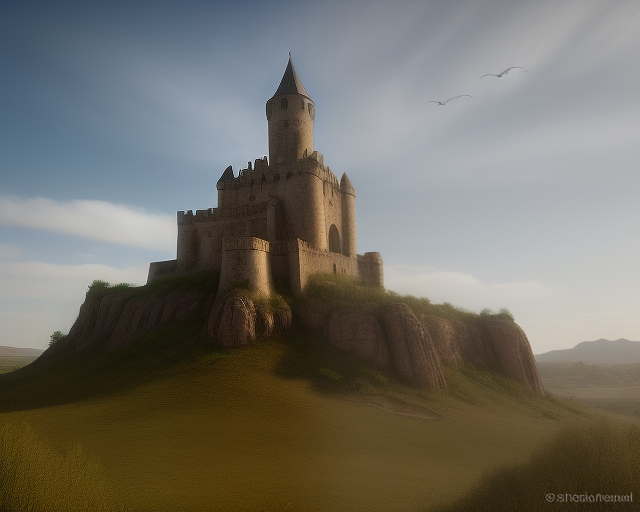
18. Southwest Tower building
Same as 17. Northeast Tower: The two exterior walls of this room are lined with bunks. There are enough bunks for nine men, and each has a trunk stowed underneath it for the guards' personal belongings. The bunks are arranged so that guards can stand between them to make use of the arrow slits in the walls. The middle of the room is taken up by weapon racks. A sword, spear, and crossbow for each guard is on hand, as well as several quivers of bolts and a pair of daggers for each guard. The weapons are the only things of value in this room. The guards do not leave any valuables in their personal trunks.
19. Inner Tower building
wall opens to stairs inside the tower that bring the guard to the top of the tower to stand watch. Nothing else is in this tower. Note: If you wish to add tunnels beneath Morgansfort as described on page 8, this tower might be a good location for a secret stairway down to them.
20. The "Green" building
square, so the Green is not green. This area is used for various military maneuvers, and the constant foot traffic has killed all grass and weeds except at the margins. In daylight hours in good weather, it is 85% likely that 1d4+1 knights or 3d6 soldiers will be practicing here; at night, there is a chance equal to 1 on 1d6 each turn of encountering 2d4 soldiers going to or from the barracks or the keep. Note that the area around the doorways to the keep and the barracks are illuminated by continual light spells.
21. Northwest Tower building
Same as 17. Northeast Tower: The two exterior walls of this room are lined with bunks. There are enough bunks for nine men, and each has a trunk stowed underneath it for the guards' personal belongings. The bunks are arranged so that guards can stand between them to make use of the arrow slits in the walls. The middle of the room is taken up by weapon racks. A sword, spear, and crossbow for each guard is on hand, as well as several quivers of bolts and a pair of daggers for each guard. The weapons are the only things of value in this room. The guards do not leave any valuables in their personal trunks.
22. North Tower building
of this room are lined with bunks. There are enough bunks for nine men, and each has a trunk stowed underneath it for the guards' personal belongings. The bunks against the outer wall are arranged so that guards can stand between them to make use of the arrow slits in the walls. Weapon racks line the walls beside the east and west doors. A sword, spear and crossbow for each guard is on hand, as well as several quivers of bolts and a pair of daggers for each guard. The weapons are the only things of value in this room. The guards do not leave any valuables in their personal trunks.
23. Knights' Quarters/Garrison Stable building
The ground floor of this area is the Garrison Stable. Horses belonging to Baronet Halden and the Knights of the Garrison are stabled here. The horses are cared for by the Knights' squires, who bunk in the stable with the horses. Along the south wall of the stable is a stairway leading to the second level, which is the Knights' Quarters. The Knights' Quarters consist of a small entryway at the south end, and a long central hallway down the long axis of the building. From this hallway, five doors open to the west and two to the east. The five small rooms on the west side belong to the five Junior Knights. The two large rooms on the east side belong to Sir Galadin and Sir Kellin. The knights are all from wealthy Slateholm families. Sir Galadin and Sir Kellin swore fealty to Baron Morgan when they were young men. When the Baron left Morgansfort, he assigned the two knights to assist his son, a task they gladly accepted. Their presence at the fort is a major reason for the Baronet's success. It was the chance to serve under the command of these two knights that attracted the junior Knights to Morgansfort. The junior Knights are all sworn directly to Baronet Halden. 14
TO
Top Sergeant Aldric
Human Fighter 2 • AC 18 • HP 12
MA
Master Sergeant Karstein
Human Fighter 2 • AC 18 • HP 11
CA
Captain Argos
Human Fighter 3 • AC 18 • HP 16
LI
Lieutenant Kellos
Human Fighter 2 • AC 18 • HP 7
LI
Lieutenant Aeos
Human Fighter 2 • AC 18 • HP 8
LI
Lieutenant Haydin
Human Fighter 2 • AC 18 • HP 7
LI
Lieutenant Korbl
Human Fighter 2 • AC 18 • HP 6
SI
Sir Galadin
Human Fighter 3 • AC 18 • HP 14
SI
Sir Emeric
Human Fighter 2 • AC 18 • HP 9
SI
Sir Horn
Human Fighter 2 • AC 18 • HP 10
SI
Sir Mora
Human Fighter 2 • AC 18 • HP 10
SI
Sir Ragnan
Human Fighter 2 • AC 18 • HP 10
SI
Sir Gervus
Human Fighter 2 • AC 18 • HP 9
SI
Sir Kellin
Human Fighter 4 • AC 18 • HP 30
24. Garrison Barracks building
24. Garrison Barracks: 1st Floor: This is where the 1st and 2nd Squads of the Morgansfort Garrison are housed. The 3rd through 8th Squads bunk in the watch towers and above the gatehouse. The east wall of this floor is filled with weapons racks for the two squads. In the northeast corner is a landing leading to a stairway to the second floor. The rest of this floor is packed with bunks, with 22 men being squeezed into this area. At least half the bunks will be occupied any time someone enters this area. The guards keep quiet in the barracks, because the officers are housed on the second floor. 2nd Floor: At the top of the stairs leading to the second floor is a door that can be locked. It is normally closed but unlocked, as there is always at least one officer of the watch asleep up here. The western 2/3 of this floor is subdivided into seven semi-private sleeping chambers by flimsily constructed wood partitions. Each chamber contains a bunk, a wardrobe, and a small table with a chair. Beneath each bunk is a locked foot locker. The seven who bunk here include Captain Argos, Lieutenant Kellos, Lieutenant Aeos, Lieutenant Haydin, Lieutenant Korbl, Top Sergeant Aldric, and Master Sergeant Karstein (all detailed below in the Garrison section). In the southeast corner of this floor is a locked closet for the rest of the garrison to store valuables if they wish. If a character gains access to this area, roll treasure types J, K, and L for the locked closet. Also roll treasure types P through T for each of the locked foot lockers.
GA
Garrison Privates (72)
Human Fighter 1 • AC 16 • HP 4
GA
Garrison Corporals (7)
Human Fighter 1 • HP 5
1S
1st Squad Corporal
Human Fighter 2 • AC 16 • HP 8
GA
Garrison Sergeants (5)
Human Fighter 1 • AC 18 • HP 6
GA
Garrison Squad Sergeants (3)
Human Fighter 2 • AC 18 • HP 9
25. Keep building
This building serves as the Baron's (and by extension, his son's) residence and office. The first floor is dominated by a large central "great room" where meals are held and where the Baronet holds court as needed. The kitchen is directly behind this room, and offices and servant's quarters line the outer area. The second floor includes rooms for the Baron and his wife, currently disused, and for the Baronet. An extensive cellar below the keep provides storage for food and other supplies. There is also a well within the cellar, near the kitchen stairs. Finally, a fairly secure vault with a metal door is secreted in the cellars; it is within this vault that the Baronet's funds are kept. Only the Baronet and Bailiff Tomandy have keys to the vault.
BA
Bailiff Tomandy
Human
BA
Baronet Halden Rathwynn
Human Fighter 5 • AC 21 • HP 27
dungeon Olde Island FortressOpen →
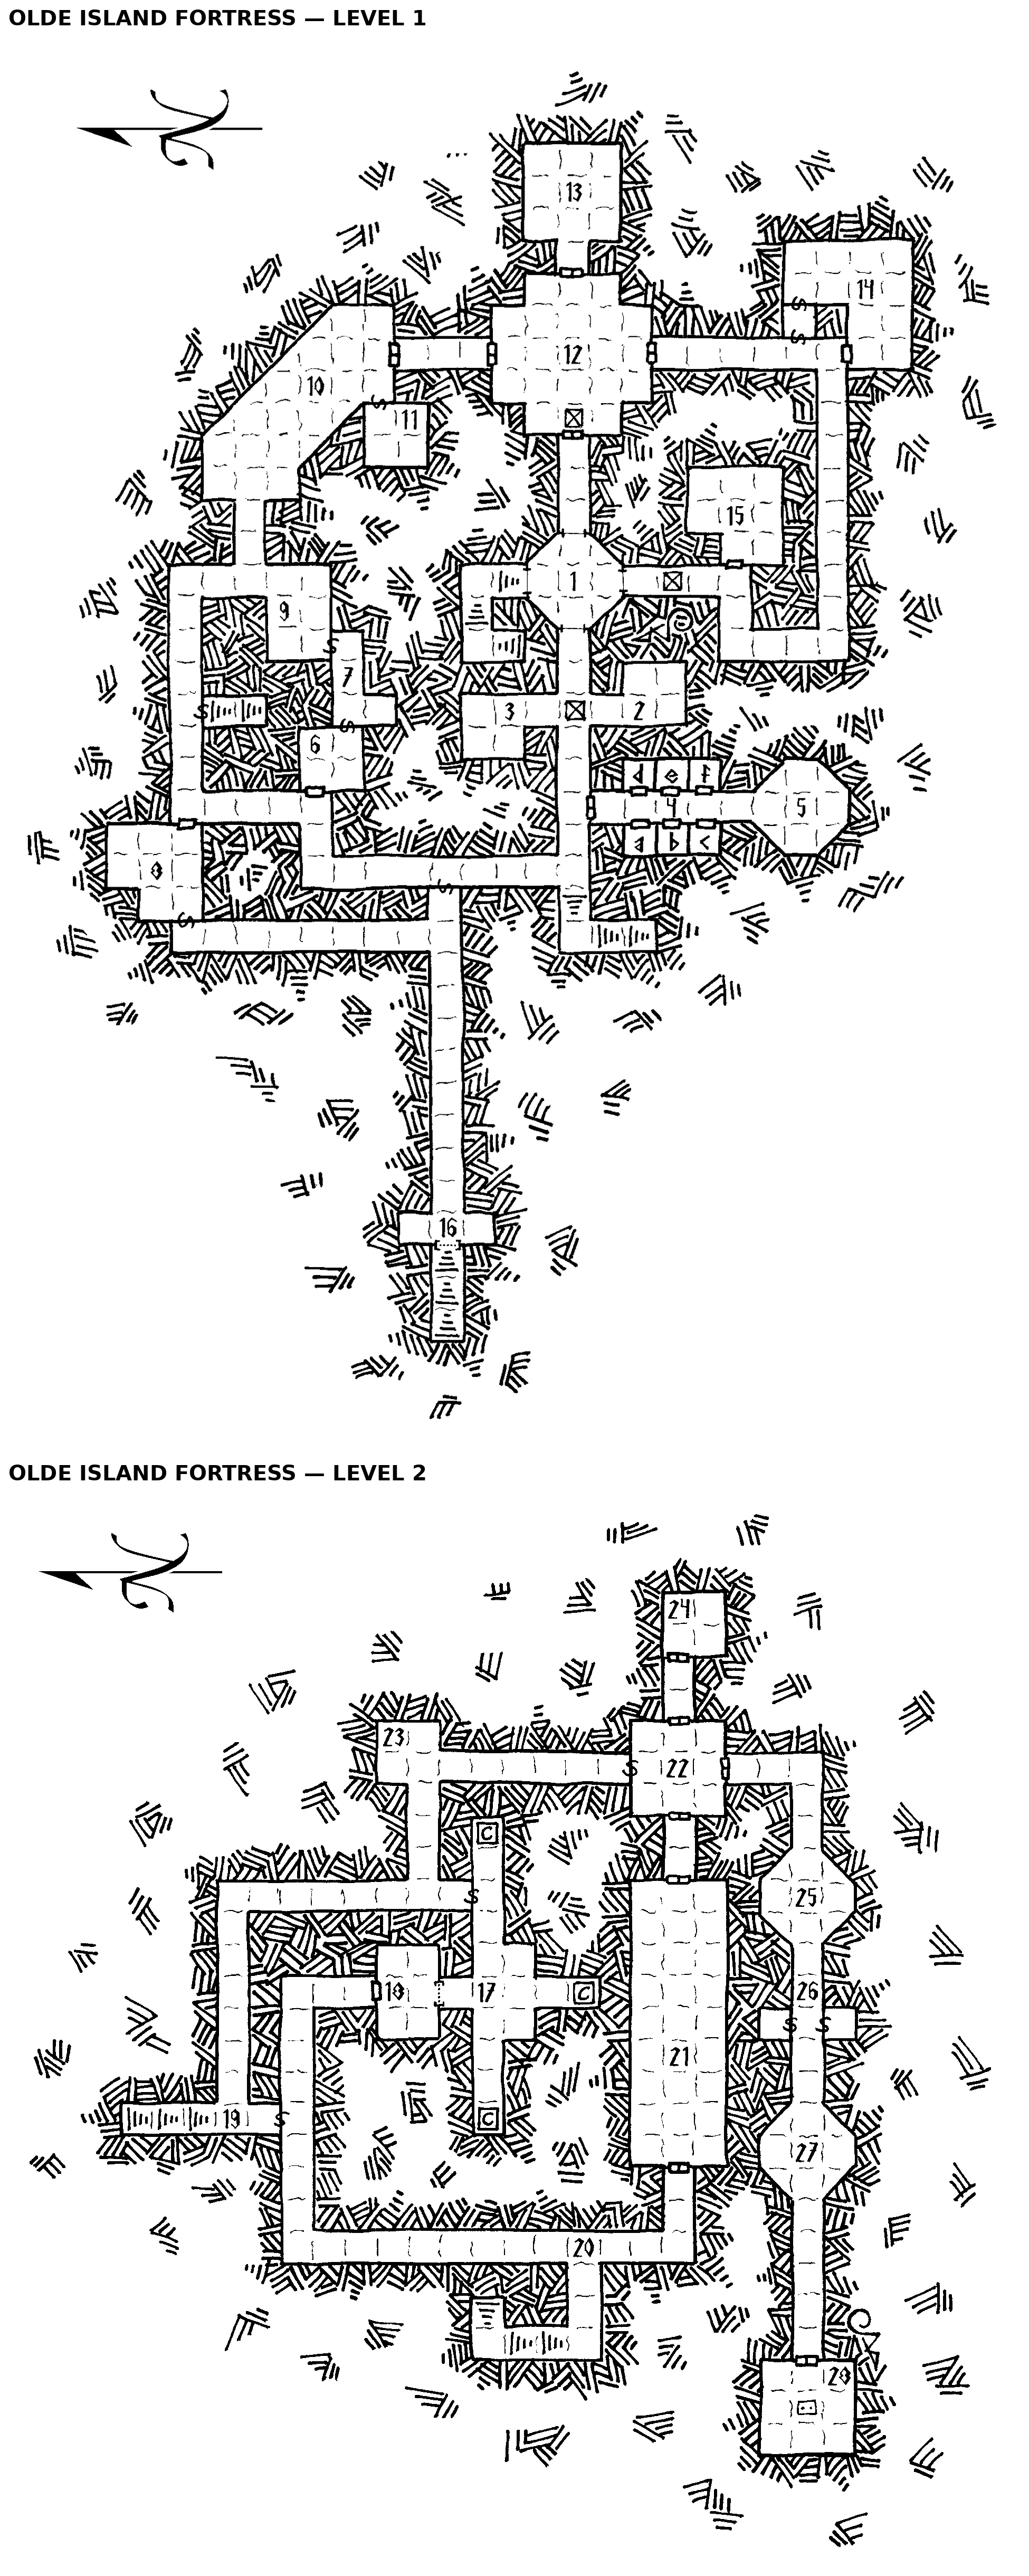
Two-level dungeon near Morgansfort, good for beginners. Collapsed bridge, island ruins, barbarian chieftain tomb (room 28, 4 variants).
BF1 gives this dungeon no wandering-monster table; encounter checks are specified per-room (e.g. room 1: roll an encounter check the first time it is entered). Dungeon maps are on BF1 PDF pp.33-34 (not yet attached).
Maps: Levels 1–2 extracted from the BF1 PDF (pp.33–34), stacked Level 1 above Level 2.
ROOMS • 37
1. Entrance Room room
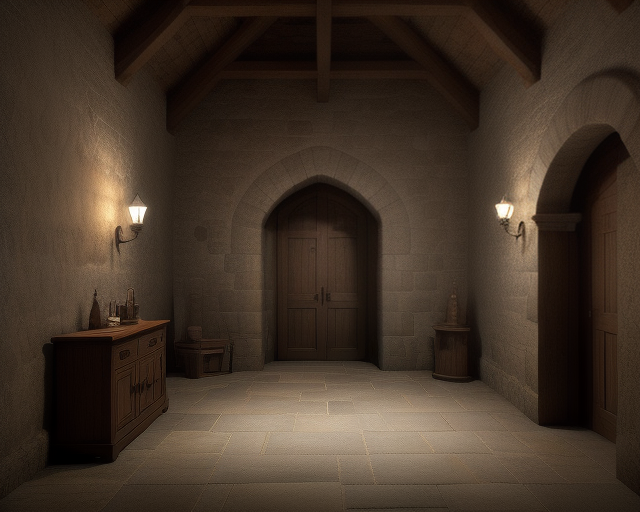
Roll an encounter check the first time this room is entered. This room appears to be empty. The floor shows signs of substantial traffic between the stairs and the western hallway. If the party is noisy, the wolves in room 2 will growl loudly (if they are there; see below), but they won't attack or enter the room. If the party attempts to go down the western hallway, the wolves will wait until an adventurer comes in sight before attacking... but of course at that point at least one adventurer is standing on the pit.
2. Wolf Lair room
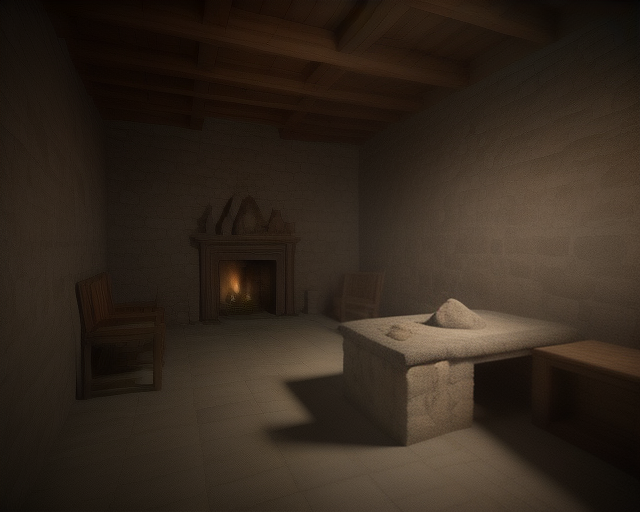
6 wolves lair in this room. There is a 75% chance they are not in the room in the daytime, 50% at night. They growl when they hear anyone in room 1, but if the party is quiet the wolves will ignore them. Of course, the wolves know to jump the pit trap in the hallway. If the wolves are present, they will certainly attack. If they are not, read or paraphrase the following: The floor of this room is littered with small bones and scraps of fur, some of which has been pushed together to form nests. A rank animal odor fills the room. The litter is noisy to walk on; a Thief has a 20% lower chance of Moving Silently in this room. Beneath the mess in the southwestern corner of the room is a loose stone (found as a secret door); underneath is a sack containing 548 sp. The sack is old and rotten and will tear open noisily if anyone attempts to pull it out. 6 Wolves: AC 13, HD 2, #At 1 bite, Dam 1d6, Mv 60', Sv F2, ML 8, XP 75 ea. HP 7 ☐☐☐☐☐ ☐☐ 9 ☐☐☐☐☐ ☐☐☐☐ 5 ☐☐☐☐☐ 9 ☐☐☐☐☐ ☐☐☐☐ 11 ☐☐☐☐☐ ☐☐☐☐☐ ☐ 7 ☐☐☐☐☐ ☐☐
3. Stirge Nests room
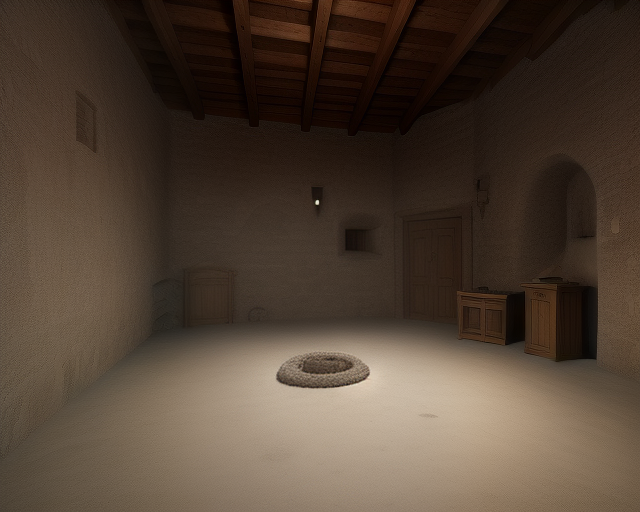
Five nests made of dried mud dot the north wall of this room, all higher than eye level. You hear a strange, high-pitched mewling. A strong, foul odor of dung fills the air, and piles of dung are visible on the floor, mostly clustered around the nests. Five adult stirges nest in this room. A total of 13 noncombatant stirge "chicks" are in the nests, but other than making the mewling noises they do not affect this encounter. If the stirges are surprised, they will simply not act for one round; for the adventurers to make use of a surprise condition in their favor, they will have to attack the nests as soon as they see them. Stirges like shiny things, and these have collected the following: • A jade statuette of an Elven woman dancing, worth 130 gp • A gold brooch in the shape of a lizard, worth 120 gp • A silver bracelet engraved in a "knotwork" pattern, worth 60 gp 20 • A man's gold earring, worth 50 gp • Two identical silver necklaces, worth 90 gp each • A silver letter opener with a wooden handle shaped like a dragon's head, worth 150 gp. These items are scattered along the north wall, and as they are tarnished and the floor is littered with dung, they will
4. Cells room
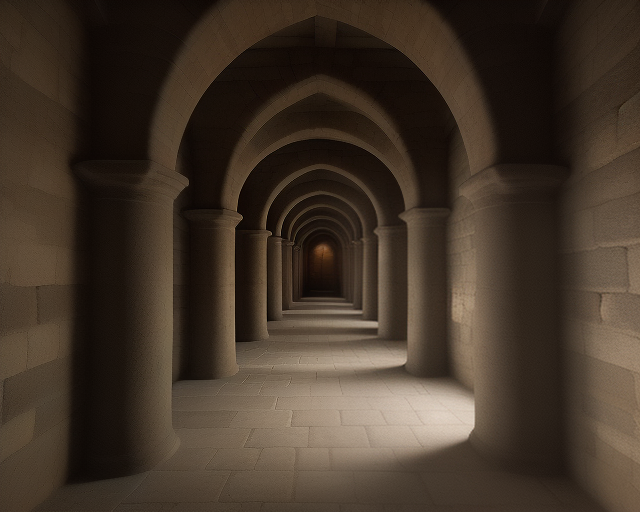
This fifty foot long corridor is lined with cell doors, three on each side. The iron-barred door from the third cell on the right lies twisted in the middle of the corridor floor. At the far end, the corridor opens into a larger space.
4a. First Cell room
The room is empty save for a pile of moldy straw on the floor and a set of corroded manacles bolted to the far wall. A rotting leather bag lies burst open on the floor next to the pile of straw. Several gold coins can be seen scattered on the floor near the bag. The rusted iron-grilled door to this room is unlocked. There are 100 gp in the bag and on the floor. Growing under and around the bag is a patch of yellow mold, automatically noticeable if the player character is looking out for trouble. Yellow Mold: AC nil, harmed only by fire, HD 2*, #At spores, Dam save vs. Death Ray or take 1d8 points of damage per round for 6 rounds, Mv 0', Sv NM, ML n/a, XP 100 HP 13 ☐☐☐☐☐ ☐☐☐☐☐ ☐☐☐
4b. Second Cell room
The room is empty except for a pile of moldy straw on the floor, a battered metal food dish, and a set of broken chains set into the opposite wall. The corroded iron-grilled door to this room is unlocked. The door is rusted shut, requiring a die roll of 1 on 1d6 to open (adjusted by Strength as normal). Lying under the metal food dish is a key to cell 4e. There is nothing else of value in this room.
4c. Third Cell room
This room is missing a door, as mentioned above. It appears that the door to this room was ripped from its hinges by great force. Inside the dank room is a pile of straw and several large bones, apparently quite old. They have marks on them such as would be made by large, blunt teeth. Nothing else here is of value.
4d. Fourth Cell room
This cell smells of death. A heap of bones in various states of decomposition rests against the far wall. The door to this room is unlocked but stuck (roll a 1-2 on 1d6 to open, adjusted by Strength). Once the door is opened and a 21 character steps inside the room, the bones will begin to move. From under the pile of bones, the character will be ambushed by a bone- white giant crab spider. Giant Crab Spider: AC 13, HD 2*, #At 1 bite, Dam 1d8+poison, Mv 40', Sv F2, ML 7, XP 100 HP 10 ☐☐☐☐☐ ☐☐☐☐☐ Also beneath the pile of bones are two Potions of Healing, a Potion of Poison, and a Potion of Delusion (appears to be a potion of speed).
4e. Fifth Cell room
This room is similar to the others; however, in the far corner is a damp wooden barrel. The door to this room is locked; the key is in room 4b. The barrel contains very stagnant water. At the bottom of the barrel is a Ring of Protection +1, buried in a thin layer of slime.
4f. Sixth Cell room
The door to this room stands open. The floor of this cell is lined with old, damp straw. This room contains nothing of interest.
5. Torture Room room
This room is furnished with torture implements, including a rack, a brazier, and an iron maiden. Manacles hang from the far walls, while the nearer walls are festooned with hand-held torture devices like whips, flails, branding irons, knives, and pincers. All the metal implements are rusty, and the wooden items such as the rack appear rickety. Anyone attempting to hear noises will detect a faint rustling noise coming from somewhere in the room. A spitting cobra lairs in this room, entering and exiting through a wide crack in the bottom of the door to area 4, above. It will be hiding beneath the rack when the room is entered. Spitting Cobra: AC 13, HD 1*, #At 1 bite or 1 spit, Dam 1d4 + poison bite, blindness spit, Mv 30', Sv F1, ML 7, XP 37 HP 5 ☐☐☐☐☐
6. Goblin Hideout room
An armed party of four goblins are in this room, resting. They are scouting the island fortress for their chieftain, who wants to move their lair here; however, the kobolds have put up a fairly effective defense, splitting the goblin party up in the process. These goblins are in a foul mood, but unless they outnumber any opposition at least two to one, they will try to flee rather than attack. 4 Goblins: AC 14, HD 1-1, #At 1 spear, Dam 1d6, Mv 20', Sv F1, ML 7, XP 10 ea. HP 2 ☐☐ 6 ☐☐☐☐☐ ☐ 5 ☐☐☐☐☐ 3 ☐☐☐
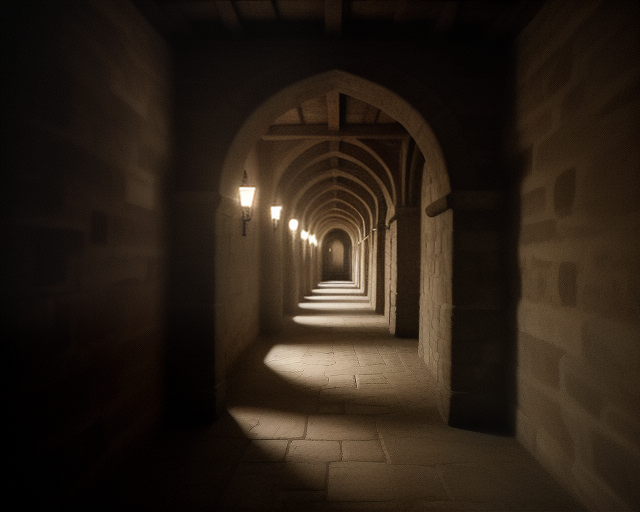
7. Secret Hallway room
This short, dark hallway shows signs of light traffic. A sturdy wooden chest rests on the floor in the center of the alcove. There are several sets of humanoid footprints on the floor of the hallway, with the most obvious tracks around the chest. The chest is locked, but not trapped; the key to this chest is carried by the largest goblin in room 9. Inside the chest is 84 cp and 300 ep.
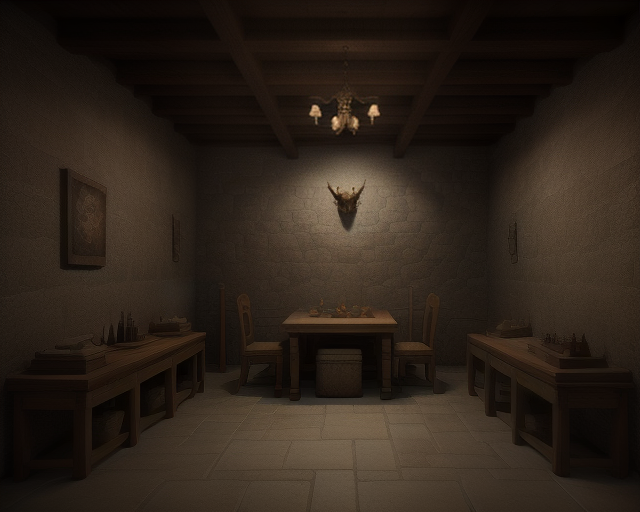
8. Rogue Orcs room
5 rogue male orcs are hiding out in this room. They know about the secret door, and if they hear the party approaching or trying to force the door they will exit through the secret door and try to sneak up behind the adventurers. They have been using the fighting between the kobolds and goblins as an opportunity to loot the rest of the dungeon. 5 Orcs: AC 14, HD 1, #At 1 longsword, Dam 1d8, Mv 30', Sv F1, ML 8, XP 25 ea. HP 4 ☐☐☐☐ 3 ☐☐☐ 5 ☐☐☐☐☐ 7 ☐☐☐☐☐ ☐☐ 4 ☐☐☐☐ The orcs have the following treasure in a pair of large sacks: 2,182 sp, 463 gp, two matching gold flagons worth 80 gp each or 200 gp as a set, and a necklace worth 300 gp. 22
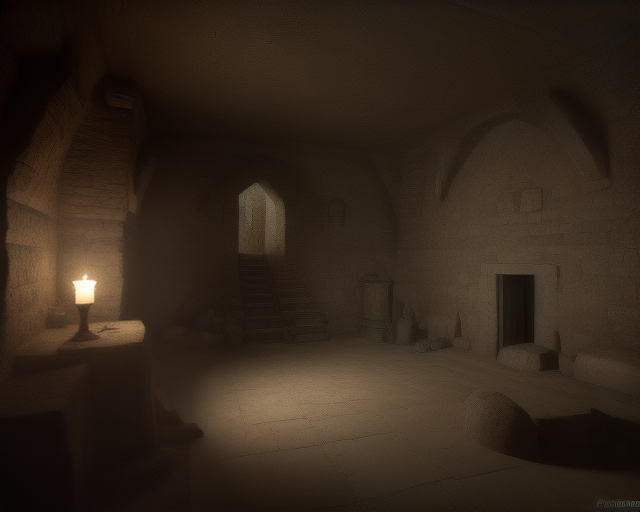
9. Goblin Lair room
The other part of the goblin party described in area 6 is here. Note that the largest goblin carries the key to the chest in area 7. He does not know what the key unlocks, as he took it away from another goblin, who in turn found it somewhere on the floor. 4 Goblins: AC 14, HD 1-1, #At 1 spear, Dam 1d6, Mv 20', Sv F1, ML 7, XP 10 ea. HP 3 ☐☐☐ 2 ☐☐ 7 ☐☐☐☐☐ ☐☐ 2 ☐☐
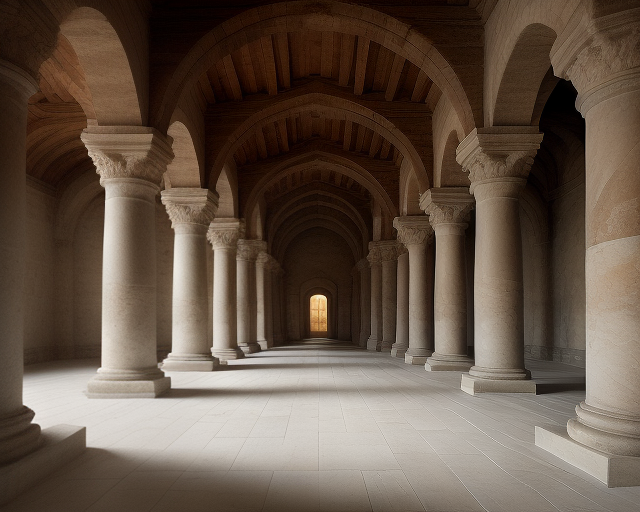
10. Grand Hall room
Elaborately carved columns parade down the center of this marble-paved hall. In the center of this room is a badly damaged stone statue, which appears to have originally depicted a man carrying a large spear with the point angled downwards; the upper parts of the statue have been smashed, and fragments of marble litter the floor nearby. At the base of the ruined statue is a large wooden chest. The chest is closed but unlocked, and is trapped. When the lid is opened, the statue will release its spear, which is positioned over the chest. It will do 1d6 damage to the character opening the chest if a save vs. Death Ray fails. The chest contains 698 cp, 273 ep, a rhodochrosite worth 10 gp, a sardonyx worth 50 gp, and a tourmaline worth 100 gp.
11. Secret Room room
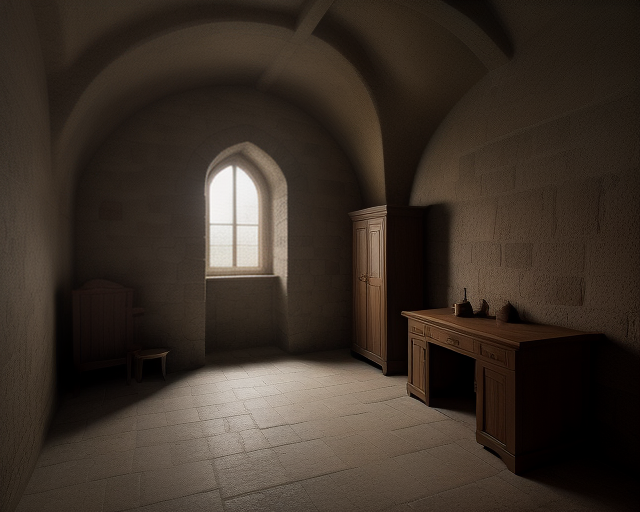
This small room is thick with dust and cobwebs. There are several rotting cloth sacks stacked in the corner, spilling their verdigrised copper and tarnished silver contents onto the floor. 763 cp and 284 sp are scattered around, requiring a full turn to pick up and put into bags.
12. Meeting Room room
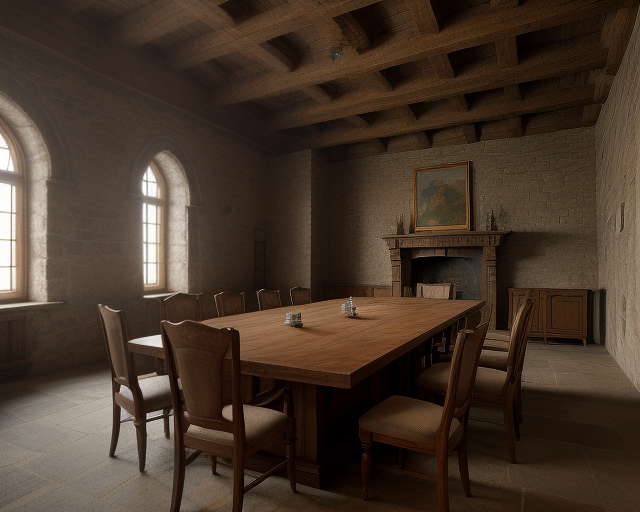
A heavy, long table and ornate chairs, badly deteriorated, occupy the center of this room. Discolored patches on the wall seem to indicate that many paintings once hung there. In front of the west door there is a pit trap leading to room 17 on the second level. This room is basically empty, but roll an encounter check the first time it is entered.
13. Storage Room room
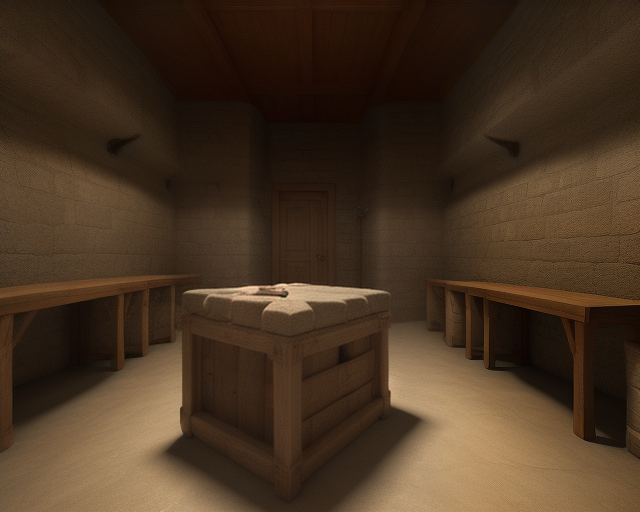
This dusty chamber contains a variety of desks, chairs, tables, stools, benches, and racks, as well as a number of framed paintings, piled in the center of the room. This room also contains a potentially deadly trap. Any character walking normally into the room will raise a cloud of fine dust (taking care to walk slowly will allow this to be avoided). If this happens then anyone who enters carrying a lit torch or lantern will ignite the dust, creating a fireball-like effect. All within 20’ of the ignition source will take 2d6 points of fire damage immediately (save vs. Death Ray for half damage). The contents of the room will then catch fire and burn fiercely, making the room a deadly inferno of flame and smoke, doing 1d8 points of damage to any character remaining in the room every round, starting 1d4 rounds after the dust is ignited. The fire will last 2d4 turns once ignited. Assuming the trap is avoided, the characters will be able to investigate the room contents. The paintings stored here once hung in the Meeting Hall (above). They are badly damaged by age and dampness, but some of the pictures can still be recognized; they depict pastoral and hunting s
14. Kobold Lair room
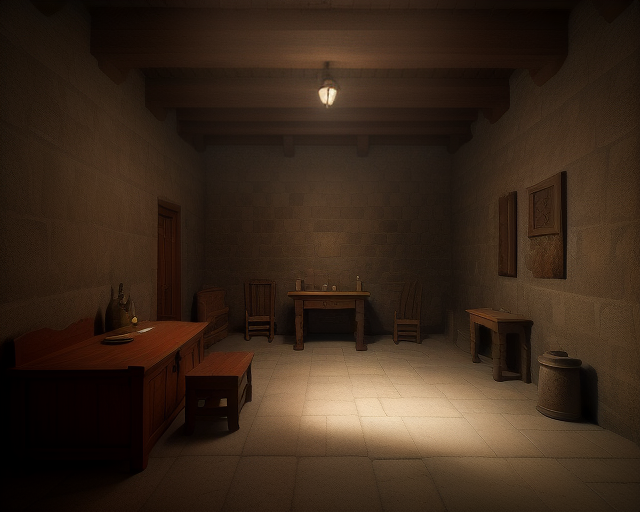
A clan of kobolds lives in this room; there are 18 adult males and 11 adult females here. Any kobolds met as a result of random encounters must come from this pool, as there are no other kobold clans on the island. Due to the current hostilities with the goblins, the females do not leave the lair, but they will fight as effectively as the males if the lair is invaded. Piles of furs and filthy cloth garments (mostly human-sized and in poor repair) are scattered around the room. In the corner nearest the secret door, under a pile of furs, is a sack containing the kobold tribe's treasure: 1,735 cp, 1,085 sp, 1,195 ep, and a Spell Scroll containing one magic-user spell: knock. They know about the secret door, and will use it to get behind the player characters (or to escape if necessary). 18 Male Kobolds: AC 13, HD ½ (1d4 HP), #At 1 small spear, Dam 1d4, Mv 20', Sv NM, ML 6, XP 10 ea. HP 2 ☐☐ 4 ☐☐☐☐ 4 ☐☐☐☐ 3 ☐☐☐ 3 ☐☐☐ 3 ☐☐☐ 3 ☐☐☐ 4 ☐☐☐☐ 3 ☐☐☐ 3 ☐☐☐ 2 ☐☐ 2 ☐☐ 3 ☐☐☐ 4 ☐☐☐☐ 3 ☐☐☐ 4 ☐☐☐☐ 2 ☐☐ 3 ☐☐☐ 11 Female Kobolds: AC 13, HD ½ (1d4 HP), #At 1 small spear, Dam 1d4, Mv 20', Sv NM, ML 6, XP 10 ea. HP 2 ☐☐ 4 ☐☐☐☐ 4 ☐☐☐☐ 3 ☐☐☐ 3 ☐☐☐ 3 ☐☐☐ 2 ☐☐ 4 ☐☐☐☐ 2 ☐☐ 1
15. The Hive room
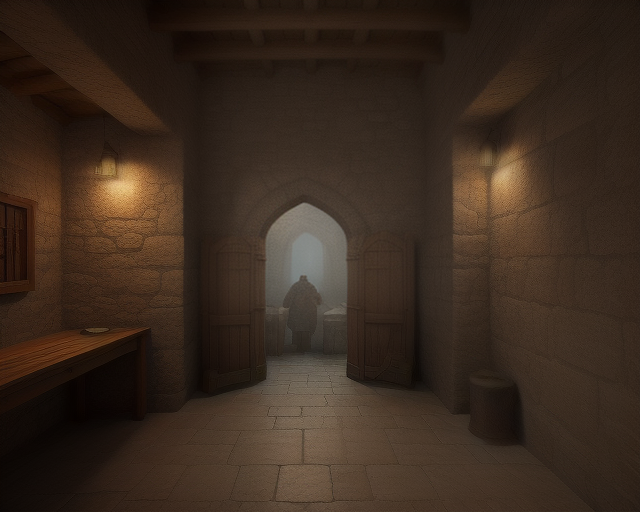
As the adventurers approach the door to this room, read the following: From the door ahead comes a faint humming sound; it becomes more of a buzzing when you get closer. The door is distorted by age and humidity, and hangs partly open. If any character has the nerve to look into the room (opening the door or just peering around the door), read this: Giant bees! You've heard of them, but they are larger than you expected... and they are moving toward you menacingly... The room is lined with a huge lattice of hexagonal wax cells; a giant honeycomb, of course. Most of the cells (85%) contain giant bee honey, while the remainder contain giant bee larva. There is no "royal jelly" here. Upon noticing the adventurers the giant bees will become agitated, attacking on sight and pursuing enemies as far as 60' in any direction. 6 Giant Bees: AC 13, HD ½* (1d4 HP), #At 1 sting, Dam 1d4 + poison, Mv 10' Fly 50', Sv F1, ML 9, XP 13 ea. HP 3 ☐☐☐ 3 ☐☐☐ 2 ☐☐ 2 ☐☐ 2 ☐☐ 4 ☐☐☐☐ 24
16. Rabbit Hole room
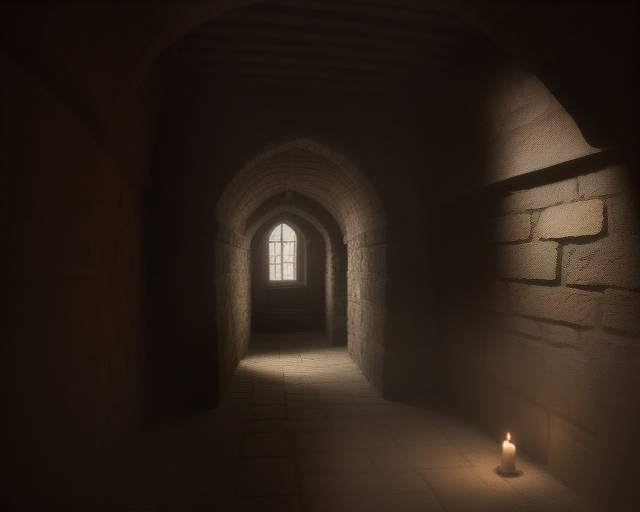
If the party approaches this area during daylight hours, read this: As you proceed down the secret hallway, you see a faint light in the distance. You see moving figures silhouetted in the dim light, and you hear deep growls... If it is dark outside when this area is approached, read this: As you proceed down the secret hallway, just beyond the range of your light you see glowing eyes. No sooner have you seen them than you begin hearing deep growling... 5 wolves lair in this area. The door shown hangs partway open, and will not close properly due to warping of the wood and rusting of the hinges. As in the earlier room full of wolves, the floor of this is littered with small bones and scraps of fur, which the wolves have pushed together into nestlike "beds." The litter is noisy to walk on, such that a Thief has a 20% lower chance of Moving Silently through the room. Scattered around the area (and mixed with the wolves' bedding) are 14 cp, 3 sp, 6 gp, 2 pp, and a silver ring set with a small amethyst (100 gp value). The staircase here ascends to a shallow cave opening not far from the ruined bridge; the entrance is covered in undergrowth, so it is unlikely to be
17. The Pits room
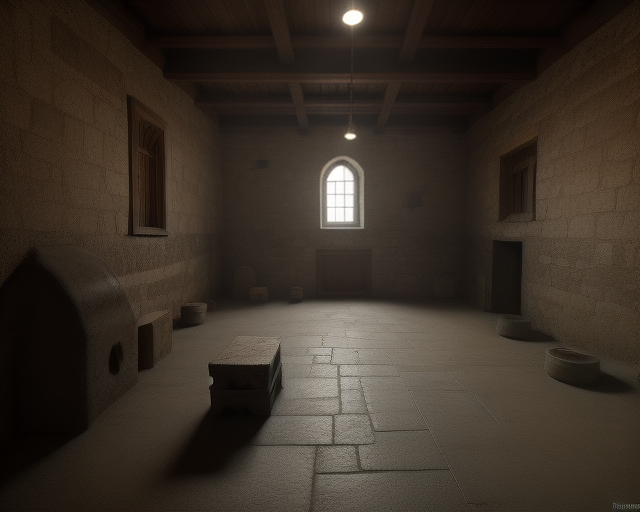
The floor of this dark room is covered with damp patches of slime, and the air is filled with a repulsive odor. The room is quiet, but if any characters listen carefully a sound like a boot pulled from sticky mud can be heard. All of the pit traps throughout level 1 drop down to this terrible room, which is inhabited by a gray jelly. To determine which trap door the jelly is closest to, roll 1d6; on a die roll of 1- 2 it is near the east pit, on a die roll of 3-4 it is near the south pit, and on a roll of 5-6 it is near the west pit. In the north wall is a locked stone door with a window set with stone bars opening to room 18. A secret door is located in the north wall, near the east pit. Gray Jelly: AC 12, HD 3, #At 1 pseudopod, Dam 2d8, Mv 1', Sv F3, ML 12, XP 175 HP 12 ☐☐☐☐☐ ☐☐☐☐☐ ☐☐
18. Observation Room room
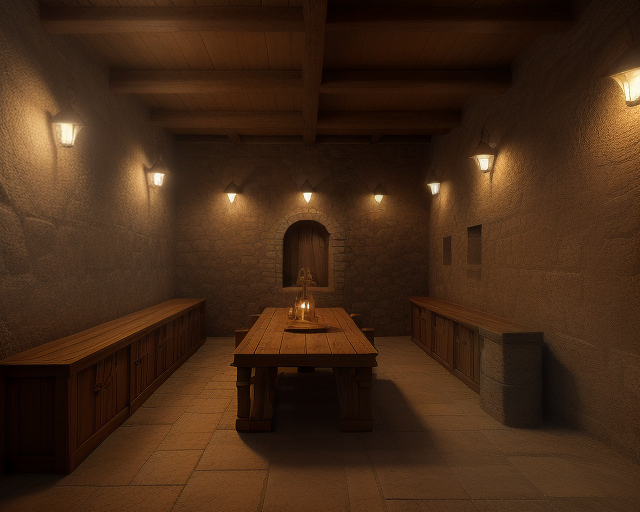
This small stone chamber is sparsely furnished with a crude wooden bench and an open wooden crate of torches. Three ceramic flasks also rest on the bench. The flasks contain lamp oil. A strong, unlocked wooden door is set into the north wall of this room.
19. Secret Hallway room
This flagstone-lined hallway can be accessed from rooms 17, 20 and 23, as well as from the stairs behind the secret door between rooms 8 and 9 on the first level. It is guarded by 4 giant bombardier beetles; 50% of the time they will be at the other end (opposite or away from the door the characters enter through); the remainder of the time, they will be 10-60 feet away (1d6 x 10). The passageway is thick with dust. A careful check will reveal that the dust has been disturbed recently by a large animal of some sort. There are many scrapes and scratches in the dust. 25 4 Giant Bombardier Beetles: AC 16, HD 2*, #At 1 bite, 1 spray, Dam 1d6 bite, 2d6 spray (cone 10' wide by 10' long from rear of monster, save vs. Death Ray for half damage), Mv 40', Sv F2, ML 8, XP 100 ea. HP 9 ☐☐☐☐☐ ☐☐☐☐ 10 ☐☐☐☐☐ ☐☐☐☐☐ 12 ☐☐☐☐☐ ☐☐☐☐☐ ☐☐ 7 ☐☐☐☐☐ ☐☐
20. Outer Hallway room
This unlit flagstone passage is empty save for a large gray jelly scouring the hallway for odds and ends. Its bulk effectively blocks the passageway, at the intersection (where the number appears on the map). Gray Jelly: AC 12, HD 3*, #At 1, Dam 2d8, Mv 1', Sv F3, ML 12, XP 175 HP 11 ☐☐☐☐☐ ☐☐☐☐☐ ☐
21. Large Hall room
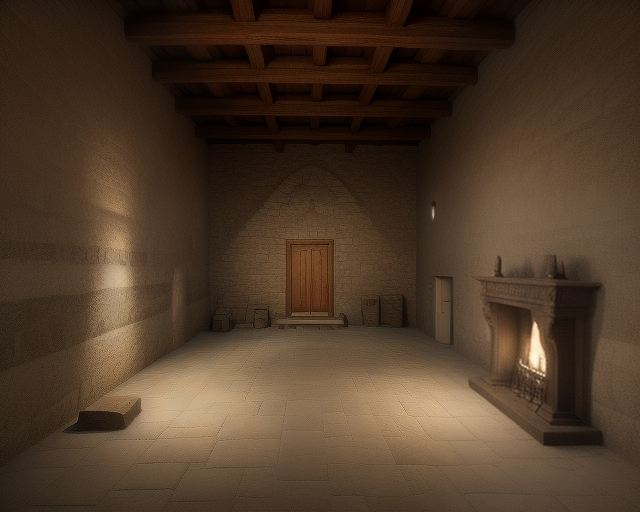
Four braziers are arranged along each side (north and south) of this room, spaced about every 20 feet. The air is foul and smells like an animal cage. The overpowering scent of musk and feces assaults your senses. The soot-coated walls contain the remnants of faded tapestries. The flagstone floor is littered with animal waste and gnawed bones. A long, battered wooden table and overturned benches and chairs occupy the center of the room. At one end of the hall is a large unlit fireplace with an elaborate stone mantle; weird glyphs are carved across the front of it. Several statues of lizard-like men adorn the room, giving it a strange, unreal feeling. Stout wooden doors are set in the west and east walls. With a loud screech, several large, man- shaped figures lurch from the shadows and advance menacingly towards you, murder gleaming in their eyes! The attacking creatures are carnivorous apes. The braziers are, of course, unlit, but they contain charcoal which could be lit to illuminate the room (a flask of lamp oil would be needed for each group of 2d4 braziers to coax the charcoal to ignite). This cannot be completed during a melee, of course. 3 Carnivorou
22. Crossroads Room room
A group of 6 hobgoblins are in this room. They are exploring, and were not expecting to meet any adventurers. Roll for surprise normally when the room is entered. They are also entirely unaware of the gnolls in room 24. Any fighting that takes place in this room will surely warn the gnolls, but they will choose to wait until the battle is over before coming out and attacking the now-weakened victors. 6 Hobgoblins: AC 14, HD 1, #At 1 scimitar, Dam 1d8, Mv 30', Sv F1, ML 8, XP 25 ea. HP 7 ☐☐☐☐☐ ☐☐ 4 ☐☐☐☐ 7 ☐☐☐☐☐ ☐☐ 2 ☐☐ 3 ☐☐☐ 2 ☐☐
23. Secret Room room
This room appears entirely empty, save for a chest in the northeastern corner of the room. The chest rests atop a low wooden platform, ten feet on a side, which appears old and probably quite weak. The chest is, in fact, nailed to the platform. A sensible party will suspect a trap, but in actuality there is no trap here. The chest is locked, but like the platform is quite weak so that it can be easily forced open. Inside is a pile of 362 silver pieces.
24. Gnoll Lair room
When this room is entered, check for surprise as normal. The following text is provided for convenience, but will have to be altered as required by the situation. This room has a foul, musky smell, mixed with the odor of rotting meat. The flickering torchlight reveals a grim chamber full of filth and debris. There are a group of large, hairy humanoids curled up in the corner resting on a pile of rags. Upon entering the room, they lift their heads and sniff the air. With a series of menacing growls, they jump up, grabbing 26 up weapons and bounding across the floor towards you with murder in their eyes! This room contains a pack of gnolls, resting after a long night of debauchery. They are not in the mood to be disturbed. Under a pile of rags in the corner is a small locked wooden chest with the following treasure inside: 1,047 cp, 2,422 sp, and 373 gp. The key to the chest is on the belt of the largest gnoll. 5 Gnolls: AC 15, HD 2, #At 1 battleaxe, Dam 1d8+1, Mv 30', Sv F2, ML 8, XP 75 ea. HP 12 ☐☐☐☐☐ ☐☐☐☐☐ ☐☐ 6 ☐☐☐☐☐ ☐ 10 ☐☐☐☐☐ ☐☐☐☐☐ 8 ☐☐☐☐☐ ☐☐☐ 8 ☐☐☐☐☐ ☐☐☐
25. Weapon Room room
The floor and walls of this room are littered with a wide assortment of weapons in a variety of conditions. Swords, maces, axes and pole arms lie scattered everywhere. All are evidently old, worn and useless. Various tools of warfare hang from decaying racks on the wall or lie on flimsy tables and shelves. In one corner of the room is an old, battered cabinet, locked with a rusty chain and padlock. Several beat-up chests are stacked in another corner; these also appear to be locked. The old weapons are valueless in game terms. There is no key to the locked cabinet; the only way to open it is to bash the door in. Allow this on a 1-2 on 1d6; adjust the range by adding the character's Strength bonus, so that +1 equals 1-3, +2 equals 1-4, and +3 equals 1-5. In the cabinet is a suit of Chain Mail +1 and a Longsword +1. Likewise, there is no key for the locked chests, but they may be smashed with an appropriate blunt weapon such as a warhammer or mace. The chests contain the following weapons in good condition: 3 shortswords, 2 longswords, 3 warhammers, and 16 longbow arrows. Any attempt to break into the cabinet or chests, whether successful or not, will alert
26. Ambush Area room
This area of the hallway is occupied by several foul creatures wrapped in filthy burial garments, hidden within the two small secret rooms. The secret doors include small concealed peepholes allowing the monsters to see into the hallway. As noted above, these creatures will respond, stealthily, if they hear any nearby noise. Otherwise they remain guarding this passageway, waiting until their "prey" has passed the secret doors. If the party does not discover the secret doors (which they are not likely to do), the ghouls will be able to surprise them on 1-4 on 1d6. 5 Ghouls: AC 14, HD 2*, #At 2 claws, 1 bite, Dam 1d4 claw, 1d4 bite (all plus paralysis), Mv 30', Sv F2, ML 9, XP 100 ea. Any character (except an Elf) hit by a ghoul must save vs. Paralysis or be paralyzed 2d4 turns. HP 9 ☐☐☐☐☐ ☐☐☐☐ 5 ☐☐☐☐☐ 9 ☐☐☐☐☐ ☐☐☐☐ 4 ☐☐☐☐ 6 ☐☐☐☐☐ ☐
27. Mural Room room
In the middle of this octagonal room is a waist-high pedestal made of stone. On top of the pedestal is a shallow metal basin, thick with dust. The walls of this room are decorated with murals. To your left and your right, colorfully painted men and women in barbaric garb bow or kneel toward the western exit from the room. Any character touching the murals, including anyone searching for secret doors, must save vs. Spells or be drawn into the mural, becoming immobile parts of the scene. If the basin is examined, ash will be found mixed with the dust. Beneath the basin is a small chamber carved into the pedestal; inside it are several small, irregular chunks of aromatic incense. If a chunk of incense is placed into the basin and burned, all characters trapped within the mural will suddenly be freed. The Game Master may wish to expand on this, placing NPCs or monsters within the mural which would be freed along with any trapped characters. 27
28. The Tomb room
This is the room described in the "Intro Story" in the Basic Fantasy RPG Core Rules. For this reason, your players may recognize it; so, three different versions are presented here! In all cases, the large bronze doors to this room are held with a wizard lock effect (at the 10th level of effect, if a dispel magic is used against it) as well as an ordinary lock (which is of an archaic design that give a bonus of +25% to attempts to pick it). A Spell Scroll containing knock is in the treasure hoard of the kobolds in area 14 on the first level, which might be acquired by the party, though, as described in the intro story, the knock spell alone will not open the doors. Once the doors are opened, read (or paraphrase) the following: As you open the bronze doors you see a large room. Within is a stone sarcophagus, resting atop a raised stone platform. Strewn about the floor are many skeletons; from the shape of the skulls and the length of the long bones you suspect the remains are probably human. The walls are decorated with a mural; the paint has faded and chipped away in places. A thick layer of dust covers everything and the air has a sickening odor of mildew an
28. The Tomb, Standard Version room
If any character chooses to examine the mural, read the following: The mural depicts a great battle, with garishly colored runic markings here and there. If any attempt to open or move the lid to the sarcophagus is made, the skeletal remains of the eleven warriors scattered about the room will animate and attack the intruders. Opening the sarcophagus is treated much like opening a stuck door. If the lid is shoved off the sarcophagus, it falls heavily to the floor and cracks into two pieces. Of course, it can be turned, as described in the intro story, or lifted off by a number of characters having a total Strength of 30 points. If the sarcophagus is opened, read (or paraphrase) the following: 28 Inside the sarcophagus lies the mummified remains of a barbarian chieftain. The corpse is holding a golden longsword in both its bony hands. The sword gleams, untarnished by time. A large ruby is set in the cross-guard. The sword is a Longsword +1, +2 vs. Undead. This fact will not be known until the sword is identified or used in combat (and in the latter case, the +2 vs. undead effect will only be discovered when the wielder strikes undead monsters). A secret compart
28. The Tomb, First Alternate Version room
If any character chooses to examine the mural, read the following: When you look more closely at the mural, you notice a particularly large warrior, standing amid numerous slain enemies with a bloody sword in each hand. His face is hidden within his helm, except for his red glowing eyes. If any attempt is made to open or otherwise tamper with the sarcophagus (more than merely touching it), booming laughter will be heard. One round later, the warrior will step out of the mural and attack, laughing all the time. Painted Warrior: AC 20, HD 5, #At 2 longswords, Dam 1d8 longsword, Mv 40', Sv F5, ML 12, XP 360 HP 25 ☐☐☐☐☐ ☐☐☐☐☐ ☐☐☐☐☐ ☐☐☐☐☐ ☐☐☐☐☐ The bones on the floor are from previous tomb-robbers slain by the painted warrior; their likenesses are displayed in the mural, as the pile of dead men around him. If the warrior is slain, he dissolves into smoke, taking all his equipment with him. Any characters who leave the room will not be pursued, and when no living opponents are left in the room, the warrior will close the doors (which will re-lock, including the wizard lock, automatically) and return to the mural. When the warrior returns to the mural, any characte
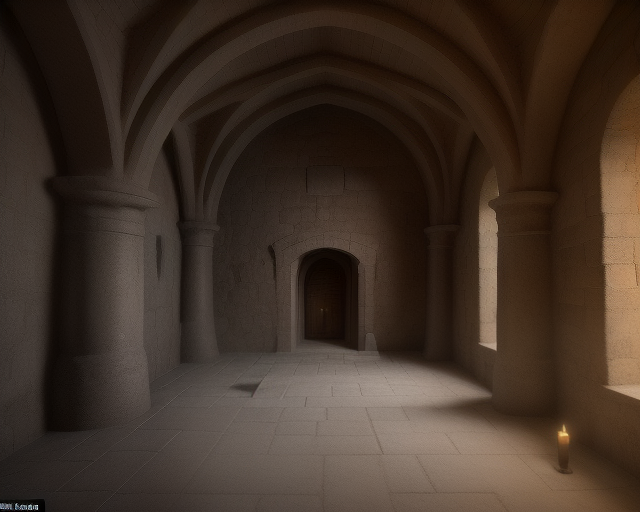
28. The Tomb, Second Alternate Version room
If any character chooses to examine the mural, read the following: The walls are decorated with a lurid mural depicting a small group of primitive figures bowing before a great reptilian beast. The mural is painted in garish colors, and runic markings are drawn on the wall at regular intervals. If anyone steps up on the stone platform, an iron portcullis will descend from the doorway, blocking the exit to the room. It will take a combined Strength of 30 to lift the portcullis back up and lock it back in place. This trap may be discovered in the normal way, by detecting traps on either the doorway or the platform. If any attempt to open or move the lid to the sarcophagus is made, a bluish gas will issue from inside. Anyone standing within 10' of the sarcophagus must make a saving throw vs. Poison or become violently ill (and therefore unable to fight and able to move at only half normal speed) for 1d6 rounds. Inside the sarcophagus lies the mummified remains of the chieftain, his arms folded across his chest. He is holding in his bony hands a gleaming, golden longsword untarnished by time. A brilliant emerald is embedded in the cross-guard. If the sword is
MAP PINS • 28
•
13. Storage Room
•
14. Kobold Lair
•
12. Meeting Room
•
10. Grand Hall
•
11. Secret Room
•
15. The Hive
•
1. Entrance Room
•
9. Goblin Lair
•
7. Secret Hallway
•
2. Wolf Lair
•
3. Stirge Nests
•
6. Goblin Hideout
•
4. Cells
•
5. Torture Room
•
16. Rabbit Hole
•
24. Gnoll Lair
•
23. Secret Room
•
22. Crossroads Room
•
25. Weapon Room
•
17. The Pits
•
18. Observation Room
•
26. Ambush Area
•
21. Large Hall
•
19. Secret Hallway
•
27. Mural Room
•
20. Outer Hallway
•
28. The Tomb
•
8. Rogue Orcs
Click-to-pin lives in detail view — upload a map, click to drop, drag to move.
dungeon The Nameless DungeonOpen →
Three-level dungeon a day north of Morgansfort. Goblin faction (see The Goblins, p39).
Wandering Monsters (BF1, The Nameless Dungeon): Wandering Monsters Adventurers will encounter monsters from the tables below on a 1 on 1d6, rolled every 3 turns (half an hour). Also, any time an "empty" room is entered, the GM should roll an encounter check. Most monsters below are limited in number, as shown; when the number listed have been met and defeated, no more of that sort will be encountered. Those that flee may return again if indicated. Level 1 Roll 1d10 for the type of encounter between turns 4 and 18, as described above; otherwise, roll 1d8 for the type of encounter. 1. 1d2 Giant Ants (7 total) AC 17, HD 4, #At 1 bite, Dam 2d6, Mv 60' (10'), Sv F4, ML 7, XP 240 ea. Only check morale when first encountered. 2. 1d4 Spitting Cobras (6 total) AC 13, HD 1*, #At 1 bite or 1 spit, Dam 1d4 + poison bite, blindness spit, Mv 30', Sv F1, ML 7, XP 37 ea. Spit range is 6', victim must save vs. Poison if hit or become blind. 3. 1d2 Ghouls (5 total) AC 14, HD 2*, #At 2 claws, 1 bite, Dam 1d4 claw, 1d4 bite (all plus paralysis), Mv 30', Sv F2, ML 9, XP 100 ea. Any character (except an Elf) hit by a ghoul must save vs. Paralysis or be paralyzed 2d4 turns. 4. 1d4 Giant Bees (8 total) AC 13, HD ½* (1d4 HP), #At 1 sting, Dam 1d4 + poison + 1 pt. per round until stinger is removed, bee dies after it stings, Mv Fly 50', Sv F1, ML 9, XP 13 ea. 5. 2d6 Giant Rats (22 total) AC 13, HD HD ½* (1d4 HP), #At 1 bite, Dam 1d4 + disease, Mv 40' Swim 20', Sv F1, ML 8, XP 10 ea. 1 in 20 chance of disease for those bitten. 6. 1d6 Giant Fire Beetles (10 total) AC 16, HD 1+2, #At 1 bite, Dam 2d4, Mv 40', Sv F1, ML 7, XP 25 ea. 7. 1d4 Giant Shrews (6 total) AC 16, HD 1, #At 2 bites, Dam 1d6 bite, Mv 60', Sv F2, ML 10, XP 25 ea. 8. 1d2 Giant Flies (8 total) AC 14, HD 2, #At 1 bite, Dam 1d8, Mv 30' Fly 60', Sv F2, ML 8, XP 75 ea. 9-0.Goblin War Party See below Level 2 Roll 1d6 for the type of encounter. 1. 1d4 Giant Draco Lizards (4 total) AC 15, HD 4+2, #At 1 bite, Dam 1d10, Mv 40' Fly 70' (20’), Sv F3, ML 7, XP 240 ea. 2. 1d4 Ghouls (8 total) AC 14, HD 2*, #At 2 claws, 1 bite, Dam 1d4 claw, 1d4 bite (all plus paralysis), Mv 30', Sv F2, ML 9, XP 100 ea. Any character (except an Elf) hit by a ghoul must save vs. Paralysis or be paralyzed 2d4 turns. 3. 1d8 Pit Vipers (10 total) AC 14, HD 1*, #At 1 bite, Dam 1d4 + poison, Mv 30', Sv F1, ML 7, XP 37 ea. 4. 1d6 Giant Oil Beetles (10 total) AC 16, HD 2*, #At 1 bite, 1 oil spray, Dam 2d4 bite, blisters oil spray, Mv 40', Sv F2, ML 8, XP 100 ea. Oil spray range is 5'; those hit suffer -2 to attacks and saves for 24 hours or until magically healed. 5. 2d4 Zombies (10 total) AC 12, HD 2, #At 1 bludgeon, Dam 1d8, Mv 20', Sv F2, ML 12, XP 75 ea. Half damage from blunt weapons, 1 point only from arrows, bolts, or sling stones 6. 1d4 Giant Flies (6 total) AC 14, HD 2, #At 1 bite, Dam 1d8, Mv 30' Fly 60', Sv F2, ML 8, XP 75 ea. Level 3 Roll 1d6 for the type of encounter. 1. 1d6 Ghouls (10 total) AC 14, HD 2*, #At 2 claws, 1 bite, Dam 1d4 claw, 1d4 bite (all plus paralysis), Mv 30', Sv F2, ML 9, XP 100 ea. Any character (except an Elf) hit by a ghoul must save vs. Paralysis or be paralyzed 2d4 turns. 2. 1d6 Shadows (8 total) AC 13 (m), HD 2*, #At 1 touch, Dam 1d4 + 1 point Strength drain, Mv 30', Sv F2, ML 12, XP 100 ea. Each hit drains one Strength point; at 0 Strength, the character becomes a Shadow. 3. 1d2 Giant Tarantulas (3 total) AC 15, HD 4*, #At 1 bite, Dam 1d8 + poison, Mv 50', Sv F4, ML 8, XP 280 ea. 4. 1 Ochre Jelly (3 total) AC 12 (only hit by fire or cold), HD 5*, #At 1 pseudopod, Dam 2d6, Mv 10', Sv F5, ML 12, XP 405 ea. 5. 1d6 Giant Tiger Beetles (8 total) AC 17, HD 3+1, #At 1 bite, Dam 2d6, Mv 60' (10'), Sv F3, ML 9, XP 145 ea. 6. 1d6 Carnivorous Apes (7 total) AC 14, HD 4, #At 2 claws or 1 thrown rock, Dam 1d4 claw or 1d6 rock, Mv 40', Sv F4, ML 7, XP 240 ea. The Goblins When a goblin encounter is rolled on the 1st level encounter table, it will be either a goblin war party or a goblin scout. War parties appear from turns 4 to 18, goblin scouts after that; if a goblin encounter is rolled during turns 1-3, roll again. 2d4 Goblin Warriors (22 total) AC 14, HD 1-1, #At 1 spear or shortsword, Dam 1d6, Mv 20', Sv F1, ML 9, XP 10 ea. 1d2 Goblin Scouts (7 total) AC 13, HD 1-1, #At 1 shortsword, Dam 1d6, Mv 20', Sv F1, ML 9, XP 10 ea. 1d8 Goblin Archers (10 total) AC 13, HD 1-1, #At 1 shortbow or 1 shortsword, Dam 1d6, Mv 20', Sv F1, ML 9, XP 10 ea. 1 Goblin Captain (3 total) AC 16, HD 3-3, #At 1 longword, Dam 1d8, Mv 20', Sv F3, ML 9, XP 145 ea. Goblin scouts should be treated as having the Hide in Shadows and Move Silently abilities of a 2nd level Thief. If the appropriate rolls are made, the scout will go unnoticed and will summon a war party in 1d4 turns; if discovered, the scout will be at the maximum possible encounter distance (as far away as he can be seen) and will flee when discovered. If the scout escapes, a war party will be summoned as above. A war party will consist of 2d4 warriors, 1d8 archers, and a captain. Any remaining goblin warriors will be lying in wait for the party as they exit the dungeon (any time after turn 18), accompanied by the remaining goblin archers and a captain. They will attack with surprise, having surrounded the clearing; the goblin archers will fire arrows at the party, but the warriors will not attack until the PCs attempt to melee the archers. The captain will stand back, giving orders (in the goblin tongue), and will try to avoid combat. The morale of the other goblins drops to 7 if he is slain (and a morale check must be rolled at that point).
Maps: Levels 1–3 extracted from the BF1 PDF (pp.64–66), stacked in order.
ROOMS • 88
1. Entrance room
(10'x10' landing, stairs ascend to the north, and descend south, east, and west)
2. Spitting Cobra Lair room
(20'x20' room, door to the north in the northwest corner) Four spitting cobras have made a lair in this room. They have no treasure of their own, but behind a loose stone in the wall is a rotten bag containing 400 sp and 36 gp (find as a secret door). 4 Spitting Cobras: AC 13, HD 1*, #At 1 bite or 1 spit, Dam 1d4 + poison bite, blindness spit, Mv 30', Sv F1, ML 7, XP 37 ea. Spit range is 6', victim must save vs. Poison if hit or become blind. HP 5 ☐☐☐☐☐ 7 ☐☐☐☐☐ ☐☐ 5 ☐☐☐☐☐ 3 ☐☐☐
3. Dark Room room
(30'x20' room, door to the south in the southeast corner) This room is under the effect of continual darkness. The room is otherwise empty.
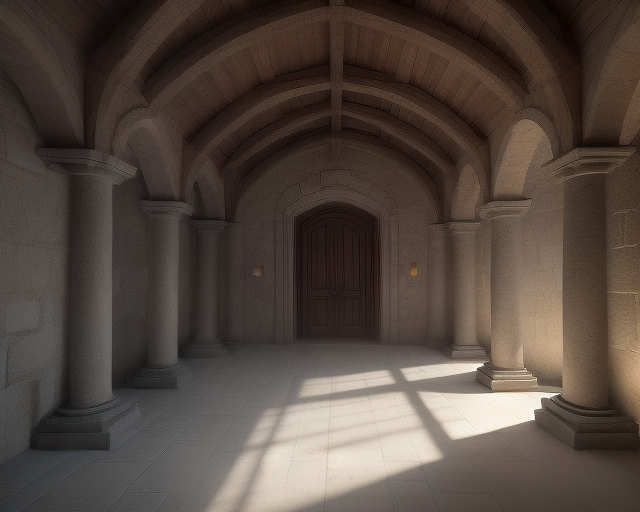
4. Octagonal Hall room
(octagonal room, 70'x80', corners chopped 20', with 6 10' square pillars, double doors north and south, secret door in northwest slanted wall) Three stirges have a nest high up on the pillar near the secret door, in a hole where a stone has fallen out. The stirges will delay attacking for 1d4+1 rounds; if the player characters aren't vigilant at this point and have not spotted the nest, the stirges will surprise the party on 1-3 on 1d6 (and won't be surprised themselves). 3 Stirges: AC 13, HD 1*, #At 1, bite Dam 1d4 + 1d4/round blood drain, Mv 10' Fly 60', Sv F1, ML 9, +2 to hit on first attack vs. any opponent, XP 37 ea. HP 6 ☐☐☐☐☐ ☐ 7 ☐☐☐☐☐ ☐☐ 3 ☐☐☐
5. Secret Room room
(irregular small room, 10'x10' square plus diagonal ½ square on east side, secret door in diagonal wall to room 5) This room appears empty, except for one odd thing: centered on the back wall of the room is a large lever, presently in the "up" position. If the lever is pulled down and left that way, the trap in area #16 is disabled, but the player characters will not know this. Pulling the lever in either direction produces a distant, faint grinding noise.
6. Octagonal Room room
(octagonal room, 30'x30' with corners chopped 10', doors south, east, and west, secret door north to room 7) This room is empty.
7. Secret Room room
(10'x10' room, secret door south to room 6) In this small room you see a badly rotted bedroll and a small locked chest. If the chest is opened either by picking the lock or smashing the chest, the room swiftly fills with a gas that causes fear (as the spell cause fear) to anyone in the room who fails a save vs. Poison. The fear effect lasts 2d10 rounds for those affected. Once successfully opened, the treasure can be claimed. Inside are 270 cp and 161 ep in loose, mixed coins.
8. Giant Shrew Lair room
(20'x20' room, door to the north in the northwest corner) The lower third of the door into this room has been chewed away. A giant shrew has made its lair here in a pile of smelly refuse in the northeast corner of the room. The giant shrew inadvertently collected a bag of treasure from another room while building its nest; if found, the bag contains 340 sp and 5 gems (1 cat's eye ruby: 5,000 gp value, 1 amethyst: 100 gp value, 1 aquamarine: 500 gp value, 1 coral: 100 gp value, and 1 onyx: 75 gp value). Note: The cat's eye ruby is one of those from the mirror in room 32. Giant Shrew: AC 16, HD 1, #At 2 bites, Dam 1d6/1d6, Mv 60', Sv F2, ML 10, XP 25 HP 6 ☐☐☐☐☐ ☐
9. Mirror Room room
(20'x20' room, door to the north in the northeast corner) This room contains nothing except a large mirror, 7' tall by 4' wide, hung 6" off of the 38 floor in the center of the south wall. The room appears to be illuminated by a soft light that emanates from the rune-engraved frame of the mirror. The illumination is roughly equivalent to torchlight. The odd thing about the mirror is that it reflects the room, but not the player characters. As soon as they get up the courage to look into it, this will be noticed. As they look into the mirror, the player characters will see some monster from the wandering monster chart enter the room, look around, and leave again. In fact, this is a slow mirror, in which reflections are delayed by one hour. The things the player characters see in the mirror happened in the past. The mirror is firmly attached to the wall, but a character with appropriate tools (such as a Thief) can easily remove it. It weighs about 50 pounds (500 cn) and is highly breakable and hard to carry. If successfully taken back to civilization, it might bring up to 1,000 gp from the right buyer. The runes carved around the frame of the mirror are from
10. Room With A Chest room
(20'x20' room, door to the north in the southeast corner) This room is completely empty save for a large chest, placed against the center of the far wall. The chest is locked, with a poorly designed lock that adds 25% to a Thief's chance of picking it, and has an obvious poison needle trap (50% bonus to detect) which is coated with old, weak poison (causing 1d6 points of damage if not detected, with a save vs. Poison allowed for no damage at all). Inside the chest there is only a scroll. It says "You Lose." As soon as any character reads the scroll, the door slams forcefully and locks; any character trying to hold it must make a save vs. Death Ray. If this roll is made, the character takes 2d4 points of damage (no saving throw) but in this case the door does not close completely, and can be forced open with a subsequent roll to Open Doors. One round after the door closes, the room swiftly fills with poison gas (save vs. Poison each round, taking 1d4 points of damage each time the save is failed). Any character exiting the room stops taking damage immediately.
11. Giant Ant Lair room
(20'x30' room, door east in northeast corner, open archway centered in west wall to room 12) Rooms 11, 12, 13, 14, and 15 are the lair of a group of sixteen giant ants. Note that giant ants will fight to the death once engaged in combat; the morale score of 7 above is used when they are first encountered, but they will not check again if combat begins. This room contains four of the giant ants normally, specifically the first four listed below. The first ant listed is the queen, who is larger than the others; her stats are still the same however. If combat occurs in this room, four more ants will appear from neighboring rooms each round until all have arrived. Giant ants collect shiny things. Among the bedding of the queen ant there is a platinum clasp worth 1,100 gp, a coronet worth 1,000 gp (engraved with the sigil of an important noble family), and a medallion worth 1,000 gp. 39 16 Giant Ants: AC 17, HD 4, #At 1 bite, Dam 2d6, Mv 60' (10'), Sv F4, ML 7/12, XP 240 ea. HP 24 ☐☐☐☐☐ ☐☐☐☐☐ ☐☐☐☐☐ ☐☐☐☐☐ ☐☐☐☐ 12 ☐☐☐☐☐ ☐☐☐☐☐ ☐☐ 20 ☐☐☐☐☐ ☐☐☐☐☐ ☐☐☐☐☐ ☐☐☐☐☐ 23 ☐☐☐☐☐ ☐☐☐☐☐ ☐☐☐☐☐ ☐☐☐☐☐ ☐☐☐ 20 ☐☐☐☐☐ ☐☐☐☐☐ ☐☐☐☐☐ ☐☐☐☐☐ 14 ☐☐☐☐☐ ☐☐☐☐☐ ☐☐☐☐ 17 ☐☐☐☐☐ ☐☐☐☐☐ ☐☐☐☐☐ ☐☐ 20 ☐☐☐☐☐ ☐☐☐☐
12. Giant Ant Lair room
(20'x20' room, open archways centered in all four walls into rooms 11, 13, 14, and 15) This room in the center of the lair is visible from all four of the other rooms in the lair; any ants not yet encountered will surely see any character or creature entering here.
13. Giant Ant Lair room
(30'x20' room, open archway centered in south wall to room 12, open archway west in northwest corner to staircase ascending to surface) Four of the ants from 11 above will be found here if surprised. Note the staircase access to ground level; it is hidden above ground by a large patch of brambles which the ants have made a 4' diameter tunnel through.
14. Giant Ant Lair room
(20'x30' room, open archway centered in east wall to room 12) Four of the ants from 11 above will be found here if surprised.
15. Giant Ant Lair room
(30'x20' room, open archway centered in north wall to room 12, door south jammed open in southwest corner to hallway) Four of the ants from 11 above will be found here if surprised.
16. Secret Room room
(20'x20' room, secret door east in northeast corner) When the secret door to this room is opened, a large crossbow affixed to the west wall will fire at the doorway. Any character in the line of fire will be attacked as if by a 3 HD monster. The bolt does 1d6 damage; it was originally poisoned but the poison is old and has lost its potency. Note: if the lever in area 5 was pulled down and left that way, this trap won't go off.
17. Octagonal Room room
(octagonal room, 30'x30', corners chopped 10', doors in each of north, south, east, and west walls, pit trap in center of room down to room 64) Note the pit trap in the center of the floor. If the trap is activated, the skeletons in 20 will move into this room and attack any remaining characters.
18. Narrow Room room
(20'x10' room, door west in southwest corner) Six giant fire beetles lair in this room. The room is littered with the empty, broken carapaces of other fire beetles who came before. Among the refuse is treasure: 41 sp, 28 gp, 3 pp, and a pearl worth 100 gp. It will take at least a turn of searching to find it all. The door to this room does not latch properly, and tends to swing closed if not held in place. 6 Giant Fire Beetles: AC 16, HD 1+2, #At 1 bite, Dam 2d4, Mv 40', Sv F1, ML 7, XP 25 ea. HP 3 ☐☐☐ 3 ☐☐☐ 5 ☐☐☐☐☐ 5 ☐☐☐☐☐ 4 ☐☐☐☐ 7 ☐☐☐☐☐ ☐☐
19. Spear Trap room
(20'x20' room, door south in southeast corner) The door to this room is tightly stuck, requiring a better than normal roll to open doors; only characters with at least 13 Strength can open it, and they must roll their Strength bonus or 40 less on 1d6 to do so (so 13-15 = 1 in 1d6, 16-17 = 1-2 in 1d6, 18 = 1-3 in 1d6). If the door is opened, the character opening the door is attacked by a spear shot from a hole in the wall opposite the door. The spear trap attacks as a 4 HD monster and does 1d6 on a successful hit. It only contains one spear, so is disarmed after attacking. There is treasure hidden inside the mechanism of the spear trap. There is a small chamber under the hole where the spear is launched from. The "hatch" must first be detected as a secret door; then a Thief must make an Open Locks roll to open it. Inside the chamber is a rotten sack containing 51 sp and 36 gp.
20. Skeleton Room room
(irregular room; 20'x30' with northern corners chopped 10', with 10'x10' alcove east in southeast corner, door in east end of alcove to room 17, secret door in west wall to short secret passage) Seven skeletons are in this room, if not encountered in room 17 above. In the secret passage connecting this room with the hallway to the west is the mortal remains of an Elf. His skull and bones have been scattered about the passageway, and his chainmail, shield, and sword are all rusted beyond use. However, there are ancient coins scattered around the area also, totaling 270 sp and 42 gp. It will take at least one full turn for one character to pick up all the coins. 7 Skeletons: AC 13 (half damage from edged weapons, 1 point only from arrows, bolts, or sling stones), HD 1, #At 1 sword, Dam 1d8, Mv 40', Sv F1, ML 12, XP 25 ea. HP 2 ☐☐ 3 ☐☐☐ 7 ☐☐☐☐☐ ☐☐ 6 ☐☐☐☐☐ ☐ 3 ☐☐☐ 2 ☐☐ 3 ☐☐☐
21. Giant Rat Lair room
(30'x30' room, open archway north centered on north wall to 20' long hallway to a door north into main corridor) The door to this room has a hole in the bottom where two planks have been broken off; the edges of the hole have been gnawed on. Inside the room are 22 adult giant rats plus 41 noncombatant juvenile rats. The lair is foul- smelling and filled with bedding consisting of dry grass, twigs and branches, and a few moldy rotten pieces of cloth. In the far southeast corner of the room is the "chief" rat's bed. He has collected the following items of treasure: 1 cat's eye ruby (5,000 gp value), 1 malachite (10 gp value),1 moss agate (10 gp value), 1 sardonyx (10 gp value), a bejeweled walking stick worth 80 gp, a crystal decanter worth 40 gp (with a rubber stopper inserted), one ornate gold and silver earring worth 120 gp, a heavy engraved silver mug worth 140 gp, and a Potion of Fire Giant Control in a silver vial. Note: The cat's eye ruby is one of those from the mirror in room 32. 22 Giant Rats: AC 13, HD ½* (1d4 HP), #At 1 bite, Dam 1d4 + disease, Mv 40', Sv F1, ML 8, XP 10 ea. HP 1 ☐ 2 ☐☐ 2 ☐☐ 2 ☐☐ 4 ☐☐☐☐ 1 ☐ 4 ☐☐☐☐ 2 ☐☐ 3 ☐☐☐ 4 ☐☐☐☐ 4 ☐☐☐☐ 4 ☐☐☐☐ 3 ☐☐☐
22. Oracle Room room
(20'x20' room, door west in southwest corner) You see two metal chairs arranged facing a carved stone face in the center of the east wall. The face is of an older Human male, with flowing hair and beard forming a circle around the face. Its eyes are closed, but the mouth is open slightly, just enough to admit a single coin. If any character is seated in either chair: The stone face opens its eyes and says: "Pay my toll and I'll answer you, pay me well and I'll be true." Then its eyes close again. If coins adding up to 10 gp in value are inserted into the mouth, the oracle again opens its eyes and says, "Ask." The oracle knows about all three levels of the dungeon, and will answer questions in detail. However, every odd- numbered answer (first, third, etc.) will be a cunning lie, while every even-numbered answer will be true. Roughly carved into the metal seat of the right-hand chair is a message saying "Beware the odds." If the party has stonecutting tools available they may attempt to tear the stone face from the wall to retrieve the treasure within. This will take 6 turns (one hour), minus 1d4 turns if a dwarf, miner, or stonecutter is doing the work. Behind
23. Left Bent Room room
(irregular room, 40'x20' with 20'x20' alcove east in northeast corner, door south in southeast corner of alcove) This room has an electrical trap on the door, causing 3d4 points of damage to any character touching the handle (save vs. Death Ray for half damage). It is powered by an alchemical creation called a lightning crystal, which can discharge as often as once per round and can release 9 discharges before it is completely consumed (it originally had 99 charges). This will only be discovered if the door is dismantled. The trap can be detected by a Thief but cannot be disarmed; any attempt to do so will cause the Thief to take damage as above. Assuming the party survives opening the door, read (or better, paraphrase) the following: This room is obviously an ancient alchemical laboratory, containing two long worktables laden with glass and metal implements of alchemy as well as a large kiln in the farthest part of the room. Numerous items of fine-quality glass and metal alchemical equipment line the tables, totaling 5,000 gp in value; the metal items are of a dull gray metal of unknown nature, while the glass is of the finest Elven manufacture. Note that t
24. Right Bent Room room
(irregular room, 40'x20' with 20'x20' alcove east in southeast corner, broken-down door north in northeast corner of alcove) The door to this room has a missing plank in the upper section. The edges of the resulting hole are slightly greasy looking, and a foul smell can be detected from the room. The room is in fact the lair of sixty-three bats. If they are disturbed, they will fly around for 2d4 rounds. Roll a wandering monster check if this happens; if wandering monsters are indicated they appear in 1d4 rounds. 63 Bats: AC 14, HD 1 HP ea., #At Confusion, Mv 30' Fly 40', Sv NM, ML 6, XP 10 ea. Note: Each box below represents a single bat HP 63 ☐☐☐☐☐ ☐☐☐☐☐ ☐☐☐☐☐ ☐☐☐☐☐ ☐☐☐☐☐ ☐☐☐☐☐ ☐☐☐☐☐ ☐☐☐☐☐ ☐☐☐☐☐ ☐☐☐☐☐ ☐☐☐☐☐ ☐☐☐☐☐ ☐☐☐
25. Crossroad room
(octagonal room, 30'x30' with corners chopped 10', open archways in each of north, south, east, and west walls) There is a green jelly in this room, on the ceiling in front of the north archway. It will drop on the first character to pass beneath it if not noticed and avoided. Green Jelly: AC 12 (only hit by fire or cold), HD 2**, #At 1 Acid, Dam if not scraped off in first round, will destroy flesh and clothing in 6+1d4 rounds, Mv 1', Sv F2, ML 12, XP 125 HP 9 ☐☐☐☐☐ ☐☐☐☐
26. Dropping Room room
(20'x20 room, open archway west in southwest corner to room 25) Three rounds after the first party member enters this room, it will suddenly drop 20' down. Each creature in the room must save (vs. Dexterity or Death Ray, as the GM prefers) to remain standing. The ceiling drops along with the floor so the archway the party entered through is no longer accessible; however, there is an archway in the same position on the lower level. Actually, this is all a cunning illusion. The archway is the same one, and the octagonal room outside is the same also. 43
27. Jelly Room room
(20'x20 room, open archway north in northeast corner to room 25) There is a green jelly in this room, waiting above the archway. It will drop on the first character to enter the room; since it is out of sight otherwise, it surprises on 1-3 on 1d6. Green Jelly: AC 12 (only hit by fire or cold), HD 2**, #At 1 Acid, Dam if not scraped off in first round, will destroy flesh and clothing in 6+1d4 rounds, Mv 1', Sv F2, ML 12, XP 125 HP 7 ☐☐☐☐☐ ☐☐
28. Climb Down Tunnel room
(irregular room, 30'x20' section with 30'x20' section attached to north 20' of east wall, door south in southwest corner) The floor of this room is covered with flagstones, each about four feet square. You can see that a flagstone in the northeast corner of the room has been pried up, then roughly replaced. If a character lifts the flagstone: You see a tunnel descending straight down. A tarnished but sturdy-looking metal ladder is attached to one side of the tunnel. If a stone is dropped into the hole, it will never be heard to hit the bottom. If a torch or other light is dropped into the hole, the characters will see that it drops further and further until goes so far that it seems to fade away. If one or more characters decide to descend the ladder, they may climb down as long as they wish but they will never reach the bottom. Characters who observe from above will see the descending character(s) get further and further away, and climbing back up will take as long or longer than climbing down. As you may have guessed by now, this is an illusion. The pit is actually only about 8' deep. Other than dispelling the effect (as 15th-level magic), the only way to di
29. Teleporter room
(irregular room, 30'x20' with 10' deep extension in north 20' of east wall, door south in southwest corner) Any character or creature who enters the eastern 10'x20' extension of this room will be teleported (no saving throw) to area #37 on the second level.
30. Giant Bee Lair room
(80'x100' room, open double doors east to room 31, 20'x10' alcove centered in west wall contains steps up to open double doors west to hallway) Rooms 30 and 31 are the lair of twenty-four giant bees. The queen bee will be in room 31 below and is detailed there. The floor in this room is wet, with some puddles here and there, and some stony rubble is strewn about the center of the room. The walls are covered with honeycomb. The ceiling is high, and has several holes averaging 2 feet 44 in diameter, where some daylight comes in (if it is daytime). Above ground, this room is covered by small, stunted trees and brush. 24 Giant Bees: AC 13, HD ½* (1d4 HP), #At 1 sting, Dam 1d4 + poison + 1 pt. per round until stinger is removed, bee dies after it stings, Mv 10' Fly 50', Sv F1, ML 9, XP 13 ea. HP 3 ☐☐☐ 3 ☐☐☐ 3 ☐☐☐ 3 ☐☐☐ 3 ☐☐☐ 3 ☐☐☐ 3 ☐☐☐ 3 ☐☐☐ 3 ☐☐☐ 3 ☐☐☐ 3 ☐☐☐ 3 ☐☐☐ 3 ☐☐☐ 3 ☐☐☐ 3 ☐☐☐ 3 ☐☐☐ 3 ☐☐☐ 3 ☐☐☐ 3 ☐☐☐ 3 ☐☐☐ 3 ☐☐☐ 3 ☐☐☐ 3 ☐☐☐ 3 ☐☐☐
31. Giant Bee Lair room
(40'x30' room, 20'x10' alcove centered in west wall to open double doors to room 30, secret door east in southeast corner to room 32) The queen bee and four superior giant bees can be found here. The walls of the room are lined with honeycomb; each cell contains a larval giant bee, except for one which contains the special honey that acts as a Potion of Healing, restoring 1d4 points of damage if consumed. Finding the cell containing this special honey is only possible after searching 2d4 turns, and then only if the adventurers have some way of identifying it. Queen Bee: AC 13, HD 2*, #At 1 sting, Dam 1d6 plus poison, stings repeatedly without dying, Mv 20', Sv F2, ML 10, XP 100 HP 13 ☐☐☐☐☐ ☐☐☐☐☐ ☐☐☐ 4 Superior Giant Bees: AC 13, HD 1*, #At 1 sting, Dam 1d4 plus poison, stings repeatedly without dying, Mv Fly 50', Sv F2, ML 10, XP 37 ea. HP 4 ☐☐☐☐ 5 ☐☐☐☐☐ 4 ☐☐☐☐ 6 ☐☐☐☐☐ ☐
32. Looted Treasure Room room
30'x10' section with 10'x20' extension east in northeast corner, secret door west centered in west wall to room 31) This room is empty, save only for the dirt on the floor and a mirror at the easternmost end of the room. Assuming the party examines the mirror more closely: The mirror is circular, made of a silvery metal set in an ornate golden frame. It seems to be attached to the wall with a mechanism of some sort. The mirror frame has a golden knob at the six o'clock position, and empty jewel settings at the twelve, three, and nine o'clock positions. The lock has no obvious keyhole, being a sort of puzzle lock, but it can be worked by a Thief at a penalty of 25% off the normal Open Locks chance. The empty settings originally contained large cat's eye rubies, which are now found in various places within the dungeon. The mirror is actually magical, and functions as a form of Crystal Ball. Touching the knob will activate the mirror, showing a room magically lighted in a lavender hue (see room 80; roll an encounter check to see what may be in the room). Unfortunately, the missing jewels have disabled all control of the mirror, so no matter what the player cha
33. Secret Doors room
(special hallway) Note that this section of hallway curls in a spiral past room 34 and area 35 to reach the stairs descending. The secret doors marked here on the map form a shortcut to the stairs descending to level 2. The mechanism that activates the first door is an irregularly shaped stone set in the wall; pressing it causes both the first and second door to swivel open. The third and fourth doors are activated the same way by a stone that appears to have been cast from the same mold; the GM may give a bonus to finding this second mechanism after the first is detected.
34. Secret Room room
(10’x10’ room, secret door north to spiral hallway 33) This small room contains a small chest with a cunningly crafted statue of a spider standing over it. Actually, the statue is a real giant crab spider which has been magically reduced in size and turned to stone. If the chest is touched or moved in any way, the spider will be restored to normal and will attack immediately. The chest contains the following treasure: a Scroll of Protection from Lycanthropes and a Cursed Scroll (causes the reader's nose to become warty and deformed, applying a penalty of -5 to all Charisma-related rolls; remove curse is the only cure). Giant Crab Spider: AC 13, HD 2*, #At 1 bite, Dam 1d8 + poison, save at +2 vs. this poison, Mv 40', Sv F2, ML 7, XP 100 HP 15 ☐☐☐☐☐ ☐☐☐☐☐ ☐☐☐☐☐
35. Pit room
(special hallway) The pit trap here opens when 400 pounds or more of characters/creatures walk onto it. It drops any characters who step on it 20' down to room 37, for 2d6 points of damage. The doors to the pit close automatically one round after opening. A save vs. Death Ray (adjusted by Dexterity) is allowed to avoid falling into it; if the save is made, the adventurer has jumped clear, with a 50% chance of being on either side of the pit. 46
36. Entry Room room
(20'x30' room, open stairway ascending north in center of north wall, secret door west centered in west wall, open rickety double doors east to hallway, barred cell door south centered in south wall to room 37) This is a highly traveled area; roll a wandering monster check any time the room is entered. Note the entrance to room 37, below, is a locked cage. The lock is very rusty, giving half normal chances to pick the lock (but double normal chances to break down the bars).
37. Cell room
(20'x10' cell, barred door north to room 36, trap door in ceiling 15' up which cannot be opened from this side leads from area 35) See rooms 35 and 36 for details on this room.
38. Empty room
(20'x30' with 10'x10' alcove west in southwest corner, secret door centered in east wall to room 36, secret door west in alcove to hallway; secret doors are obvious on this side)
39. Former Ghoul Storage room
(cross-shaped room, 40'x40' with all four corners indented, door west in south end of west wall to hallway) At some time in the distant past, someone stored a large number of ghouls in this room in suspended animation. The enchantment was such that, were the door opened without a magic word being spoken first, the ghouls would all reanimate instantly. Recently, a giant ant scout found the door to this room and decided to investigate it. The ghouls quickly ended the giant insect's life, and then spread out from the room to other places in the dungeon. There are no ghouls here now, but the room is littered with fragments of torn cloth, pieces of giant insect carapace, and a small rotten piece of carrion here and there. The room has a foul smell which will cling to any who enter for 2d6 turns after they leave the room.
40. Looted Treasure Room room
(20'x20' room, open hallway south in southeast corner runs 10' south, turns west, runs 30', turns north, runs 10' to secret door which is obvious from this side) The main part of this room is filled with the debris of numerous smashed chests. The long- dead skeleton of a human male is scattered around the room also. He was slain by a scything blade trap, which swings out from the left-hand side of the room entry at 3' in height, striking as a 4 HD monster for 2d8 damage. One round after swinging out, the blade automatically retracts and the trap is reset. There are 1,242 cp spread around the room, mixed with the debris. At least three turns will be required to collect them all (if anyone attempts this).
41. Empty room
(L-shaped room, 40'x20' with 20'x20' extension west in southwest corner, door north in northwest corner, secret door west in southwest corner)
42. Oil Beetle Lair room
(30'x30' room, open hallway east in northeast corner runs 10', turns south, runs 30' to obvious secret door) The secret door to this room opens when pushed forcefully from either direction, and closes automatically. Eight giant oil beetles lair here. 8 Giant Oil Beetles: AC 16, HD 2*, #At 1 bite, 1 oil spray, Dam 2d4 bite, blisters oil spray, Mv 40', Sv F2, ML 8, XP 100 ea. Oil spray range is 5'; those hit suffer -2 to attacks and saves for 24 hours or until magically healed. HP 7 ☐☐☐☐☐ ☐☐ 8 ☐☐☐☐☐ ☐☐☐ 7 ☐☐☐☐☐ ☐☐ 10 ☐☐☐☐☐ ☐☐☐☐☐ 7 ☐☐☐☐☐ ☐☐ 8 ☐☐☐☐☐ ☐☐☐ 7 ☐☐☐☐☐ ☐☐ 10 ☐☐☐☐☐ ☐☐☐☐☐
43. Empty room
(20'x20' room, door south in southeast corner to hallway, secret door west to 10'x10' passage to obvious secret door to room 50) There is nothing at all in this room except for dust and cobwebs. 47
44. Secret Room room
(20'x20' room, obvious secret door north in northwest corner to hallway almost opposite room 45's door) This was once a treasure room; when it was looted, the adventurers who did so temporarily disarmed the sleep gas trap here. Unfortunately, the twig the Thief inserted into the mechanism is long since gone. The trap may be detected and disarmed as normal by a Thief; if this is not done, when the door to the room is opened sleep gas will be released, filling the room in one round and flowing 20' in both directions down the hallway the next. Each character must save vs. Poison or become unconscious. If all characters fall asleep, roll on the wandering monster chart, then roll saves for each character until one succeeds. That character will awaken to find the party surrounded by the monsters.
45. Giant Fly Lair room
(irregular room, 30'x20' with 10'x10' alcoves centered in east and west walls, door south in southeast corner to hallway) Nine giant flies lair in this room. They sometimes drag their kills back to the lair, and in fact this room contains the remains of a draco lizard, a cave locust, and three giant bees, all infested with huge maggots. A powerful stench fills the room; all characters must save vs. Poison or fight at -2 due to the smell. If not surprised, the giant flies will be hiding in the shadowy alcoves, waiting to leap out at the party; this grants them surprise on 1-3 on 1d6. 9 Giant Flies: AC 14, HD 2, #At 1 bite, Dam 1d8, Mv 30' Fly 60', Sv F2, ML 8, XP 75 ea. HP 5 ☐☐☐☐☐ 8 ☐☐☐☐☐ ☐☐☐ 10 ☐☐☐☐☐ ☐☐☐☐☐ 7 ☐☐☐☐☐ ☐☐ 9 ☐☐☐☐☐ ☐☐☐☐ 9 ☐☐☐☐☐ ☐☐☐☐ 5 ☐☐☐☐☐ 10 ☐☐☐☐☐ ☐☐☐☐☐ 11 ☐☐☐☐☐ ☐☐☐☐☐ ☐
46. Old Chapel room
(30'x30', door north in northwest corner to hallway, secret door south centered in south wall to 40' long hallway to room 41) Sixteen human-sized figures in rotting clothing kneel in this room before a decrepit- looking wooden altar. The creatures do not appear to move, not even to breathe, and there is an odor of decay in the air. This room was once used as a chapel of the god of the undead. The altar stands against the south wall (in front of the secret door), and sixteen zombies kneel in poses of prayer in two rows before the altar. The zombies do not move until the party either attacks a zombie or touches the altar. The altar is rotten; any attempt to move it results in its collapse. Note that it blocks access to the secret door. 16 Zombies: AC 12 (half damage from blunt weapons, 1 point only from arrows, bolts, or sling stones), HD 2, #At 1 weapon, Dam 1d8, Mv 20', Sv F2, ML 12, XP 75 ea. HP 5 ☐☐☐☐☐ 7 ☐☐☐☐☐ ☐☐ 8 ☐☐☐☐☐ ☐☐☐ 9 ☐☐☐☐☐ ☐☐☐☐ 8 ☐☐☐☐☐ ☐☐☐ 9 ☐☐☐☐☐ ☐☐☐☐ 9 ☐☐☐☐☐ ☐☐☐☐ 9 ☐☐☐☐☐ ☐☐☐☐ 8 ☐☐☐☐☐ ☐☐☐ 8 ☐☐☐☐☐ ☐☐☐ 10 ☐☐☐☐☐ ☐☐☐☐☐8 ☐☐☐☐☐ ☐☐☐ 12 ☐☐☐☐☐ ☐☐☐☐☐ ☐☐ 13 ☐☐☐☐☐ ☐☐☐☐☐ ☐☐☐ 14 ☐☐☐☐☐ ☐☐☐☐☐ ☐☐☐☐ 10 ☐☐☐☐☐ ☐☐☐☐☐
47. Room Of The Pool room
(large irregular room, 40'x50' with 20' wide hallways centered on the east and west end; each hallway contains a 30' run of steps up to a 10' landing with rickety open double doors centered on the end wall; main part of room contains a 5' deep pool, 20'x30', centered) Steps lead down before you into a very large room. Phosphorescent fungus on the walls and ceiling give the room a ghostly illumination. The room is dominated by a large pool in the center. Gigantic mushrooms line the corners of the room. 48 The doors at the ends of this room no longer latch properly, and swing freely on their hinges. The water in the pool is cold, clean, and safe. The four corners of the room are filled with a variety of giant fungi; each grouping contains one shrieker which begins to shriek when any character passes through the corner square. Normally shriekers are more sensitive than this, but these have become accustomed to many creatures coming to drink. Note that while they are shrieking, there is a 50% chance per round of a wandering monster being attracted, arriving in 2d6 rounds. In the bottom of the pool near the center is an open inlet for water; overflow drains are
48. Draco Lizard Lair room
(30'x30' room with 10'x10' alcove centered in the south wall; obvious secret door south in alcove to hallway, secret door west in northwest to room 49) One giant draco lizard is in this room. The secret door is the sort that swivels when pushed and returns to the closed position when released; the lizard can easily operate it. Giant Draco Lizard: AC 15, HD 4+2, #At 1 bite, Dam 1d10, Mv 40' Fly 70' (15'), Sv F3, ML 7, XP 240 HP 29 ☐☐☐☐☐ ☐☐☐☐☐ ☐☐☐☐☐ ☐☐☐☐☐ ☐☐☐☐☐ ☐☐☐☐
49. Teleporter room
(30'x10' room, obvious secret door east in southeast corner) Any character or creature that enters the northern 10' of this room is immediately teleported to room 85 on the third level.
50. Pressure Plate Floor room
(30'x30' room, open hallway north in center of wall, secret door east to short passage to obvious secret door to 43 in southeast corner) The first character to enter the room will feel a flagstone settle slightly underfoot, and hear a sharp "click." It is assumed that the players will find this alarming. In fact, every flagstone in the room will settle slightly and click when stepped on, springing back when weight is removed. 49
51. Empty room
(irregular room, door in west wall; from north side of door, 20' east, diagonal 1 square southeast, 10' east, 20' south, 20' west, diagonal 1 square northwest, 10' west, 10' north)
52. Pit Viper Lair room
(30'x20' room, door west in southwest corner) Three large pit vipers lair in this room. The door to this room has a rat-chewed section at the bottom which the snakes use to enter and exit. The room is otherwise empty. 3 Pit Vipers: AC 14, HD 2*, #At 1 bite, Dam 1d4 + poison, Mv 30', Sv F1, ML 7, XP 100 ea. HP 8 ☐☐☐☐☐ ☐☐☐ 5 ☐☐☐☐☐ 11 ☐☐☐☐☐ ☐☐☐☐☐ ☐
53. Jelly Room room
(40'x20' room with 10'x10' alcove west just south of center of west wall, door west in alcove) This room is barren and empty. There is a large wet spot just inside the doorway. The wet spot is actually a gray jelly. Gray Jelly: AC 12, HD 3*, #At 1 pseudopod, Dam 2d8, Mv 1', Sv F3, ML 12, XP 175 HP 13 ☐☐☐☐☐ ☐☐☐☐☐ ☐☐☐
54. Moldy Crossing room
(50'x20' room, open hallway south attached to south 20' of west wall, door west 10' north of center of west wall, door north in northwest corner, open hallway east in northeast corner, door east 10' south of center of east wall) This large space has two large patches of yellow mold, one covering the door to room 56, and the other on the wall beside the door to room 55. The first will definitely release its cloud of spores if the door to room 56 is disturbed, while the other has a 25% chance to release spores if the door to room 55 is opened. 2 Yellow Mold patches: AC nil, harmed only by fire, HD 2*, #At spores, Dam save vs. Death Ray or take 1d8 points of damage per round for 6 rounds, Mv 0, Sv NM, ML n/a, XP 100 ea. HP 9 ☐☐☐☐☐ ☐☐☐☐ 14 ☐☐☐☐☐ ☐☐☐☐☐ ☐☐☐☐
55. Empty room
(20'x20' room, door west in southwest corner to room 54)
56. Giant Fly Lair room
(20'x20' room, door east in southeast corner to room 54) Seven giant flies lair in this room. Like the previous lair of this sort, the floor is covered with the remains of various creatures, including five giant rats, three giant bees, and a giant oil beetle. All are infested with huge maggots. A powerful stench fills the room; all characters must save vs. Poison or fight at -2 due to the smell. Among the refuse and offal on the floor is a gold medallion worth 70 gp and a cloak pin worth 150 gp. Each turn of searching by a character grants a cumulative 20% chance to find an item (so if three characters search the room for a turn, each has 25% to find an item; a second turn of searching give each a 50% chance, and so on). 7 Giant Flies: AC 14, HD 2, #At 1 bite, Dam 1d8, Mv 30' Fly 60', Sv F2, ML 8, XP 75 ea. HP 4 ☐☐☐☐ 7 ☐☐☐☐☐ ☐☐ 7 ☐☐☐☐☐ ☐☐ 5 ☐☐☐☐☐ 7 ☐☐☐☐☐ ☐☐ 8 ☐☐☐☐☐ ☐☐☐ 11 ☐☐☐☐☐ ☐☐☐☐☐ ☐
57. Empty room
(20'x20' room, door south in southwest corner to room 54)
58. Ghoul Lair room
(20'x20' room, door west in southwest corner) Four ghouls lair in this room. The door is barred when the player characters approach it, so unless they are very inventive, there is no chance the ghouls will be surprised; however, they will arrange themselves to allow one or two characters (at most) to enter so they can be flanked. The room smells quite bad, but there is not much other than a few bones and some large bloodstains in the room. Hunting has been poor lately, and the ghouls are hungry... In the far corner of the room is a half-rotten leather bag containing 260 cp, 140 ep, and 80 gp. 50 4 Ghouls: AC 14, HD 2*, #At 2 claws, 1 bite, Dam 1d4 claw, 1d4 bite (all plus paralysis), Mv 30', Sv F2, ML 9, XP 100 ea. Any character (except an Elf) hit by a ghoul must save vs. Paralysis or be paralyzed 2d4 turns. HP 8 ☐☐☐☐☐ ☐☐☐ 9 ☐☐☐☐☐ ☐☐☐☐ 10 ☐☐☐☐☐ ☐☐☐☐☐9 ☐☐☐☐☐ ☐☐☐☐
59. Lizard Lair room
(20'x20' room, door south in southwest corner, secret door north in northeast corner) A single giant draco lizard lives in this room; it is 50% likely to be present, and if not present it is 25% likely to return while the party is in the room. The south door to this room does not latch properly, and swings both ways; it will close automatically if not held or spiked. Giant Draco Lizard: AC 15, HD 4+2, #At 1 bite, Dam 1d10, Mv 40' Fly 70' (20'), Sv F3, ML 7, XP 240 HP 23 ☐☐☐☐☐ ☐☐☐☐☐ ☐☐☐☐☐ ☐☐☐☐☐ ☐☐☐
60. Elf Princess room
(20'x30' room, double door north in center of north wall) Read (or paraphrase) the following If there are no elves in the party: This room is totally empty, and surprisingly clean. On the other hand, if one or more elves are present, read the following: This room is magically illuminated and is hung with rare and beautiful tapestries of Elven design. A long banquet table loaded with elvish foods is in the center of the room. A beautiful Elven woman with long blonde hair and crystal-blue eyes is seated at the head of the table; she wears a fine gown and a delicate silver coronet. In the latter case, there will be enough additional chairs to seat the Elven party members. All these contents are visible to all party members, but are completely insubstantial to the non-elves in the party. The princess will immediately arise and greet the elves in the party, inviting them to be seated and feast. She will grant a single cure light wounds to each injured Elf. The food is of highest quality and in sufficient quantity to sate the appetites of those invited. The Elven princess will speak pleasantly with her Elven guests, but she does not know anything about the dungeon
61. Moaning Room room
(40'x20' room, door south in southwest corner, door east 10' from northeast corner, secret door west in northwest corner) This room appears empty; only a few piles of giant insect droppings are visible in this room. After the party has been in the room 1d6 rounds, they will begin to hear a low moaning. The moaning will slowly increase in volume and pitch. By the end of the first turn it will be too loud to allow normal conversation, and at that point (if the party is still in the room) the GM should roll a random encounter check. The moaning will continue at this volume so long as someone is in the room, and an encounter check should be made every turn. If room 62 is entered after a turn is spent in this room, there is no chance to surprise the giant flies.
62. Giant Fly Lair room
(30'x20' room, open hallway east 20' to door to hallway in center of east wall, open hallway west 20' to door to room 61 in center of west wall) Seven giant flies lair in this room. Like the other lairs of this sort, the floor is covered with the remains of various creatures, including a giant black widow spider and two rock baboons. All are infested with huge maggots. A powerful stench fills the room; all characters must save vs. Poison or fight at -2 due to the smell. 7 Giant Flies: AC 14, HD 2, #At 1 bite, Dam 1d8, Mv 30' Fly 60', Sv F2, ML 8, XP 75 ea. HP 4 ☐☐☐☐ 9 ☐☐☐☐☐ ☐☐☐☐ 7 ☐☐☐☐☐ ☐☐ 9 ☐☐☐☐☐ ☐☐☐☐ 6 ☐☐☐☐☐ ☐ 8 ☐☐☐☐☐ ☐☐☐ 11 ☐☐☐☐☐ ☐☐☐☐☐ ☐
63. Prison room
(20'x20' room, southeast corner chopped 10', door north in northwest corner, secret door in southeast corner diagonal wall to room 64; note pit in hallway just outside north door) Note the pit in the hallway outside the room. It opens automatically when a weight of at least 200 pounds passes the center of the trapdoor, dropping all in the square down 20' to the next level (see room 76 on the third level). The secret door is held by a hidden catch near the floor (the same sort of catch on both sides) and swivels in the center.
64. Cell room
(octagonal room, 30'x30', corners chopped 10', secret door in northwest diagonal wall to room 63, self-closing trapdoor in ceiling to room 17 pit trap) There are a few scattered bones in this room, which is otherwise empty. See room 63 for information about the secret door.
65. Ghoul Room room
(20'x30' room, door west in northwest corner) Two ghouls are in this room. Having slain a giant fly, they are tearing the slimy guts out of the insect for food, but any humanoids that might come along would be a welcome change of menu. 2 Ghouls: AC 14, HD 2*, #At 2 claws, 1 bite, Dam 1d4 claw, 1d4 bite (all plus paralysis), Mv 30', Sv F2, ML 9, XP 100 ea. Any character (except an Elf) hit by a ghoul must save vs. Paralysis or be paralyzed 2d4 turns. HP 11 ☐☐☐☐☐ ☐☐☐☐☐ ☐ 10 ☐☐☐☐☐ ☐☐☐☐☐
66. Black Widow Spider room
(diamond-shaped room, 40'x40', corners chopped 20', open hallway west just below centerline of west corner, open hallway south just below centerline of east corner) This room contains a single, larger than normal giant black widow spider, which has built a web from the north corner of the room to the south corner. The web is hard to see; if the party moves through the room quickly, check for surprise. If they are surprised, the first rank will run into the web (see the spell web for the effect). It will burn slowly if ignited. Giant Black Widow Spider: AC 14, HD 3*, #At 1 bite, Dam 2d6 + poison, Mv 20' Web 40', Sv F3, ML 8, XP 175 HP 22 ☐☐☐☐☐ ☐☐☐☐☐ ☐☐☐☐☐ ☐☐☐☐☐ ☐☐ 52
67. Pit Vipers room
(30'x20' room, 10'x20' alcove west in southwest corner, 20'x10' alcove south in southeast corner, door north in northwest corner) There are six pit vipers in this room, curled up sleeping in a nest of dirt in the back of the west alcove, behind a large metal-bound chest. The wood and metal are both unknown varieties, and the chest is locked with a padlock of the same metal; there is no apparent rot, rust, or corrosion on the chest. The padlock is of high quality, giving a 15% penalty to any picking attempt. Smashing the chest open should also be harder, though it is up to the GM to determine this. The chest contains 1,350 sp, 370 gp, and the following gems: one cat's-eye agate worth 10 gp, one piece of jade worth 75 gp, a jasper worth 10 gp, and a tiger eye worth 1 gp. 6 Pit Vipers: AC 14, HD 1*, #At 1 bite, Dam 1d4 + poison, Mv 30', Sv F1, ML 7, XP 37 ea. HP 8 ☐☐☐☐☐ ☐☐☐ 7 ☐☐☐☐☐ ☐☐ 8 ☐☐☐☐☐ ☐☐☐ 6 ☐☐☐☐☐ ☐ 12 ☐☐☐☐☐ ☐☐☐☐☐ ☐☐ 10 ☐☐☐☐☐ ☐☐☐☐☐
68. Glass Jelly Room room
(30'x20' room, 10' alcove east in center of east wall to door east to hallway) A glass jelly waits just to the right of the entry alcove in this room. Trapped within the body of the monster are 9 ep, 17 gp, the key to the chest in Room 67, and a metal tube containing a Scroll of Protection from Elementals. Glass Jelly: AC 12, HD 4*, #At 1 pseudopod, Dam 2d4 + paralysis, Mv 20', Sv F2, ML 12, XP 280 HP 20 ☐☐☐☐☐ ☐☐☐☐☐ ☐☐☐☐☐ ☐☐☐☐☐ 53
69. Hallway room
(hallway at bottom of stairs, secret doors east and west to areas 69A and 69B, double doors at end into room 70) An ochre jelly is in area B (behind the secret door) and will enter the main hallway 1d6 rounds after the player characters arrive. Ochre Jelly: AC 12, HD 5*, #At 1 pseudopod, Dam 2d6, Mv 10', Sv F5, ML 12, XP 405 HP 25 ☐☐☐☐☐ ☐☐☐☐☐ ☐☐☐☐☐ ☐☐☐☐☐ ☐☐☐☐☐
70. False Temple room
(30'x30' room, southeast and southwest corners chopped 10', double doors south to area 69, secret door west in northwest corner to hallway) This room appears to have been a temple to some evil god. It is actually a false temple created to protect the real temple, room 73. The furnishings of this room have been removed over the centuries, and the murals on the walls are defaced and faded beyond recognition. A giant tarantula spider is currently in this room devouring a giant bee. If left alone, it will ignore the party until it is done. Giant Tarantula: AC 15, HD 4*, #At 1 bite, Dam 1d8 + poison, Mv 50', Sv F4, ML 8, XP 280 HP 19 ☐☐☐☐☐ ☐☐☐☐☐ ☐☐☐☐☐ ☐☐☐☐
71. Statue Gallery room
(40'x70' room with 10'x10' alcove west in southwest corner, secret door north in center of north wall to hallway, secret door east 10' from northeast corner to hallway to room 72) This large room was evidently once a gallery of statues. In various places around the room are statues which have been toppled and broken; many other spots show signs of statues that have been removed. Only one statue remains intact, in the northeast corner of the room. This statue is of an elvish maiden lying back against a small dragon which likewise lies on its belly. In the hands of the maiden is an open book which she is reading. The head of the small dragon lays blissfully asleep in her lap; the tome from which she reads is perched on its dozing head. The maiden is life-sized and the dragon about 10' long, but is coiled about her. The statue is of an unknown metal, rather than stone as all the broken statues in the room were made of. The opening mechanism for the secret door is in the dragon's mouth, which is made to emulate a subtle yawn. Reaching into the mouth, a bold character will find a small pull-ring. When the pull-ring is pulled, the secret door will groan and slide
72. Irregular Room room
(20'x30' room, southwest corner chopped 10', 10'x10' alcove north in northeast corner, door west to room 71) In the middle of the 10'x10' square alcove is a chest. It isn't locked; if it is opened, a 5'x5' section of ceiling directly above it will emit a loud grinding noise. It's a falling ceiling block, and it was supposed to fall instantly, but time has corroded the mechanism so that it is delayed one round before falling. The chest appears to be filled with gold coins; actually they are copper pieces which have been plated with a very thin layer of gold (so 54 the coins are worth no more than 1 cp each). There are 472 such coins in the chest (which has a raised bottom so as to appear more full). Characters attempting to spend such coins as gold can expect to be found out quickly; if melted down for the copper value, the party will be paid no more than 2 gp for the whole mess. If the character opening the chest does not leave the alcove instantly, the ceiling block will fall, doing 2d8 points of damage to the character(s) under it. A save vs. Death Ray (adjusted by Dexterity) can be made to jump clear at the last moment. There is a treasure in this room,
73. Evil Temple room
(60'x50' room, northeast and northwest corners chopped 20', double doors north to hallway) This appears to be a temple to some forgotten god of evil. The walls are painted with extensive murals of disturbing evil acts, and a pentacle 20 feet in diameter painted in blood dominates the room. The bloody pentacle appears to be fresh. You hear a moaning breeze, yet you feel no air movement. Seven shadows are in the room also. Shadows surprise on 1-5 on 1d6. They guard a treasure hidden beneath a loose flagstone in the center of the pentacle: 280 gp, 90 pp, a cat's eye ruby worth 5,000 gp, a bracelet worth 900 gp, a non-magical ring worth 1,300 gp, and a Ring of Delusion. Note: The cat's eye ruby is one of those from the mirror in room 32. All the non-magical treasure items, including the coins, are cursed such that anyone carrying the items will be offensive to monsters of evil nature or animal intelligence; such creatures will always attack the bearers of the cursed treasure in preference over any other character, and will not check morale so long as any treasure-bearers still live. The curse can be removed from the entire treasure with a single remove curse sp
74. Hallway room
(10'x10' landing at bottom of two staircases, one up 20' north to long hallway north, the other up 20' east to crossing hallway) A group of six giant ants are approaching this area from the opposite direction of the party. Surprise should be checked for both sides. 6 Giant Ants: AC 17, HD 4, #At 1 bite, Dam 2d6, Mv 60' (10'), Sv F4, ML 7/12, XP 240 ea. HP 12 ☐☐☐☐☐ ☐☐☐☐☐ ☐☐ 20 ☐☐☐☐☐ ☐☐☐☐☐ ☐☐☐☐☐ ☐☐☐☐☐ 20 ☐☐☐☐☐ ☐☐☐☐☐ ☐☐☐☐☐ ☐☐☐☐☐ 23 ☐☐☐☐☐ ☐☐☐☐☐ ☐☐☐☐☐ ☐☐☐☐☐ ☐☐☐ 11 ☐☐☐☐☐ ☐☐☐☐☐ ☐ 21 ☐☐☐☐☐ ☐☐☐☐☐ ☐☐☐☐☐ ☐☐☐☐☐ ☐
75. The Oven room
(20'x20' room, door north in northwest corner to area 74) The door to this room is made of brass plates, assembled with brass fittings and brass rivets, but it is completely free of corrosion. The door does not have a lock, but it does have a simple doorknob, and it opens easily. Inside the room is empty save for a large rust- free iron ring set into the center of the floor, and an Elf's charred skeleton arranged around it. A strong rust-free chain is passed through the ring and shackled around the skeleton's bony wrists. 55 If the door to the room is closed (it does not close itself), the room begins to warm up rapidly. After one turn, each character or creature in the room takes 1 point of damage from the heat, and an additional point every turn thereafter until death occurs. There is nothing to prevent those in the room from leaving; this is not a trap, it's an ancient execution device.
76. Prison room
(20'x40' room, northeast corner chopped 10' by iron bars, 20'x20' cell behind bars with southwest corner chopped 10' by same bars, open hallway from main section south 10' from southeast corner, secret door north in northwest corner of cell which only opens from other side, self-resetting trapdoor in ceiling of cell connects to hallway just outside room 63) The bars closing the cell off are made of an unknown alloy, and have remained untarnished for untold centuries. There is no key for the lock, but it may be opened by a Thief or by a knock spell in the usual way. There is an empty metal key hook screwed into the wall beside the south entrance. The secret door cannot be opened from this side (except by magic).
77. Ape Lair room
(40'x30' room, door east in southeast corner to hallway, door west in southwest corner to hallway, secret door north centered in north wall to 10'x10' hallway to obvious secret door to room 78) A small tribe of carnivorous apes lairs here. The largest is a male, and the others are female. 3 Carnivorous Apes: AC 14, HD 4, #At 2 claws or 1 thrown rock, Dam 1d4 claw or 1d6 rock, Mv 40', Sv F4, ML 7, XP 240 ea. HP 21 ☐☐☐☐☐ ☐☐☐☐☐ ☐☐☐☐☐ ☐☐☐☐☐ ☐ 11 ☐☐☐☐☐ ☐☐☐☐☐ ☐ 16 ☐☐☐☐☐ ☐☐☐☐☐ ☐☐☐☐☐ ☐
78. Tarantula Lair room
(20'x20' room, door east in southeast corner to hallway, secret door south in southwest corner to 10'x10' hallway to obvious secret door to room 77) A giant tarantula spider lairs in this room. It likes shiny pebbles, and has collected a small pile of about a hundred such stones. Four of them are actually valuable gemstones: an aquamarine (750 gp value), a citrine (75 gp value), a piece of jet (100 gp value), and a star rose quartz (50 gp value). Giant Tarantula: AC 15, HD 4*, #At 1 bite, Dam 1d8 + poison, Mv 50', Sv F4, ML 8, XP 280 HP 18 ☐☐☐☐☐ ☐☐☐☐☐ ☐☐☐☐☐ ☐☐☐
79. Lesser Pool Room room
(60'x30' room, open hallway west in southwest corner, open hallway east in northeast corner, secret door north centered in north wall, 40'x10' pool centered in room) Roll a wandering monster check each turn the player characters are in this room.
80. Pillared Room room
(irregular room, 60'x30' main section connected at the southeast corner to 30'x20' section, 10'x10' pillars centered in north and south ends of main section 10' from end walls, open hallway west 10' from northwest corner, open hallway west in southwest corner) This room is illuminated by magic similar to a continual light spell, which casts a slightly lavender radiance over the whole room. Since this room is a major concourse for monsters on this level, the GM should roll an encounter check when the room is entered, and again every turn, at the usual 1 in 6 chance. Note: this room is the one viewed by the magic mirror in room 32.
81. Empty room
(60'x30' room, 10'x10' pillars centered in north and south ends 10' from end walls, open hallway west in northwest corner, open hallway south in southwest corner 20' to door, secret door north centered to room 82) Each turn the player characters are in this room, roll 1d6. On a roll of 1-2 the giant tiger beetles in room 82 will open the secret door and charge to the attack, having sensed the party with their antennae. 56
82. Tiger Beetle Lair room
(20'x20' room, obvious secret door south in southwest corner to room 81) Five giant tiger beetles lair in this room. They have no treasure. The corners of the room are full of large slimy-looking white eggs. 5 Giant Tiger Beetles: AC 17, HD 3+1, #At 1 bite, Dam 2d6, Mv 60' (10'), Sv F3, ML 9, XP 145 ea. HP 12 ☐☐☐☐☐ ☐☐☐☐☐ ☐☐ 11 ☐☐☐☐☐ ☐☐☐☐☐ ☐ 8 ☐☐☐☐☐ ☐☐☐ 16 ☐☐☐☐☐ ☐☐☐☐☐ ☐☐☐☐☐ ☐ 18 ☐☐☐☐☐ ☐☐☐☐☐ ☐☐☐☐☐ ☐☐☐
83. Compactor room
(20'x20' room, door west in northwest corner to hallway) The walls, ceiling, and floor of this room are a uniform dark terracotta red color. It appears to be empty, but you can see a rectangular outline of a darker color straight across from the entry door. This room is a trap. Each character entering the room has a 1 in 4 chance to step on the triggering flagstone. When this happens, a metal plate will slide down swiftly from the door frame with substantial force; any character standing in the door must roll a save vs. Death Ray or be struck by the plate. If this save is failed, the character takes 2d4 points of damage and falls in the doorway. A second save vs. Death Ray must be made or the character will be crushed to death by the plate. The GM may determine however they wishes which side of the door the character is on if the second save is made. After the plate closes off the room, the ceiling will begin to descend, moving 1 foot per round. It begins at a height of 10'. If the trap is not deactivated, it will kill all the characters in the room when it reaches the floor. Jamming at least three iron spikes between the wall and ceiling will halt the ceili
84. Empty room
(20'x30' room, door north centered to hallway) The door to this room is firmly stuck. If it is forced, the gargoyle in room 85 will be alerted and will attempt to ambush the party from behind. 57
85. Gargoyle room
(20'x30' room, southwest and southeast corners chopped 10', door south to hallway) A single gargoyle is in this room. If the door to room 84 is forced, the gargoyle will be alerted and will attempt to ambush the party. If this room is entered first, the door will open easily and the gargoyle might be surprised. Gargoyle: AC 15 (m), HD 4**, #At 2 claws, 1 bite, 1 horn, Dam 1d4 claw, 1d6 bite, 1d4 horn, Mv 30' Fly 50' (15'), Sv F6, ML 11, XP 320 HP 18 ☐☐☐☐☐ ☐☐☐☐☐ ☐☐☐☐☐ ☐☐☐
86. The Sealed Door room
(20'x20' room, double doors south in southeast corner to hallway, door west in southwest corner to room 87) This room appears to be empty. There is a door in the west wall, made of some gray metal. It has huge armored hinges, but instead of a knob or handle the door appears to be closed by a circular seal, marked with the signs of the Zodiac. The door west into room 87 is made of an adamantine alloy, set flush into the wall, with huge armored hinges as described. The circular seal is about 16" in diameter and holds the door closed by means of magic. The seal is attached to the edge of the door so that it laps half over the door, half over the wall; it is positioned about 3 feet above the floor. The seal is as shown on the Player's Handout: The Seal page (see below). The Zodiac symbols are largely universal, so even an illiterate peasant farmer will recognize them (since they are important to the planting schedule). The signs on the seal, however, are out of order. The correct order of the signs is as follows: If any player asks about the order of the symbols, give them Players Handout: Astrological Symbols. When the Seal is touched, it will begin to glow; when left untouched for a full round the glow will fade. To open the door, the out-of-order signs must be touched in the correct order; the first out-of-order sign must be touched first, so touching all the signs in their correct relative order will not open the seal. For a sign to be touched "first" the Seal must not be glowing when it is touched. The signs which must be touched are as follows, in the order they must be touched: When this is done, the door will open about a quarter inch, and may be opened the rest of the way by grasping the edge of the Seal and pulling. If closed completely, the Seal re-locks automatically. The door will not close on its own. From the inside, it may be opened simply by pushing on the door. 58
87. Tapestry Room room
(20'x30' room, door east in northeast corner to room 86) This room once contained several items of artwork, but the only item remaining is a tapestry, 15' high by 20' wide, hanging in the middle of the south wall. The tapestry depicts the scene of twelve elvish maidens dressed in gossamer gowns of whites and greens and golds dancing around a small fire. The fire is in an open area beneath the boughs of old trees of yore, and shafts of soft moonlight shine down here and there upon the merriment. Three elvish males dressed in tunics of purple and silver, and holding lyres of silver, sit nearby on the gnarled roots of the trees, apparently playing a tune to which the maidens dance. Several small radiant pixies or sprites are seen in the boughs, and are depicted as looking toward whoever is standing before the tapestry. Beyond the scene, in the background, a path can be seen winding away into the forest, and there is a city of crystal and silver in the far distance. The tapestry itself is very finely woven, obviously of elvish make. It has a border of royal purple. Upon the entire border is woven in flowing elvish script of fine-threaded silver (these verses rhy
88. Library room
(20'x30' room, orientation irrelevant, door in center of one 30' wall) This room appears to be a small library. The walls are made of light reddish-brown stone blocks. Two large bookcases stand against the shorter walls. A small table is set in the middle of the room. The ceiling of the room is covered by a green mossy material, which also runs down the right-hand wall, covering one of the bookshelves. A patch of the moss also covers the top and two legs of the table. This is the room beyond the door in the tapestry. Looking back through the door, the party can still see the path leading back to the ethereal scene with the dancing maidens. The "moss" is in fact a large patch of yellow mold which has changed color due to a mineral substance in the stone of the room. Each round of disturbing the mold (for activities such as searching the room, or a specific locale covered by the mold, such as the table) incurs a cumulative 10% chance that the mold will release its spores (maximum 50% chance). Any attack on the mold has an immediate 50% chance that it will release spores. Because of the large size of the mold, the entire room is affected by the spores, rather th
MAP PINS • 87
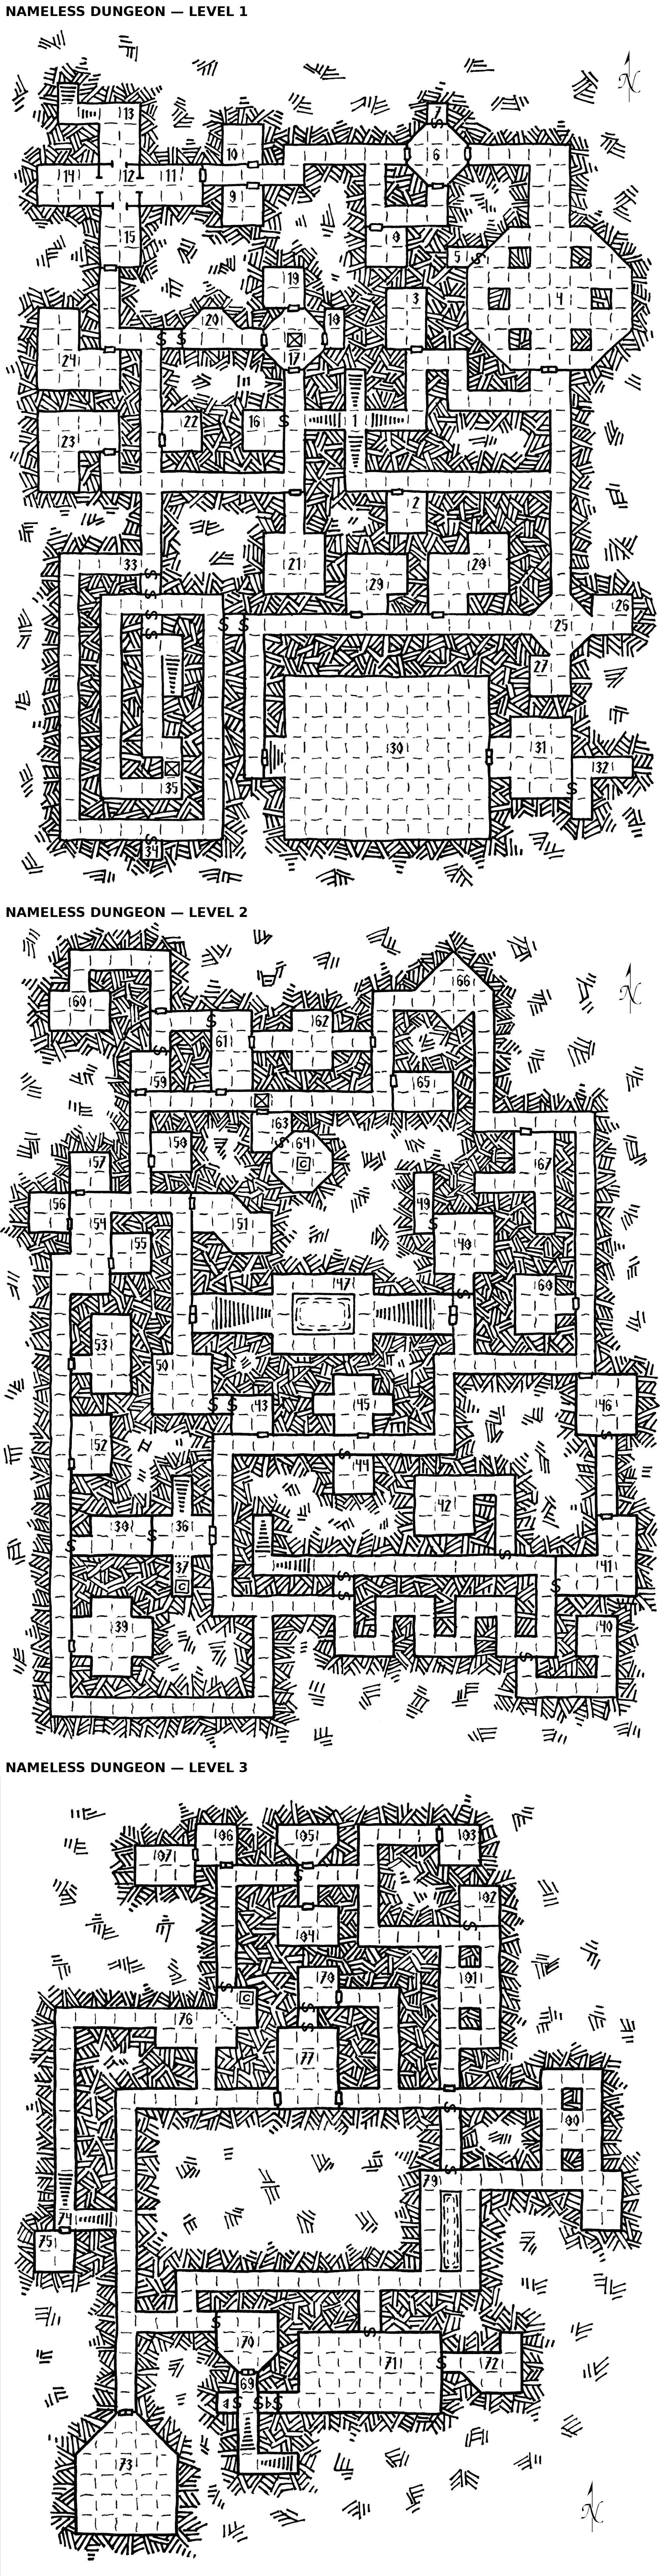
•
7. Secret Room
•
13. Giant Ant Lair
•
10. Room With A Chest
•
6. Octagonal Room
•
12. Giant Ant Lair
•
11. Giant Ant Lair
•
14. Giant Ant Lair
•
9. Mirror Room
•
15. Giant Ant Lair
•
8. Giant Shrew Lair
•
5. Secret Room
•
19. Spear Trap
•
4. Octagonal Hall
•
3. Dark Room
•
18. Narrow Room
•
20. Skeleton Room
•
17. Octagonal Room
•
24. Right Bent Room
•
1. Entrance
•
16. Secret Room
•
22. Oracle Room
•
23. Left Bent Room
•
2. Spitting Cobra Lair
•
21. Giant Rat Lair
•
33. Secret Doors
•
28. Climb Down Tunnel
•
29. Teleporter
•
26. Dropping Room
•
25. Crossroad
•
27. Jelly Room
•
31. Giant Bee Lair
•
30. Giant Bee Lair
•
32. Looted Treasure Room
•
35. Pit
•
34. Secret Room
•
66. Black Widow Spider
•
60. Elf Princess
•
62. Giant Fly Lair
•
61. Moaning Room
•
59. Lizard Lair
•
65. Ghoul Room
•
63. Prison
•
58. Ghoul Lair
•
64. Cell
•
57. Empty
•
67. Pit Vipers
•
56. Giant Fly Lair
•
49. Teleporter
•
51. Empty
•
54. Moldy Crossing
•
55. Empty
•
48. Draco Lizard Lair
•
47. Room Of The Pool
•
68. Glass Jelly Room
•
53. Jelly Room
•
50. Pressure Plate Floor
•
45. Giant Fly Lair
•
43. Empty
•
46. Old Chapel
•
52. Pit Viper Lair
•
44. Secret Room
•
42. Oil Beetle Lair
•
36. Entry Room
•
38. Empty
•
41. Empty
•
37. Cell
•
39. Former Ghoul Storage
•
40. Looted Treasure Room
•
86. The Sealed Door
•
85. Gargoyle
•
83. Compactor
•
87. Tapestry Room
•
82. Tiger Beetle Lair
•
84. Empty
•
81. Empty
•
78. Tarantula Lair
•
76. Prison
•
77. Ape Lair
•
80. Pillared Room
•
79. Lesser Pool Room
•
74. Hallway
•
75. The Oven
•
70. False Temple
•
72. Irregular Room
•
71. Statue Gallery
•
69. Hallway
•
73. Evil Temple
Click-to-pin lives in detail view — upload a map, click to drop, drag to move.
dungeon Cave of the UnknownOpen →
One-level dungeon of strange monsters under an unusual master — Starisel Zelinth.
Adventure background (BF1 pp.67-68): Introduction The following text is provided to help the GM get this adventure started; feel free to modify it as needed. You are relaxing in the Toothless Dragon, enjoying the ale and regaling the other patrons with the story of your latest exploits. A man enters, wearing dirty, torn clothing, with a worried expression on his face. He looks around the room, evidently still sun- dazzled, but then his eyes fall upon you, and he quickly approaches. "I am Kardon Karien, a merchant. I heard from the watchmen that you are capable individuals who might be available for hire... is that so?" Assuming the player characters answer in a more or less positive fashion, the merchant continues: "My caravan was attacked north of here by orcs... I am the only man who survived, and then only because they thought me dead after they overturned my wagon. My daughter Gwelayn and her serving girl were taken by them into the forest. As soon as I recovered my senses and dragged myself from under the wagon, I came directly here to look for help. "Hunt them down for me, rescue my daughter, and I will give you eight hundred gold pieces, all I have available right now. Will you help?" GM's Information The orc lair is in a cave beneath a hill in the forest a few miles north of Morgansfort; it will not be hard to find, as the wrecked caravan is easy to locate, and the orcs stupidly left numerous clues as to their direction of travel. However, the orcs don't have the women anymore; behind the more or less natural caverns of the orc lair lies another dungeon complex: Long ago, a powerful necromancer caused an underground complex to be built within the hill. The primary entrance is through the caves (the present orc lair) but there is also an old well on top of the hill which connects to room 19, and can be used as an entrance/exit. It is recommended that the players not be told of this second entrance, though they may discover it by diligence or luck. The necromancer who lived and conducted research here left long ago; it is left as an exercise for the GM to detail this part, if they wish. Deep inside the dungeon is the Altar of Darkness, a powerful evil magic item. A frustrated low-level necromancer named Starisel Zelinth learned of the Altar, and traveled to the caverns to obtain it. The Altar has the power to animate the dead as zombies. Unfortunately for Starisel, the Altar is too large to move, so he has had to learn about its powers "on location." Starisel was a sickly individual, and staying in the cold, damp dungeon and handling the dead made his condition progressively worse. He finally convinced himself that the Altar could make him a lich (a powerful undead wizard) if he poisoned himself while lying on it. For several days he gave himself small doses of arsenic, until he felt quite sick. Then he laid down on the Altar and drank a large dose of the same poison mixed with a narcotic, and soon he died. The Altar did its work, animating him as a zombie; but as he was also the person controlling the Altar, he was animated in a self-willed form. The arsenic in his body prevents him from rotting, and he can still prepare and cast spells, and function mostly as though he was still alive. There was, however, a cost. Starisel no longer has a pulse, and his body is cold. He has lost most of the sensation in his body as well, so he no longer feels pain (or pleasure). Finally, he has recently realized he can no longer improve his magical abilities. He has, in fact, been transformed into a type of monster known as a Zombraire. These limitations have largely cost him his sanity. He skulks around the dungeon, looking for dead bodies he can animate and dragging them back to the Altar. Assuming the player characters don't dispose of the bodies of any monsters they slay, Starisel will collect them and animate them (up to six per day as given in the description of the Altar, below). The PC's may begin to recognize the zombies they meet... especially if they leave a dead comrade behind. The tribe of orcs living here is unusual. It all started with a female orc named Badushna, who was cast out of her tribe because she was "more beautiful" (less repulsive) than the chief’s head wife. She didn’t wander the wilderness long, because she knew the ogre who lived nearby would take her in. After all, she was beautiful, wasn’t she? Badushna isn’t just a "pretty face" though, she’s smart too (for an orc anyway) and has led the ogre, Onyg, to greater successes in looting and extortion than he could have ever done on his own. Their successes led to other outcast or "rogue" orcs, mostly males, joining them, and eventually they needed a larger home. Their search led them to the caves at the front of the complex. They quickly began regular raids on the caravans on the nearby trade road, being careful to attack only the weakly defended caravans, and they became richer than any orc ever believed possible. Zelinth quickly learned of their arrival, and considered destroying them, but by this time he had completed his transformation into an undead monster and become quite insane. He decided that he wanted a wife, and he would use the orcs to get one. In the night he entered the quarters of Onyg and Badushna, using a hold monster spell (from a scroll) to immobilize the sleeping ogre. His zombie minions grabbed Badushna as she awoke and he quickly asserted his power over her by means of threats. He then told her that the orcs must capture an attractive maiden for him, to be his wife, and if they did this he would spare their lives. Onyg overheard this exchange but could not move to attack the necromancer and his minions. By the time the spell wore off, Zelinth was gone. Badushna saw him leave and knows of the secret door, but does not know anything about the room beyond. Under orders from Onyg, the orcs kept a lookout for an attractive maiden among the caravans they robbed. Until this point they had avoided taking any hostages, as Badushna knew that capturing people was certain to lead to rescue missions. In a few days, they were successful, capturing both the daughter of a merchant and her serving-maid. They opened the secret door and shoved both women inside. Zelinth was pleased beyond belief, and immediately imprisoned both women in cells in area 8. He promptly forgot about the serving- maid Saril, as he has no interest in her; he will not remember to give her any food or water, and so she may be in poor shape when found. He plans to take Gwelayn, the merchant’s daughter, to area 23 at midnight. He will place her on the altar and pour a strong solution of arsenic down her throat. The transformation of his new "wife" will be complete by dawn. Thus, if the player characters do not find her before midnight, she will be dead (or undead) when they do. The merchant, Kardon Karien, will still pay the reward for his daughter if her body is returned to him. The serving-girl is of no interest to him if Gwelayn is dead, and he will release her from his service at that point. The GM may wish to give the players 100 XP for each girl rescued alive as a bonus. It is recommended that the full bonus be given to each character involved, rather than divided.
Wandering Monsters (BF1 p.69): Monsters Wandering Monsters An encounter should be rolled for every second turn. Roll 1d6; on a 1, roll again to choose among the monsters below, and again for the number appearing. Most monsters below are limited in number, as shown; when the number listed have been met and defeated, no more of that sort will be encountered. Of course, those that flee may return again if indicated. 1. 1d20 Normal Bats (79 total) AC 14, HD 1 HP ea., #At Confusion, Dam N/A, Mv 30' Fly 40', Sv NM, ML 6, XP 360 total or 3 ea. Note: As each bat has just 1 hit point, each checkbox below represents a single bat. 2. 2d4 Zombies (8 total*) * This maximum number may increase if Zelinth succeeds in creating additional zombies during the adventure. For convenience, an additional 10 rows of zombie hit points are given below. AC 12, HD 2, #At 1 bludgeon, Dam 1d8, Mv 20', Sv F2, ML 12, XP 75 ea. Half damage from blunt weapons, 1 point only from arrows, bolts, or sling stones 3. 1d8 Skeletons (10 total) AC 13 (half damage from edged weapons, 1 point only from arrows, bolts, or sling stones), HD 1, #At 1 bony fist, Dam 1d6, Mv 40', Sv F1, ML 12, XP 25 ea. 4. 2d4 Giant Centipedes (8 total) AC 11, HD ½* (1d4 HP), #At 1 bite, Dam Poison (save at +2), Mv 40', Sv NM, ML 7, XP 13 ea. 5. 1d8 Giant Fire Beetles (9 total) AC 16, HD 1+2, #At 1 bite, Dam 2d4, Mv 40', Sv F1, ML 7, XP 25 ea. 6. Starisel Zelinth (plus 2d4 zombies) Starisel's statistics are given below. He will be accompanied by 2d4 zombies (taken from item 2 in this list; also, 25% of the time, his "wife" Gwelayn (also described below) will be with him (unless, of course, the adventurers succeed in saving her). If seriously threatened, Zelinth will leave the remaining zombies to keep his adversaries (the adventurers) busy while he makes his escape; he will always seek to take Gwelayn with him if she is present. The Orcs (And Their Leaders) Onyg the Ogre: AC 15, HD 4+1, #At 1 huge club, Dam 2d6, Mv 30', Sv F4, ML 10, XP 240 Badushna the Orc Queen: AC 11, HD 1, #At 1 shortsword, Dam 1d6, Mv 40', Sv F1, ML 8, XP 25 5 Armed Female Orcs: AC 11, HD 1, #At 1 spear, Dam 1d6, Mv 40', Sv F1, ML 7, XP 25 ea. Note: The unarmed (pregnant) female orcs in room 3 are non-combatant; assume all have 3 hit points and use the statistics above only if necessary. 28 Orc Warriors: AC 14, HD 1, #At 1 scimitar, Dam 1d8, Mv 40', Sv F1, ML 8, XP 25 ea. Starisel Zelinth and Gwelayn Starisel Zelinth, Zombraire: AC 13 (half damage from blunt weapons, 1 point only from arrows or bolts), HD 2*, #At 1 dagger +2, Dam 1d4+2 or by spell, Mv 20', Sv M2, ML 9, XP 100 Spells available: shield, sleep (x2), invisibility, web, protection from normal missiles, hold person Zelinth is immune to sleep, charm, hold, and poison due to his zombie body. He may be Turned as a wight. He has several magic items which will always be on his person or within reach: A Ring of Protection +1, a Staff of Striking with 16 charges remaining, a Dagger +2, and a Rope of Climbing (which he will use to escape via the well in room 19 if he is being pursued). As noted above, Zelinth will almost never be found without a contingent of 2-8 zombies, and is 25% likely to be accompanied by his zombie "wife" Gwelayn. Gwelayn, Zombie: AC 12 (half damage from blunt weapons, 1 point only from arrows or bolts), HD 2, #At 1 bludgeon, Dam 1-8, Mv 20’, Sv F2, ML 12, XP 75 Gwelayn is a normal zombie in most details, but she appears at a glance to be alive due to the preserving power of the arsenic poison.
Map: extracted from the BF1 PDF (p.81).
ROOMS • 24
1. Orc Common Room room
There are many orcs in this room. A few are obviously female; as they see you enter, they flee down the tunnel to the left. The males draw weapons and approach you, grinning. The orcs are described in the Monsters section above; generally there will be 2d6+4 orc warriors present, as the others are out raiding. Make a wandering monsters check (1 on 1d6) every second turn while the player characters are within the lair; if an encounter is indicated, it will be the remaining orcs returning. The females mentioned will leave in the first round of combat (if possible); 1d8 are present when the room is first entered. A noisy battle here will draw the attention of Onyg and Badushna (normally found in room 4). Onyg will wade into battle against any invader immediately, while Badushna will attempt to join the other females.
2. Orc Warrior Barracks room
This room is obviously a barracks for the rank and file orcs. There are many piles of bedding, resembling nests, spread around the perimeter of the room. There will only be orcs here at night or if they flee here from room 1, above.
3. Orc Females room
In this room you see many female orcs, dressed in ill-fitting human clothing in garish colors. Several are obviously pregnant. They have a series of nest-like beds composed of furs, fabric and dirty pillows lined up along the walls. All appear surprised to see you enter, and while the more obviously pregnant orc-women move to the back, the others draw shortswords out of their clothing and prepare to defend themselves. Orc women do not go around armed most of the time, but Badushna insisted on arming the women of her new tribe to allow them to better protect their young. This tribe is still new, so there are not actually any offspring to protect yet, but the five not-yet-pregnant females will fight to protect the thirteen pregnant ones. The pregnant females will surrender and beg for mercy if the females protecting them are slain. Of course, you can’t trust an orc even when she surrenders... if the player characters do not drive them out of the dungeon, they may choose to attack the player characters when they are vulnerable (such as when they return from the lair of Zelinth). They will only do so if they are certain they will win. 69
4. Orc Chieftain’S Chamber room
This is evidently the bed chamber of the ogre. A rude pile of furs, skins, and various dirty pillows against the south wall makes up his bed. In the northwest corner of the room is a pile of chests, bolts of cloth and bags that appear to be full of coins. If not encountered elsewhere, Onyg and Badushna will be found here. The tribe's treasure is kept here as well, in a pair of large sacks: 2,661 cp, 1,691 gp, a piece of chalcedony (100 gp value), and a Cursed Scroll. The orcs have not bothered to try to read the scroll, as none of them can read anyway. If unrolled and viewed (not even read), the scroll catches fire, burning the character holding it for 1d8 points of damage. That character must roll a save vs. Spells or catch fire; the fire burns a single round, doing an additional 1d8 points of damage. However, if this happens, all equipment worn or carried by the character which might be damaged by a normal fire must save vs. Death Ray (using the character's own saving throw value) or be destroyed. Roll separately for each such item. This would include items made of paper and leather, as well as any oil carried (which would increase the damage suffered by t
5. Grand Entry Room room
You enter a large room, thirty feet square, with a set of double doors centered in the far wall. Both doors are decorated with bull's heads, carved in low relief, with tarnished silver handles shaped like horns. There are two empty torch sconces on each wall, with each pair being spaced about twelve feet apart. The double doors are false. Turning the doorhandles opens the trapdoor, dropping the victim (and anyone else in that square) into a 20' deep pit unless a save vs. Death Ray is made (adjusted by Dexterity). Each secret door is opened by turning the torch sconce on the left side of the door. The left-hand secret door does not quite close right, and any attempt to search for secret doors will find it right away.
6. Poison Gas Trap room
This hallway ends in a dirty trick. When anyone steps into the last square of the hallway, the hidden portcullis (detect as secret 70 door if looked for) falls, trapping those behind it. After 1d4 rounds a bitter odor will be detected... poison gas. Each character trapped by the portcullis, as well as any standing right next to it (trying to open it, for instance) must make a save vs. Poison each round for three rounds. Any who fail fall into a death-like sleep (likely to be mistaken for death if the victim is not examined closely). The portcullis can be opened by inserting a special crank-handle into a hole in the wall near the secret door, and cranking it up. Zelinth carries the handle stuck into his belt when he comes here, while the rest of the time it will be in his chest in room 21. It can also be opened by lifting it, if the characters trying to do so have a total Strength of 30 or more, i.e. two characters with 15 or better, or one with 18 Strength and one with 12, or any other equivalent combination. No more than four characters can try at a time. This should actually be pretty easy, if they think to have more than one character try; but of course
7. Pit Trap room
The pit is 30' deep, and will be tripped by any weight of 150 pounds or more. "Loose stones" in the walls approaching the pit from each direction can be pressed to lock the trapdoor; if this is done, the trapdoor will remain locked for about one turn. The loose stones can be detected as secret doors. If the trap is tripped, the doors will remain open for one turn, then slowly close by themselves as the trap resets.
8. Prison room
If the player characters arrive here as subdued or sleeping victims, they will awaken in the southwest cell as described in room 6 above. If this is the case, one torch will be lit, in the sconce on the west side of the double doors. Read this text in this case: You awaken in a small cell. The only light comes from a torch outside your cell. You can't see the entire space outside the cell, but you can see that there is another cell across from yours. In this case, if they begin talking among themselves, the serving girl Saril will call out to them (see below). If they search for secret doors, someone in the party will find it (it doesn't close quite right, much like the one in room 5). It opens if a loose stone in the upper right-hand corner is pressed. Alternately, the rusty bars can be bent on a roll of 1 on 1d12; add the character's Strength bonus to the range (so 13 Strength would be 1-2 on 1d12, 16 would be 1-3, and 18 would be 1-4). If room 8 is entered normally, there will be no light at all (other than that brought by the player characters). If it is before midnight, Gwelayn will be in the northwestern cell, and Saril in the northeastern one. If it is
SA
Saril
9. Arena room
If the player characters are escaping prisoners with no light, read this text: The pitch-black corridor opens into a larger space, a room of some sort. Suddenly there is light, blinding you momentarily; when you can see again, you realize you are in an octagonal room. The floor of the room is littered with bones, and you see a few rusty weapons. You hear a squeal behind you, and turn about to see a portcullis close off the corridor. Across the room from where you entered is a barred opening, apparently another portcullis. To your right is another such opening; the space beyond it is a ten foot square room, in which you can see a horrible catlike monster moving slowly toward you... In the small cell is a zombie deceiver. Due to its undead status it no longer has the power of displacement, but on the other hand it has gained a hit die in the exchange. If the lever in room 10 is pulled, the gate will open and the monster will attack anyone in the arena. Of course, Zelinth is in room 10 if the players are escaping prisoners, and he will taunt them before pulling the lever. The weapons on the floor include a spear, two shortswords, a battle axe, and a mace; the we
10. Arena Viewing Room room
This room is used by Zelinth to control the events in room 9. On the short wall section beside the bars there are four levers. Initially, the first and second levers are up, while the third and fourth are down. The first, if pulled down, exposes a metal stud with continual light cast on it in the middle of the ceiling of room 9. This will be blinding to anyone who entered the room in the dark. Zelinth won't be blinded by this effect as he no longer sees as the living see. Pulling down the second lever closes the portcullis in room 9, preventing anyone in that room from returning to the cell. Raising the third lever opens the portcullis that closes off the monster-cage on the north side of the arena. The last one controls the portcullis between 9 and 10 and is down initially, as the portcullis is already closed when room 9 is entered. Each lever has the reverse effect when raised back up (i.e. hiding the light or opening the appropriate portcullis). 72
11. Common Room room
The pit trap at the entrance to this room opens if 150 pounds or more of weight is placed upon it. It does not reset automatically, but must be closed by inserting the crank-handle into a hole in the east wall of this room and cranking it back up. The pit is 10' deep, and contains a tentacle worm. After the pit has been dealt with, read or paraphrase the following: This large space is a sort of common room, with hallways leading out in every direction. There is a pile of rotten lumber in the southwest corner that may have been a couple of long tables and some chairs a long time ago. The room appears unoccupied. Make double the usual number of encounter checks while any characters are in this room. Tentacle Worm: AC 13, HD 3*, #At 6 tentacles, Dam Paralysis (save to resist), Mv 40', Sv F3, ML 9, XP 175 HP 15 ☐☐☐☐☐ ☐☐☐☐☐ ☐☐☐☐☐
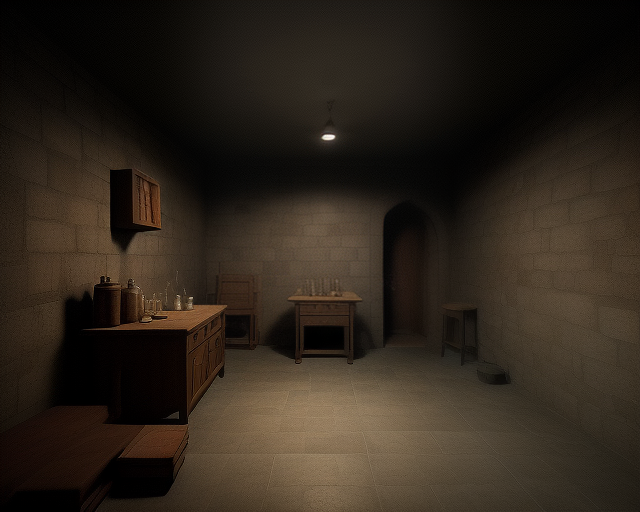
12. Laboratory room
This room appears to be a laboratory. A variety of glassware, some filled with fluids of various unhealthy colors, is spread across two worktables, one along the left-hand wall and the other against the far wall. A smaller table, more like a desk, is positioned near the right-hand wall; it bears a large book and an ink bottle with a quill pen sticking out of it. A chair stands nearby, pushed back against the wall. In the middle of the room stands a large cauldron, which appears to be filled with tar. The "tar" is actually a small black jelly which is dormant. If the cauldron is disturbed, the "tar" touched or probed, or if any living creature stands within 5' for more than 3 rounds, the monster will awaken and rear up out of the cauldron, attacking the nearest character. Black Jelly: AC 14, HD 2*, #At 1 pseudopod, Dam 2d8, Mv 60' (20'), Sv F2, ML 12, XP 100 HP 11 ☐☐☐☐☐ ☐☐☐☐☐ ☐ 73
13. Laboratory room
Tables line the walls, left, right, and opposite. In the middle of the room is a statue, apparently a wild boar. A variety of stonecutting tools as well as chunks of stone litter the tables. Everything in the room is very dusty. The statue is actually a crystal living statue which will attack anyone who touches it, or who disturbs any of the tools. Some of the tools in the room could be used as weapons, doing 1d4 (for small tools) or 1d6 (for larger tools) points of damage. As they are not actually weapons, apply a penalty of -2 on the attack roll to anyone using a tool in this way. Also, anyone searching for small stones to use with a sling will find 2d6 such stones on the first turn spent searching, 1d6 on the second; no more will be found after this. Crystal Living Statue: AC 16, HD 3, #At 1 bite, Dam 2d6, Mv 30', Sv F3, ML 12, XP 145 HP 17 ☐☐☐☐☐ ☐☐☐☐☐ ☐☐☐☐☐ ☐☐
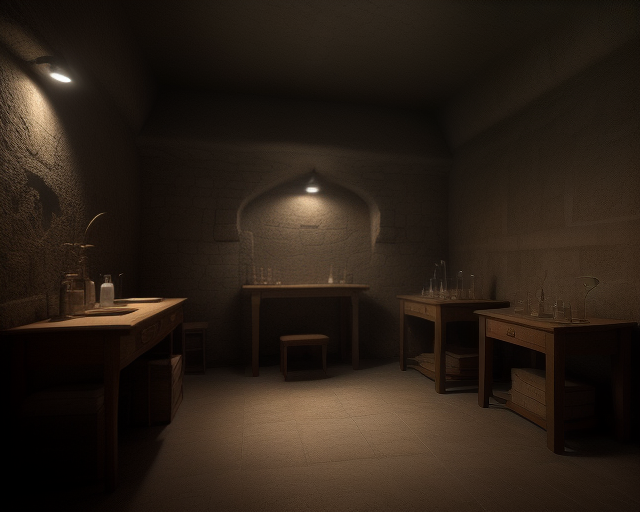
14. Laboratory room
This room appears to be a laboratory. A number of dusty metal implements and glass vessels are spread across two worktables, one along the left-hand wall and the other against the right-hand wall. The table along the right-hand wall has three glass jars with metal lids. One contains a viscous red liquid, another contains a light brown fluid, and the last contains a green liquid. The red liquid is paint. The light brown fluid is honey. The green fluid is in fact a green jelly. Neither of the first two are in any way dangerous, and the honey will, in fact, taste good if anyone tries it. Sticking a finger into the green jelly will cause it to attack, as will attempting to drink the green jelly (and there is no way to burn it off in this case). Green Jelly: AC 12 (only hit by fire or cold), HD 2**, #At 1 acid, Dam if not scraped off in first round, will destroy flesh and clothing in 6+1d4 rounds, Mv 1', Sv F2, ML 12, XP 125 HP 9 ☐☐☐☐☐ ☐☐☐☐
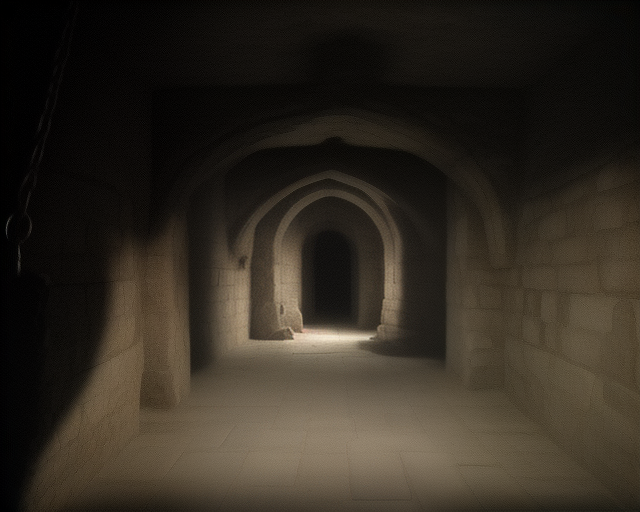
15. Laboratory room
The first thing you notice upon opening the door to this room is the filthy screaming manlike monster chained to the far wall. After taking a moment to compose yourselves, you take note of a long worktable against the right-hand wall, laden with the sort of tools used by morticians. A wooden chair stands beside the table. More interesting perhaps is the chest just to the left of the screeching horror. The monster is a wight. The chains which hold it will break in 3d10 rounds after the party enters the room. The chest is close enough to the monster that it can reach anyone approaching it, and thus attack normally. The chest is latched, but not locked, and contains two Potions of Healing wrapped in cloth. Wight: AC 15 (s), HD 3*, #At 1 touch, Dam 1 level drain, Mv 30', Sv F3, ML 12, XP 175 HP 14 ☐☐☐☐☐ ☐☐☐☐☐ ☐☐☐☐ 74
16. Laboratory room
This room is obviously another laboratory, but it is in disrepair. Several work tables are scattered around the room; one is missing the legs at one end and thus sits at a crazy angle. In the far left corner of the room, several large mushrooms are visible. The large mushrooms are, in fact, shriekers. Searching the room (if a search is undertaken) will require at least three turns, and nothing of value will be found. Note that the shriekers will begin shrieking one round after the door is opened. 3 Shriekers: AC 13, HD 3, #At shrieking, Dam nil, Mv 5', Sv F1, ML 12, XP 145 ea. HP 13 ☐☐☐☐☐ ☐☐☐☐☐ ☐☐☐ 12 ☐☐☐☐☐ ☐☐☐☐☐ ☐☐ 18 ☐☐☐☐☐ ☐☐☐☐☐ ☐☐☐☐☐ ☐☐☐
17. Dining Room room
As you open the door, a powerful stench of rotting flesh fills the air. At this point, all characters must make saving throws vs. Poison or retch for 1 round; those who fail suffer -2 on all attack rolls for the duration of their stay in this room. Inside the room you see a chilling sight: six people sitting at a table, utensils in hand, about to feast upon mounds of steaming rotten flesh. They turn toward you slowly, and you realize the diners aren't living people... they're zombies. They arise from their seats, moaning, and begin to approach you threateningly... 6 Zombie Diners: AC 12 (half damage from blunt weapons, 1 point only from arrows, bolts, or sling stones), HD 2, #At 1 bludgeon, Dam 1d8, Mv 20', Sv F2, ML 12, XP 75 ea. HP 13 ☐☐☐☐☐ ☐☐☐☐☐ ☐☐☐ 12 ☐☐☐☐☐ ☐☐☐☐☐ ☐☐ 9 ☐☐☐☐☐ ☐☐☐☐ 8 ☐☐☐☐☐ ☐☐☐ 11 ☐☐☐☐☐ ☐☐☐☐☐ ☐ 7 ☐☐☐☐☐ ☐☐
18. Kitchen room
This room is evidently a kitchen. The room is dominated by a heavy worktable in the middle of the floor. Cabinets line the far wall, and a fireplace is centered on the right- hand wall. As you look around the room, you hear a rattling noise to your right. It's an animated skeleton wielding a meat cleaver! The skeleton is from a carnivorous ape, which makes it rather tougher than the average skeleton. Carnivorous Ape Skeleton: AC 13 (half damage from edged weapons, 1 point only from arrows, bolts, or sling stones), HD 4, #At 1 huge cleaver, Dam 1d10, Mv 40', Sv F4, ML 12, XP 240 HP 19 ☐☐☐☐☐ ☐☐☐☐☐ ☐☐☐☐☐ ☐☐☐☐
19. Well room
If this room is entered during daytime hours, read the following: This room is unevenly lit by what appears to be sunlight, streaming in from a circular hole in the center of the ceiling. Centered below the hole in the ceiling is an identical hole in the floor; the rest of the floor is covered with animal droppings. The ceiling of the room is in shadow, but you think you see movement there... If the party enters after nightfall, read this: The floor of this room is covered in animal droppings, everywhere save for a circular hole in the middle of the floor. In daytime, the room is full of sleeping bats; after nightfall, the room empties as the bats go out to hunt for food. Of course, if the party goes ahead and enters the room in the daytime, the bats will probably be disturbed and "attack." If this happens, remember that anyone in the room trying to ward off the bats might fall into the hole in the floor... if the players do not state that they are staying clear of the hole, have each roll a save vs. Death Ray with Wisdom as a bonus, with those who fail falling in. 75 The hole is filled with cold water, which is not exactly clean but neither is it dangerous to
20. Study room
In the middle of this large room is a table at which four men are seated. They are holding playing cards and appear to be playing a game of some sort; a small pile of coins lies in the middle of the table. Slowly they turn toward you, and with a groan they lay down their cards and rise. Their vacant expressions and the smell of decay reveal them to be undead. Besides the table and chairs, the room is furnished with many bookshelves with relatively few books on them. The books are badly damaged and contain random poetry and prose; nothing of value will be found in them. On the table lies 18 cp, 11 sp, and 3 gp. 4 Zombies: AC 12, HD 2, #At 1 bludgeon, Dam 1d8, Mv 20', Sv F2, ML 12, XP 75 ea. HP 9 ☐☐☐☐☐ ☐☐☐☐ 8 ☐☐☐☐☐ ☐☐☐ 12 ☐☐☐☐☐ ☐☐☐☐☐ ☐☐ 11 ☐☐☐☐☐ ☐☐☐☐☐ ☐ 76
21. Master’S Bedroom room
If Zelinth has not yet transformed Gwelayn, this room will be empty: This is a bedroom, with a bed against the right hand wall, a chest at the foot of it, and a large wardrobe against the left hand wall. However, if Gwelayn’s transformation into a zombie has been completed by Zelinth, they will both be here: This is a bedroom, with a bed against the right hand wall, a chest at the foot of it, and a large wardrobe against the left hand wall. Lying in the bed you see a man and a woman, covered only by a thin sheet despite the chilly air of the dungeon. The man sits up suddenly. "What is the meaning of this, interrupting my sleep? Don’t you know I’m the master of this castle?" Turning to the woman, he says "Get up, my love, we must deal with these unwanted visitors." The woman slowly sits up, turning her cold, vacant eyes toward you... Gwelayn will be wearing only a nightgown, and at a glance appears alive (as she is both recently dead and preserved by the arsenic). Her vacant expression and zombie behavior will surely give her away... the GM is advised to play this out as horribly as possible. As soon as Zelinth sees the party enter, he will summon all the rema
22. Bodyguard’S Bedroom room
This room is evidently a bedroom. It contains a bed, a chest, a desk, a chair, and a wardrobe. Lying on the bed is the skeleton of a man, or perhaps some sort of humanoid; the skull has prominent canine teeth showing. Suddenly the skeleton arises from the bed, lifts up a rusty longsword and approaches you menacingly. This is the skeleton of a hobgoblin. The room contains no treasure nor anything of particular interest. Hobgoblin Skeleton: AC 13 (half damage from edged weapons, 1 point only from arrows, bolts, or sling stones), HD 1, #At 1 longsword, Dam 1d8, Mv 40', Sv F1, ML 12, XP 25 HP 6 ☐☐☐☐☐ ☐
23. Altar Room room
In this chamber you see a large altar, carved from a solid block of black marble. Inlaid into the rim of the top are golden runes, arcane markings of some sort. Set into the top of the altar are shackles, one at each corner. If it is before midnight, this room will be empty, except for the zombies mentioned below. If it is midnight or shortly thereafter, Zelinth will be found here with Gwelayn: A woman is shackled to the altar, and a man stands behind it. He holds a goblet in one hand, and is trying to force the woman to drink its contents. See below for Zelinth's response to this interruption. If it is between midnight and dawn: A woman is shackled to the altar; her eyes are closed and she isn't moving. A man stands behind the altar, dagger drawn, looking at you in surprise and anger. Resting at one corner, beside the woman's left hand, is a golden goblet. See below for Zelinth's response to this interruption. If it is past dawn: There is a wet puddle of what appears to be half-dried blood in the middle of the altar, and resting at one corner, beside one of the manacles, is a golden goblet. The puddle is, in fact, blood. The goblet contains a bit of red wine m
24. Anteroom room
This room is full of armed skeletons, which advance on you as soon as you enter. 10 Skeletons: AC 13, HD 1, #At 1 bony fist, Dam 1d6, Mv 40', Sv F1, ML 12, XP 25 ea. HP 4 ☐☐☐☐ 7 ☐☐☐☐☐ ☐☐ 7 ☐☐☐☐☐ ☐☐ 5 ☐☐☐☐☐ 2 ☐☐ 4 ☐☐☐☐ 2 ☐☐ 4 ☐☐☐☐ 7 ☐☐☐☐☐ ☐☐ 7 ☐☐☐☐☐ ☐☐ 78
NPCs HERE
ST
Starisel Zelinth
Undead (Zombraire) Magic-User 2 • AC 13 • HP 10
GW
Gwelayn
Undead (Zombie) Monster 2 • AC 12 • HP 9
ON
Onyg the Ogre
Ogre Monster 4 • AC 15 • HP 25
BA
Badushna
Orc Monster 1 • AC 11 • HP 6
MAP PINS • 24
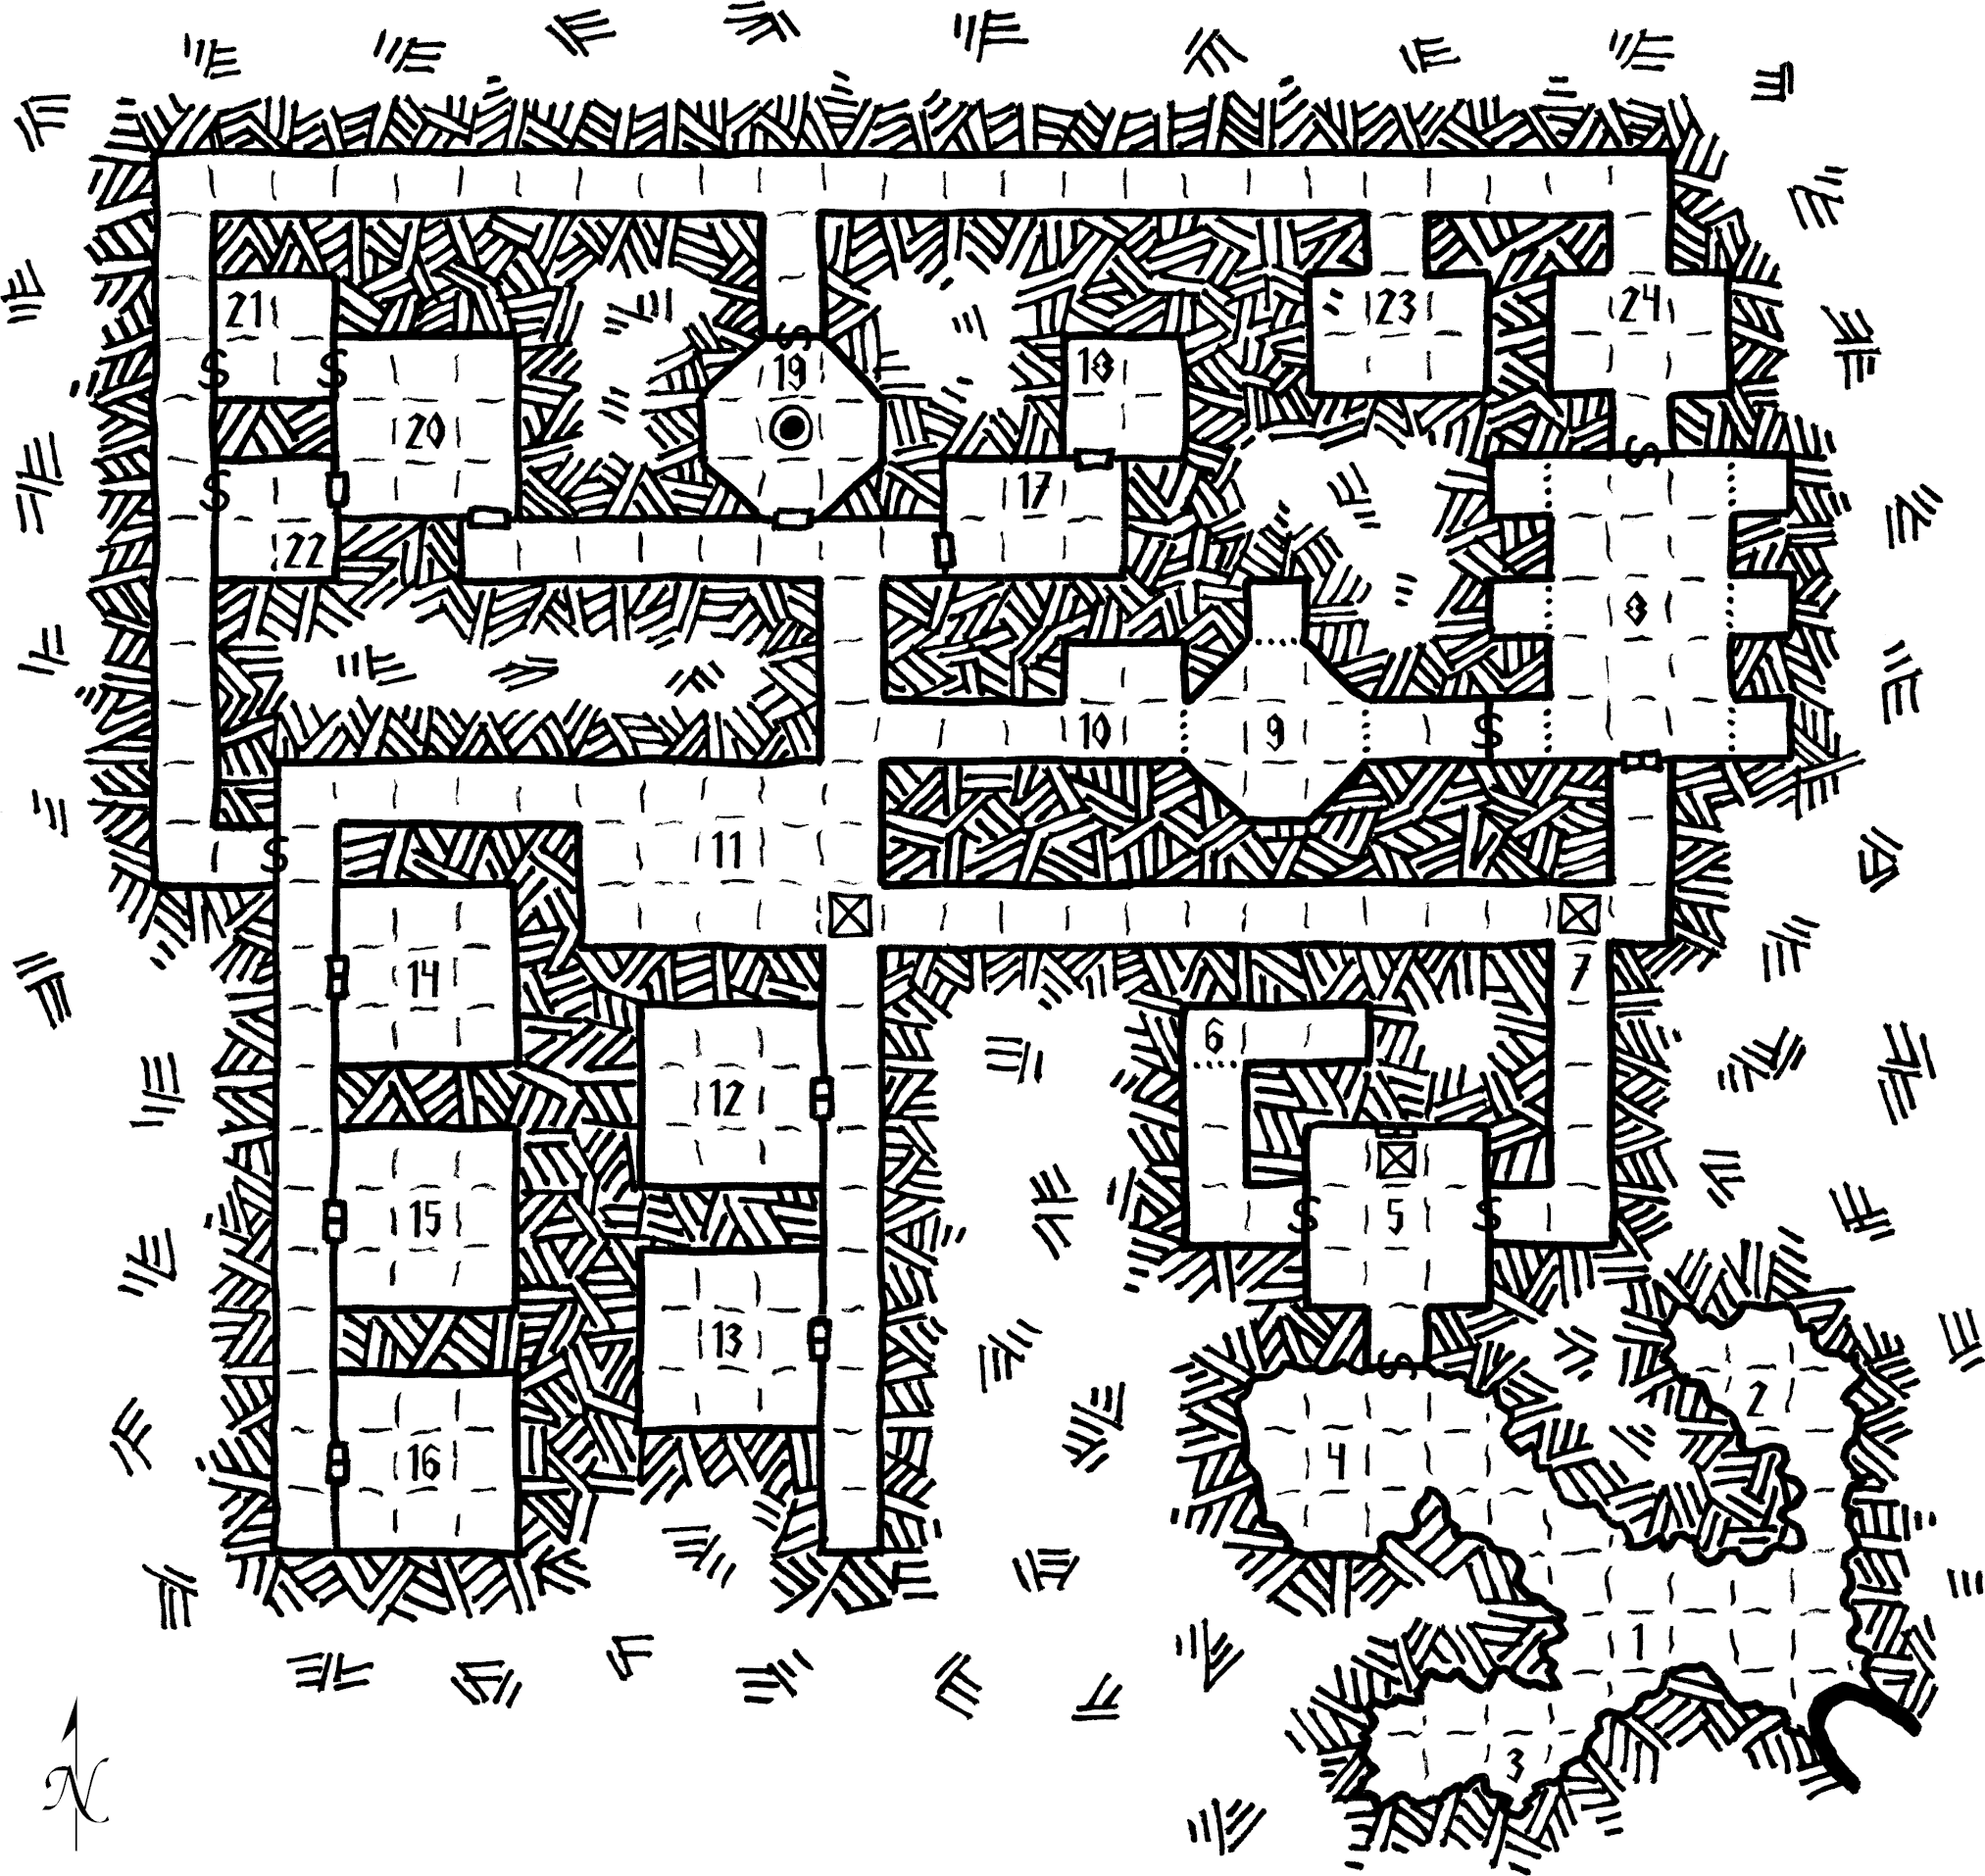
•
24. Anteroom
•
21. Master’S Bedroom
•
23. Altar Room
•
19. Well
•
18. Kitchen
•
20. Study
•
17. Dining Room
•
22. Bodyguard’S Bedroom
•
10. Arena Viewing Room
•
9. Arena
•
11. Common Room
•
7. Pit Trap
•
14. Laboratory
•
6. Poison Gas Trap
•
12. Laboratory
•
5. Grand Entry Room
•
15. Laboratory
•
13. Laboratory
•
2. Orc Warrior Barracks
•
4. Orc Chieftain’S Chamber
•
16. Laboratory
•
1. Orc Common Room
•
3. Orc Females
•
8. Prison
Click-to-pin lives in detail view — upload a map, click to drop, drag to move.
region The Western LandsOpen →
The Western Lands, a campaign adventure area consisting of the remnants of a once-great empire, a pair of important free cities, and quite a lot of wilderness territory. (BF1 Introduction) The gazetteer chapter of BF1 Morgansfort opens with the regional map of the Western Lands (attached here) and describes its kingdoms, regions, and free cities and its religions; those entries are the child locations below. Morgansfort itself -- the campaign's home base, southeast of Slateholm -- is a separate top-level location in this campaign.
BF1 Morgansfort r43, The Western Lands (book pp.2-5). Regional map: BF1 PDF p.4 (1 block = 24 miles).
ROOMS • 2
Kingdoms, Regions, and Free Cities region
The gazetteer entries for the kingdoms, regions, and free cities of the Western Lands, as printed in BF1 Morgansfort (book pp.3-4).
Religion in the Western Lands region
The religions of the Western Lands, as printed in BF1 Morgansfort (book pp.4-5).
How to use
- Town: Add buildings as children → attach NPCs to buildings. Everything one hop away.
- Dungeon: Add rooms as children → upload map on dungeon detail → click to pin monster/trap/treasure (linked to Codex).
- Next: CRUD forms (no player/GM split) — you asked for single view, so edit is always allowed.